Before the shop can sell anything, someone has to keep the merchandise in order,
and that someone is you. This chapter is where you stop worrying about a half-finished listing
going live, the wrong size being packed, or a growing range becoming impossible to browse. It
covers creating and organising products, grouping them into categories and collections, tagging
them, attaching size charts and add-on services, and keeping reviews trustworthy.
The problem: a new listing is half-written, the Arabic
description unfinished, the price not yet set. If shoppers can see it in that state, the first
person to notice the mistake is a customer.
The heart of the store. Each product holds its name and description in every
language, its price in riyals, a photo gallery, stock, status, and links to other products. A
product can be a Draft (hidden), Active (live on the
storefront), or Archived (retired). Only Active products appear to shoppers,
so a listing goes live only when you decide it is ready.
In practice
Say a new shipment of ready-to-wear black crepe abayas arrives and you want them
listed on the shop, with full English and Arabic descriptions, before you announce them.
How Angelite handles it: you open Catalog then Products, click Add product, and
type the abaya's name and story in both the English and Arabic tabs. You set the price in riyals,
drag the studio photos into the gallery, enter the stock count, and tick the Abayas category. While
you finish writing, you leave the status on Draft so nobody can see it. When everything looks right
you switch it to Active and save, and the abaya goes live on the storefront.
How to use it
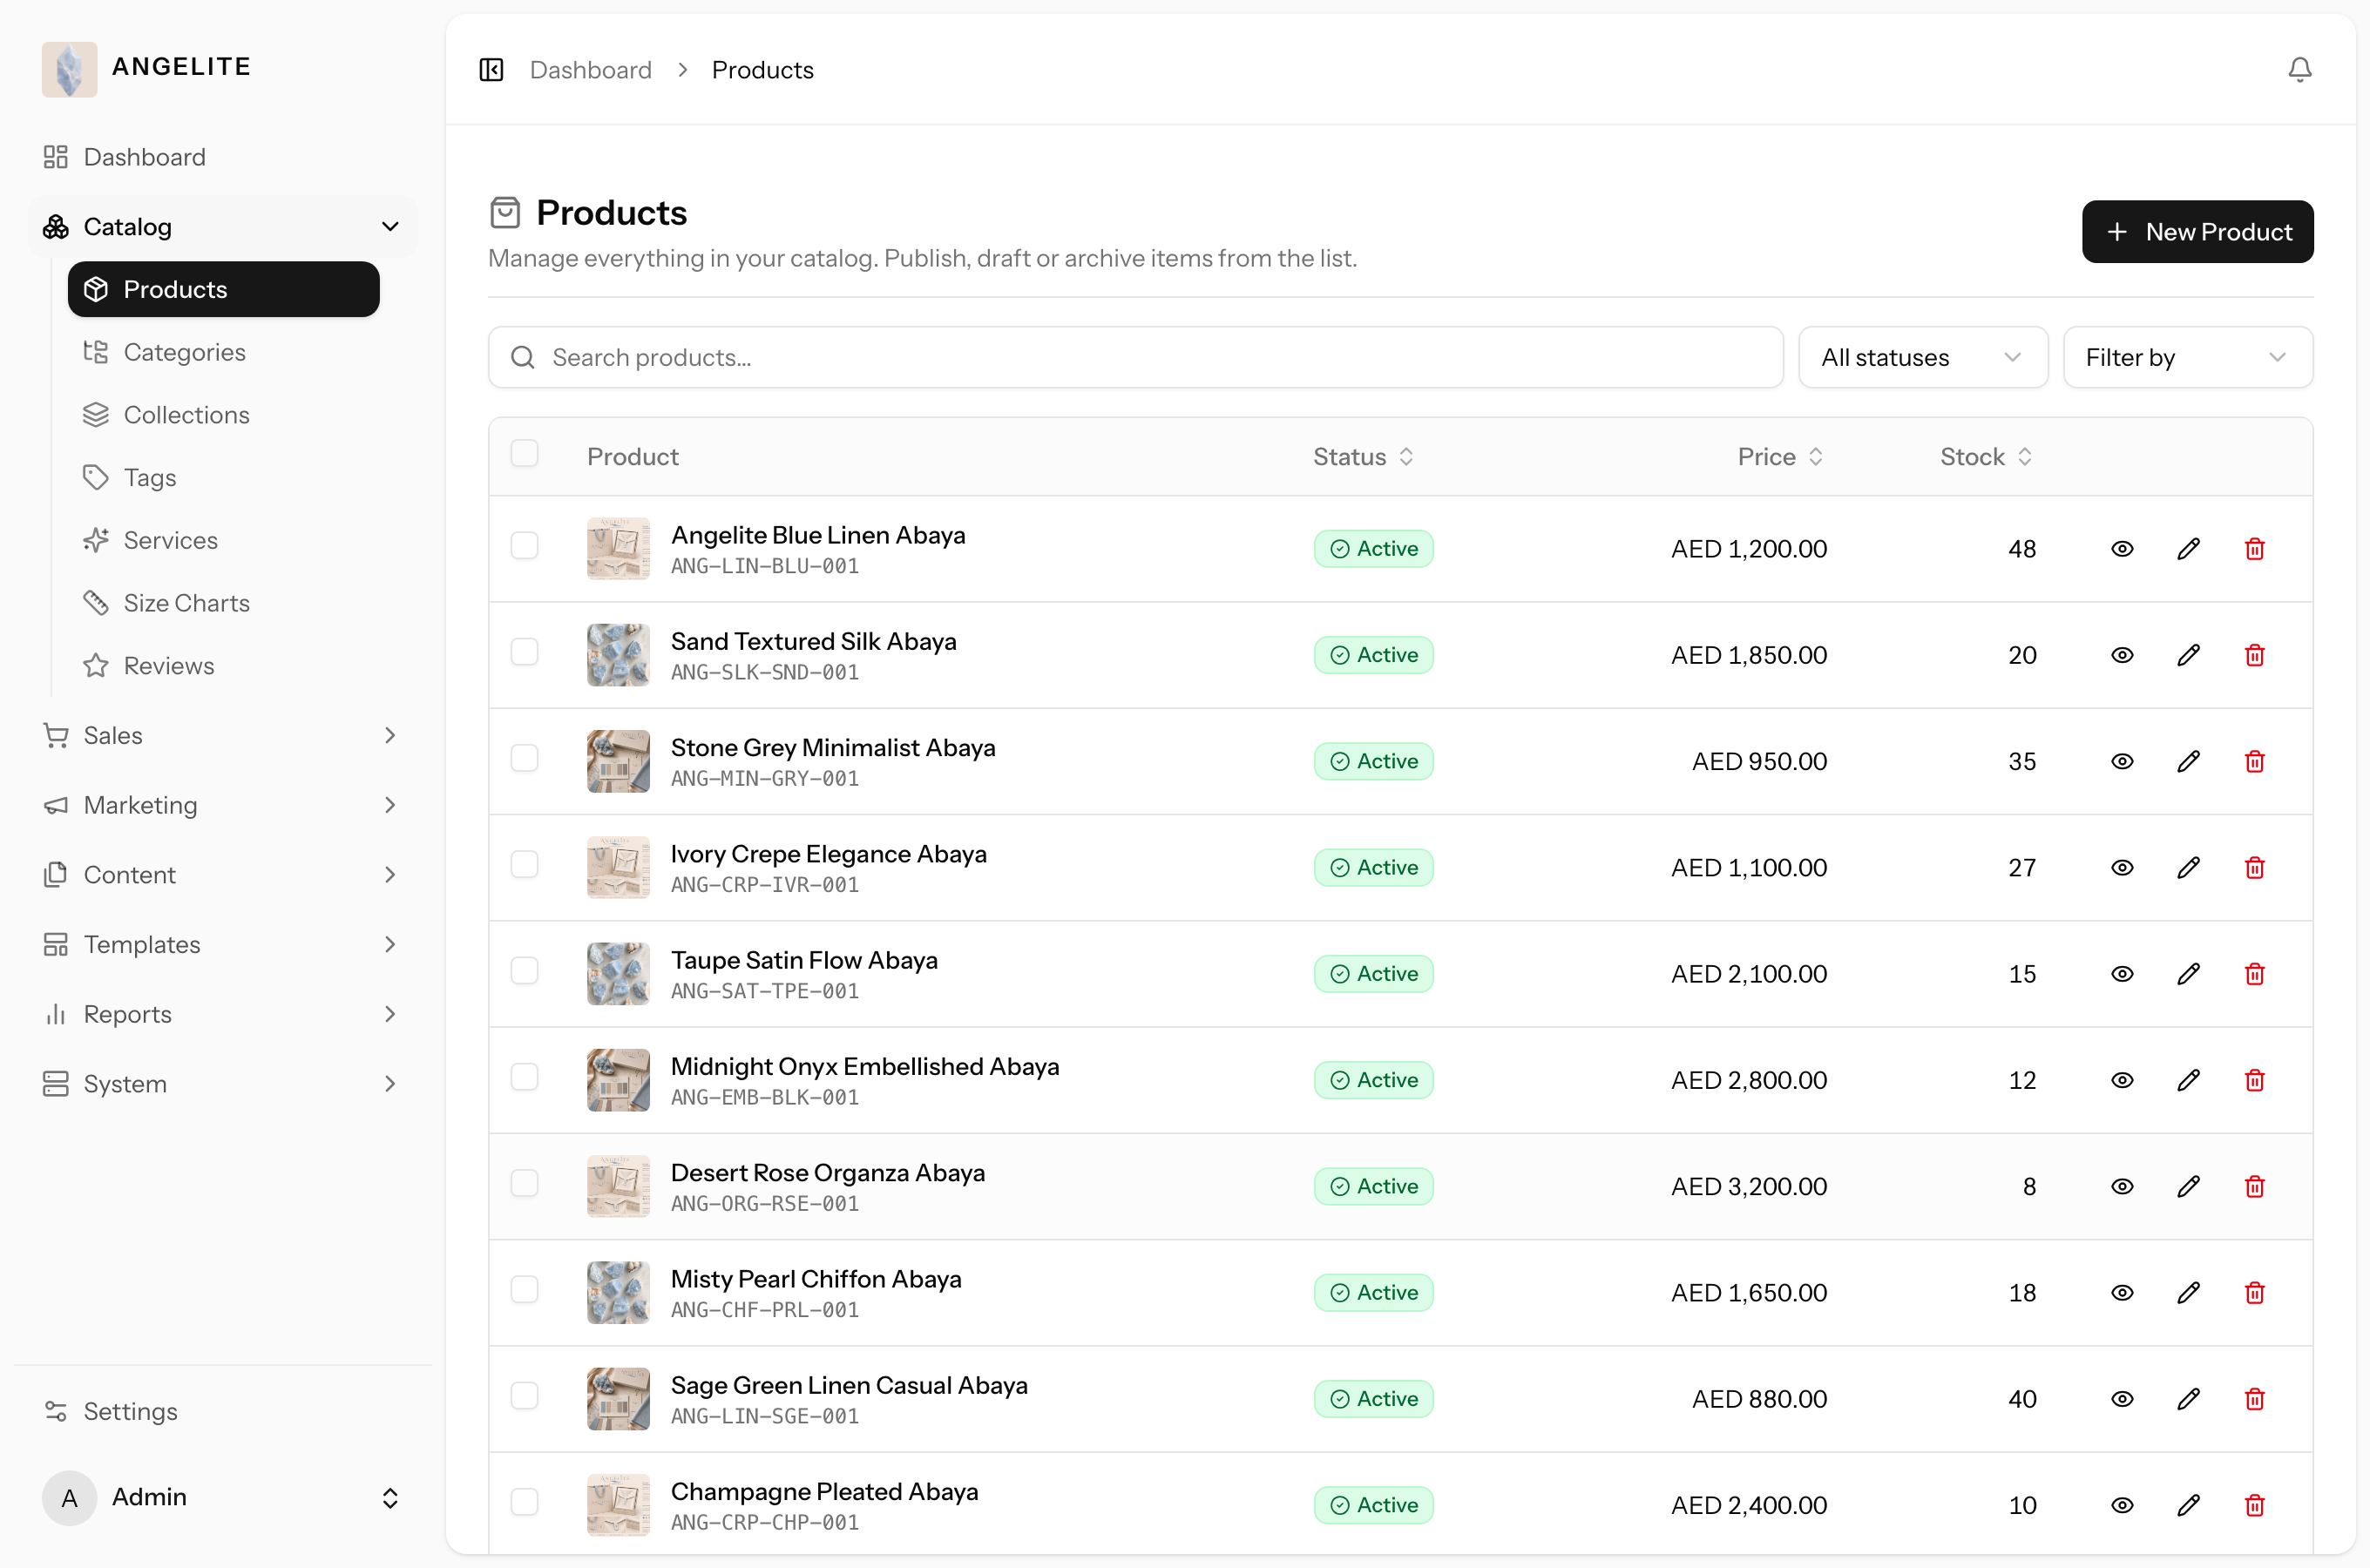
Open Catalog → Products to see the full list with photo, price, stock and status.
Click Add product (top right) to create a new one, or click a row to edit an existing product.
Fill in the name and description, set the price, and upload images by dragging them into the gallery.
Assign the product to categories, collections and tags, and set its stock quantity.
Set the status to Active and save. The product is now live on the storefront.
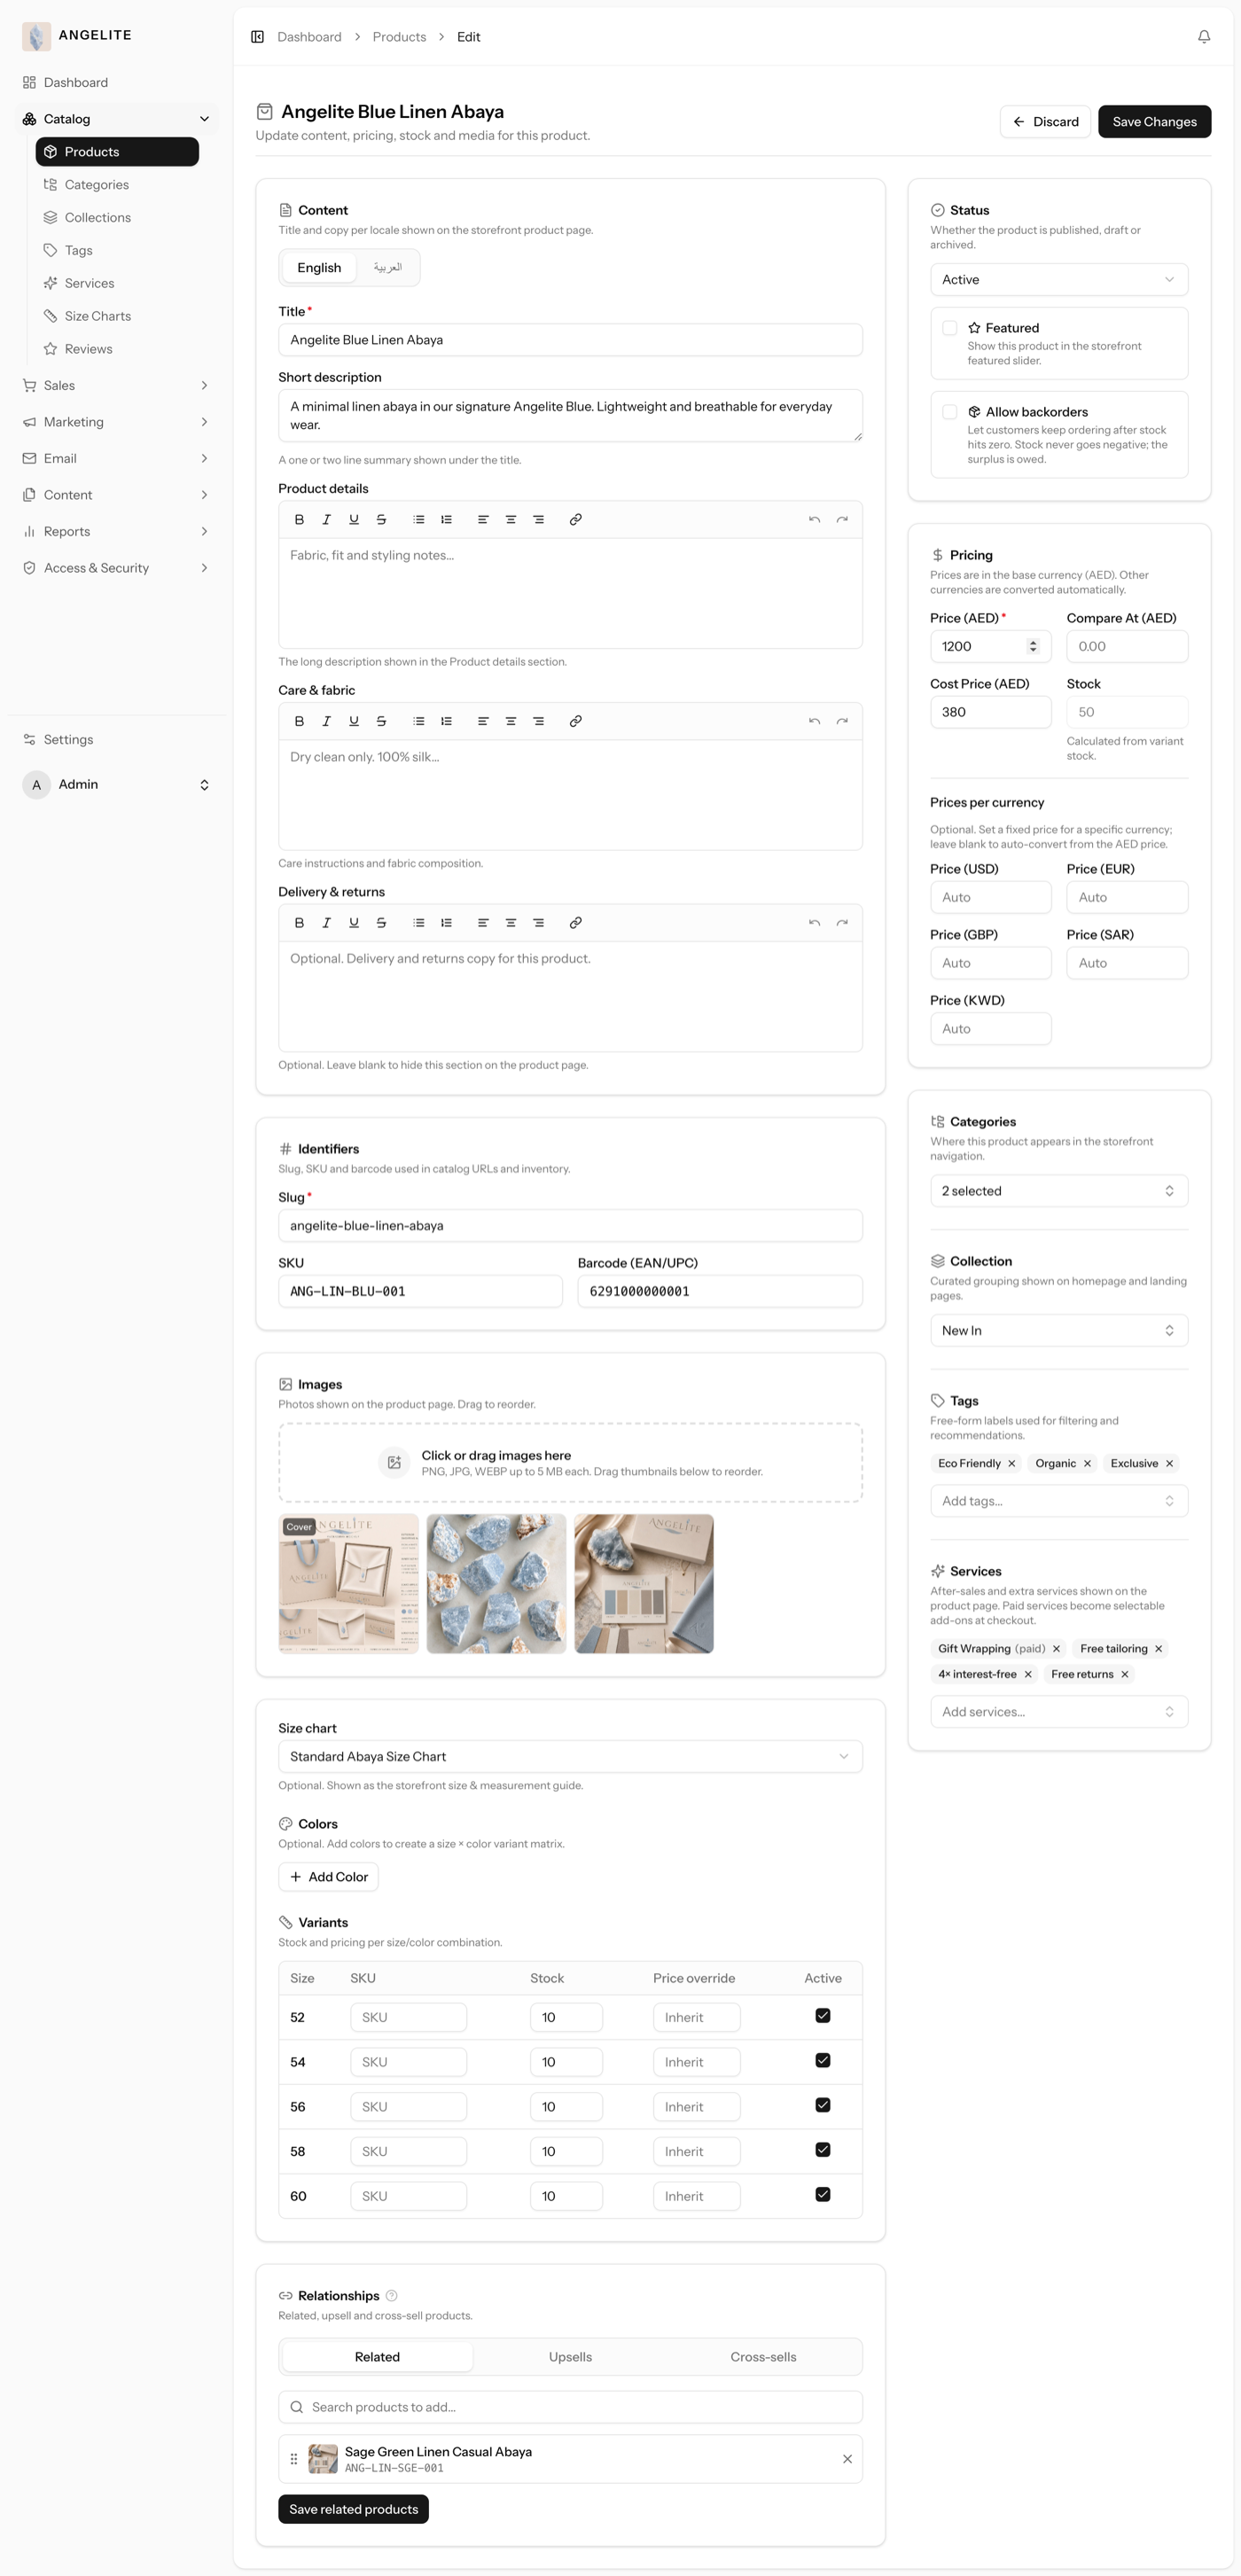
Where: Catalog → Products. Each row shows the photo, price, stock and live status.Where: the product editor, with the gallery, pricing, translations, stock and relations all on one screen.
Tip: keep a product as a Draft while you prepare it; nothing is visible to
shoppers until you switch it to Active.
Product sizes & add-ons
Admin
The problem: an order arrives for "the black abaya" with no
size on it, so you chase the customer for her measurements, hold the parcel, and hope nobody
ends up packing the wrong piece.
Offer a product in several sizes, and let shoppers choose optional add-ons. The
exact size and add-on a customer picks are recorded on the order, so you always know precisely
which piece and which extras to pack, with no guesswork and no follow-up messages.
In practice
Imagine a signature abaya you make in three sizes, and you want a customer to
pick her exact size so the right piece is set aside for her.
How Angelite handles it: you open the abaya in the product editor and, in the sizes
and add-ons section, add each size you offer (S, M, L) with its own stock count, plus an optional
add-on such as a matching hijab. On the product page the shopper chooses her size and ticks the
hijab, and that exact pairing is recorded on the order, so you fulfil the precise size and extras
she chose with no guesswork.
How to use it
Open a product in Catalog → Products and find the sizes and add-ons section.
Add each size option you offer (for example S, M, L), with its own stock if it differs.
Add any optional add-ons the shopper can select on the product page.
Save. The options now appear on the product page for customers to choose.
Where: inside the product editor, alongside pricing and stock.
Backorders
Admin
The problem: your best-selling abaya sells out the week
before Eid. More are already on the way from the workshop, but the shop says "out of stock"
and every one of those turned-away buyers is a lost sale.
Backorders let a product keep selling after the shelf count hits zero. You
switch it on per product; checkout keeps working, and the extra pieces sold are recorded as
owed, so you know exactly how many to set aside when the new stock arrives.
In practice
Say the black crepe abaya sells out on Monday and forty more arrive from
the workshop on Thursday.
How Angelite handles it: you open the product and turn on backorders.
Shoppers keep buying all week; the stock simply rests at zero instead of blocking the sale.
When Thursday's delivery lands, the orders placed in between are waiting in your list,
ready to fulfil first.
How to use it
Open the product in Catalog → Products.
Turn on Allow backorders and save.
Fulfil backordered pieces first when new stock arrives.
Where: the stock area of the product editor.
Tip: leave backorders off for limited or one-off pieces so you never
promise stock you cannot supply.
Product relations
Admin
The problem: the hand-beaded hijab that completes your plain
kaftan only sells when you happen to suggest it in person. On the website nothing points the
shopper to the pairing, so she buys the kaftan alone and the hijab stays on the shelf.
Connect products to one another as related,
accessory or bundle links; these feed the "you may also like"
suggestions on the product page. The links you picked by hand always win over the automatic
suggestions, so the pairing shoppers see first is the one you chose.
In practice
Imagine a plain evening kaftan that looks its best paired with one particular
hand-beaded hijab, and you want shoppers to discover that pairing every time.
How Angelite handles it: you open the kaftan in the product editor, scroll to the
relations section, choose the accessory relation type, then search for and add the matching hijab.
From then on that hijab appears in the "you may also like" suggestions on the kaftan's page. Because
the links you picked by hand always win over the automatic suggestions, your pairing is the one
shoppers see first.
How to use it
Open a product in Catalog → Products and scroll to the relations section.
Choose the relation type, then search for and add the products to link.
Save. The linked products now surface as suggestions on the storefront.
Where: the relations section of the product editor.
Tip: the links you pick by hand always come before the automatic
suggestions, so use them to hand-pick the perfect pairing.
Quick-add suggestions
Admin
The problem: some of your pieces are simple enough to buy on
sight, but finding them in a range of hundreds so they can get the one-tap shortcut means
combing through the whole catalogue yourself.
A helper that picks out products suited to quick-add, the shortcut that lets
shoppers drop an item into the bag straight from its card without opening the full page. You
review the suggestions and confirm the ones that fit, instead of hunting for candidates on
your own.
In practice
Say you sell a range of simple ready-to-wear everyday abayas that shoppers rarely
need to read about in detail, and you want them to be effortless to grab while browsing.
How Angelite handles it: while you work on merchandising and relations, Angelite
shows you a list of products like those everyday abayas that suit the quick-add shortcut. You
pick the ones that fit and save, and they become available for the storefront's quick-add button. Now
a shopper can drop her usual abaya into the bag straight from the product card, without opening the
full page, which smooths the path to a quick repeat purchase.
How to use it
While editing relations or merchandising, suggested products appear for you to review.
Pick the ones that fit and save; they become available for the storefront quick-add button.
Related: the shopper-facing Quick-add control is covered in Chapter 02,
Storefront.
Organising the catalog
Categories
Admin
The problem: your range has grown to the point where a shopper
hunting for one plain everyday abaya has to scroll past every occasion piece you own, and many
give up before they find it.
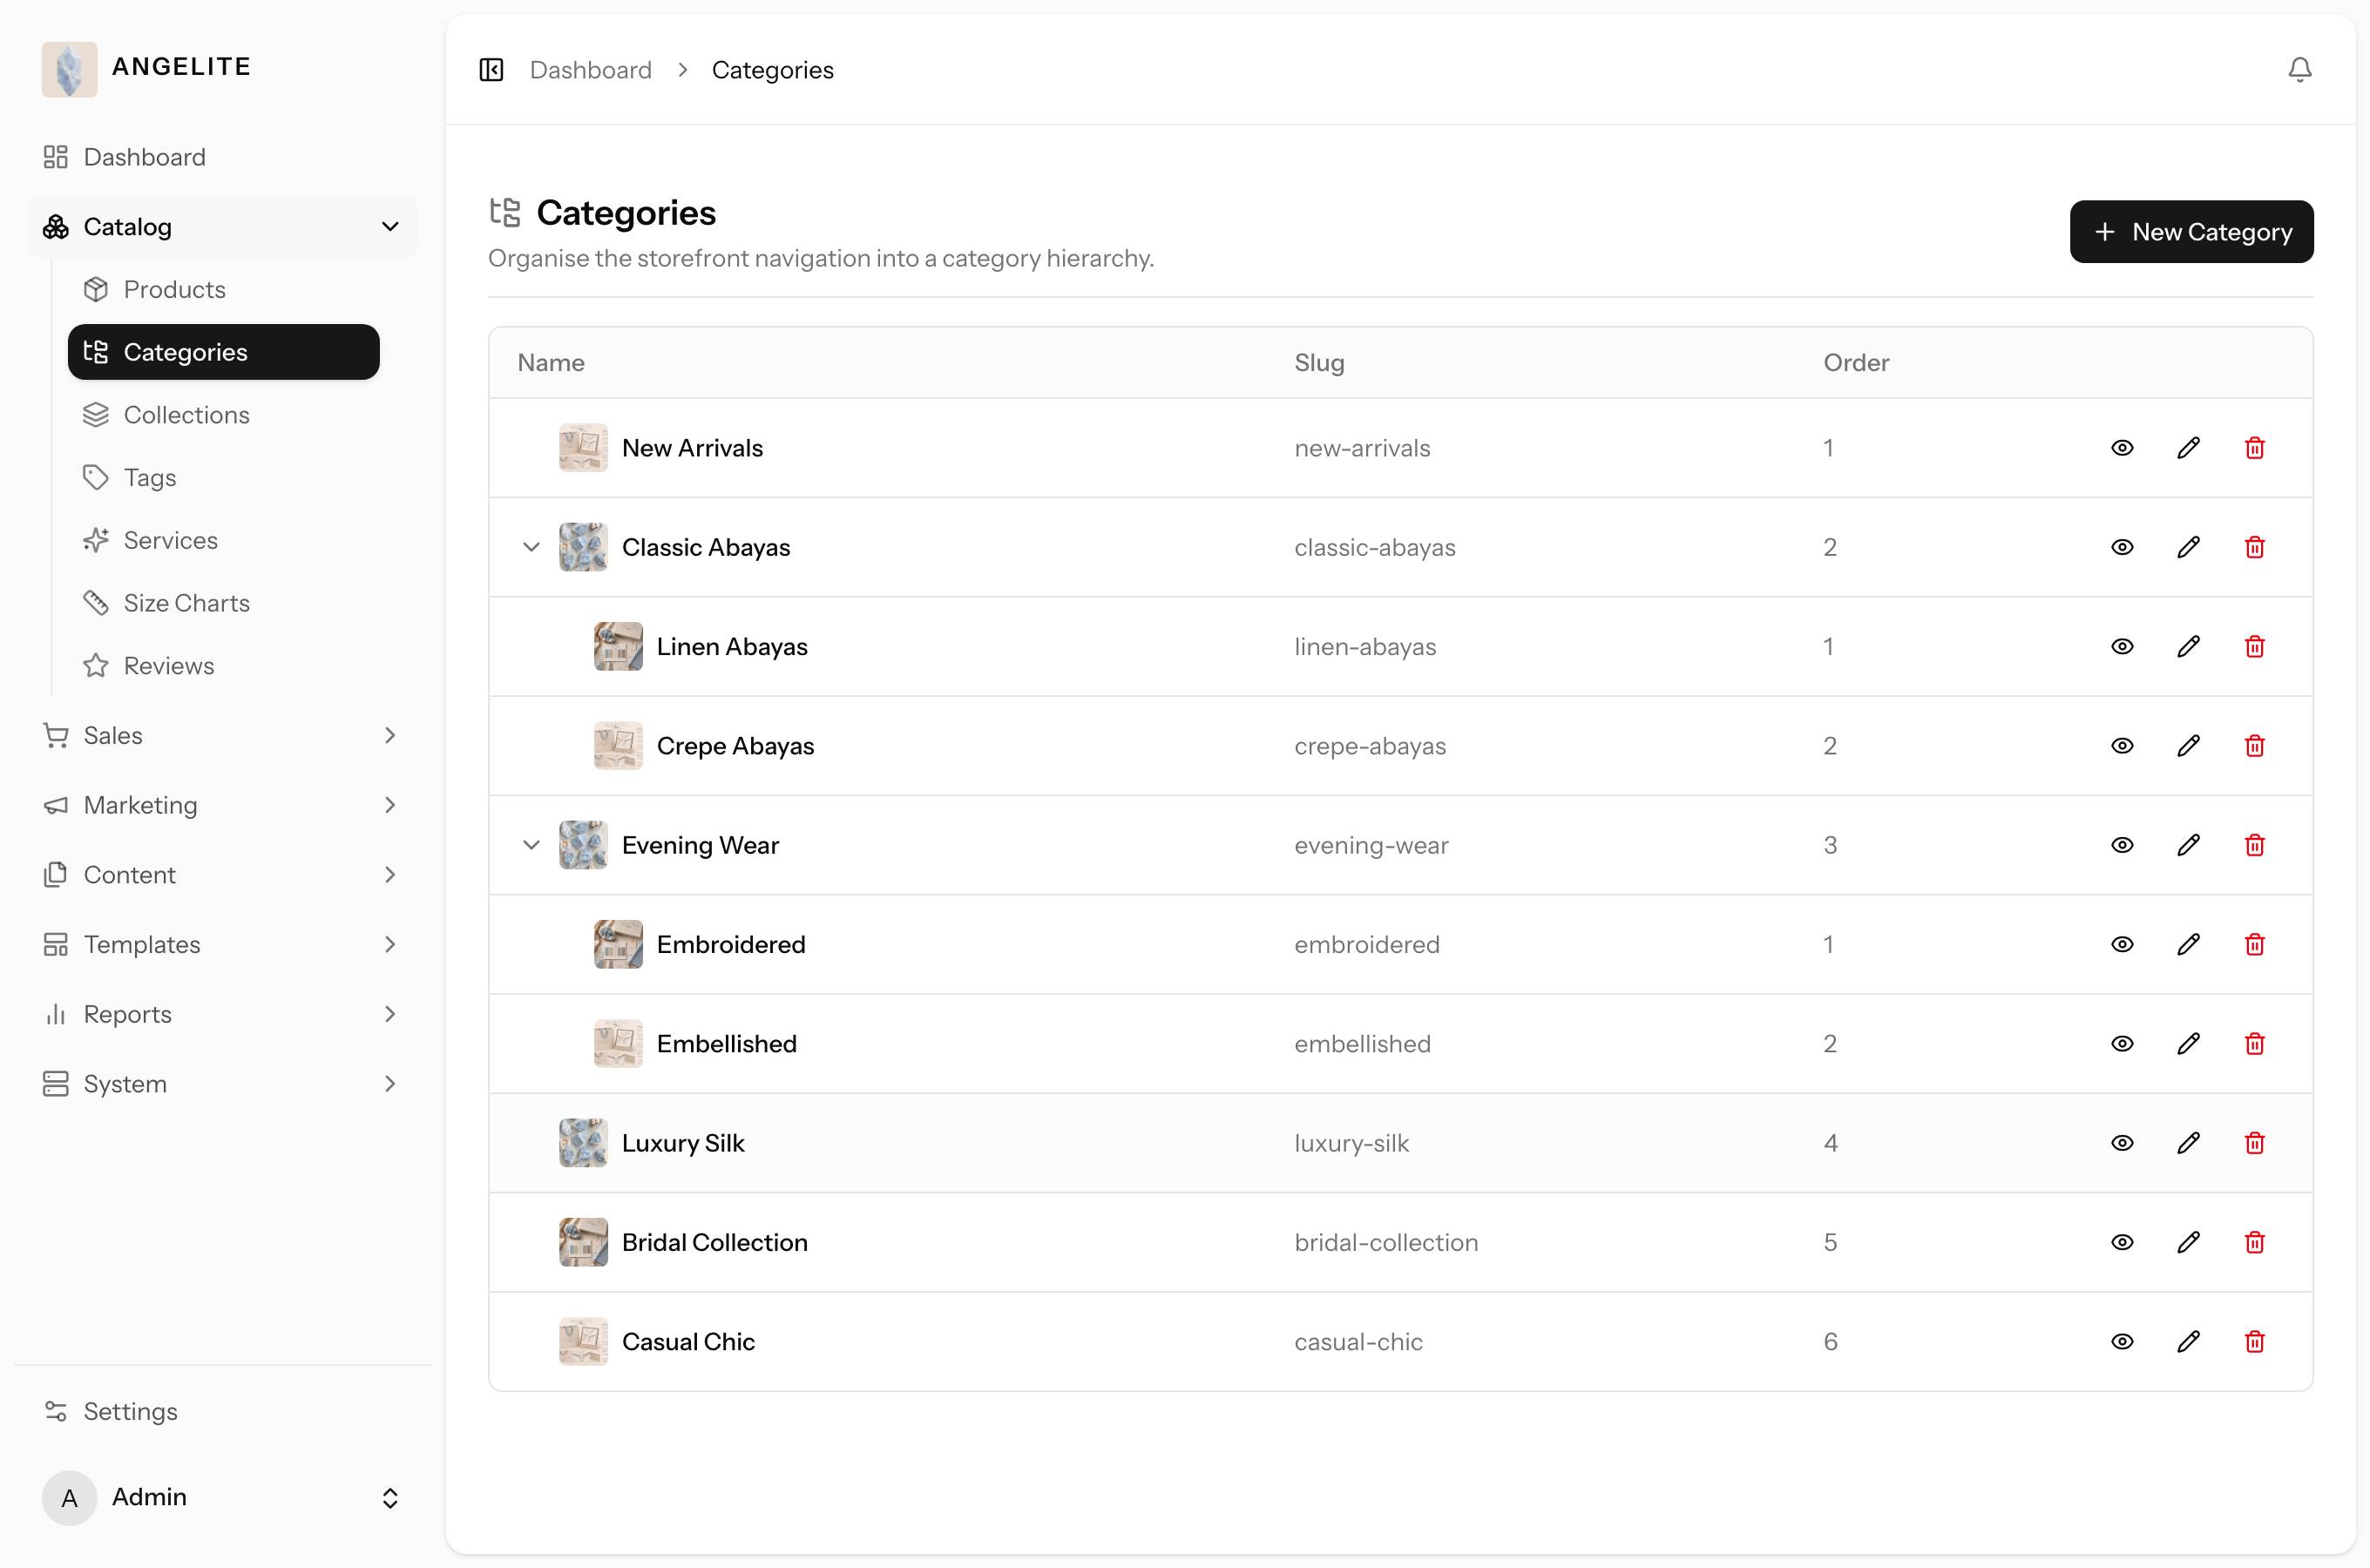
The tree of departments your products live in (for example Abayas → Embroidered).
Categories give the storefront its browse structure and its navigation menus, so every shopper
has a clear, click-through path to what she wants instead of scrolling your whole range.
In practice
Imagine your abaya range has grown so large that shoppers struggle to find the
plain everyday styles among the hand-embroidered occasion pieces, and you want a clear path to each.
How Angelite handles it: you open Catalog then Categories and add an Abayas
category, then nest an Embroidered category beneath it, naming each in both English and Arabic. From
the product editor you assign your occasion pieces to Embroidered. The storefront menu now shows
Abayas with an Embroidered sub-section, giving each style a tidy home and a browsable page shoppers
can reach in a couple of taps.
How to use it
Open Catalog → Categories.
Add a category, give it a name in each language, and nest it under a parent if needed.
Assign products to the category from the product editor.
Save. The category becomes a browsable page on the storefront.
Where: Catalog → Categories.
Collections
Admin
The problem: you want the homepage to tell one Ramadan story,
but the pieces that belong in it live in different departments, and reorganising your whole
category tree for a six-week season is out of the question.
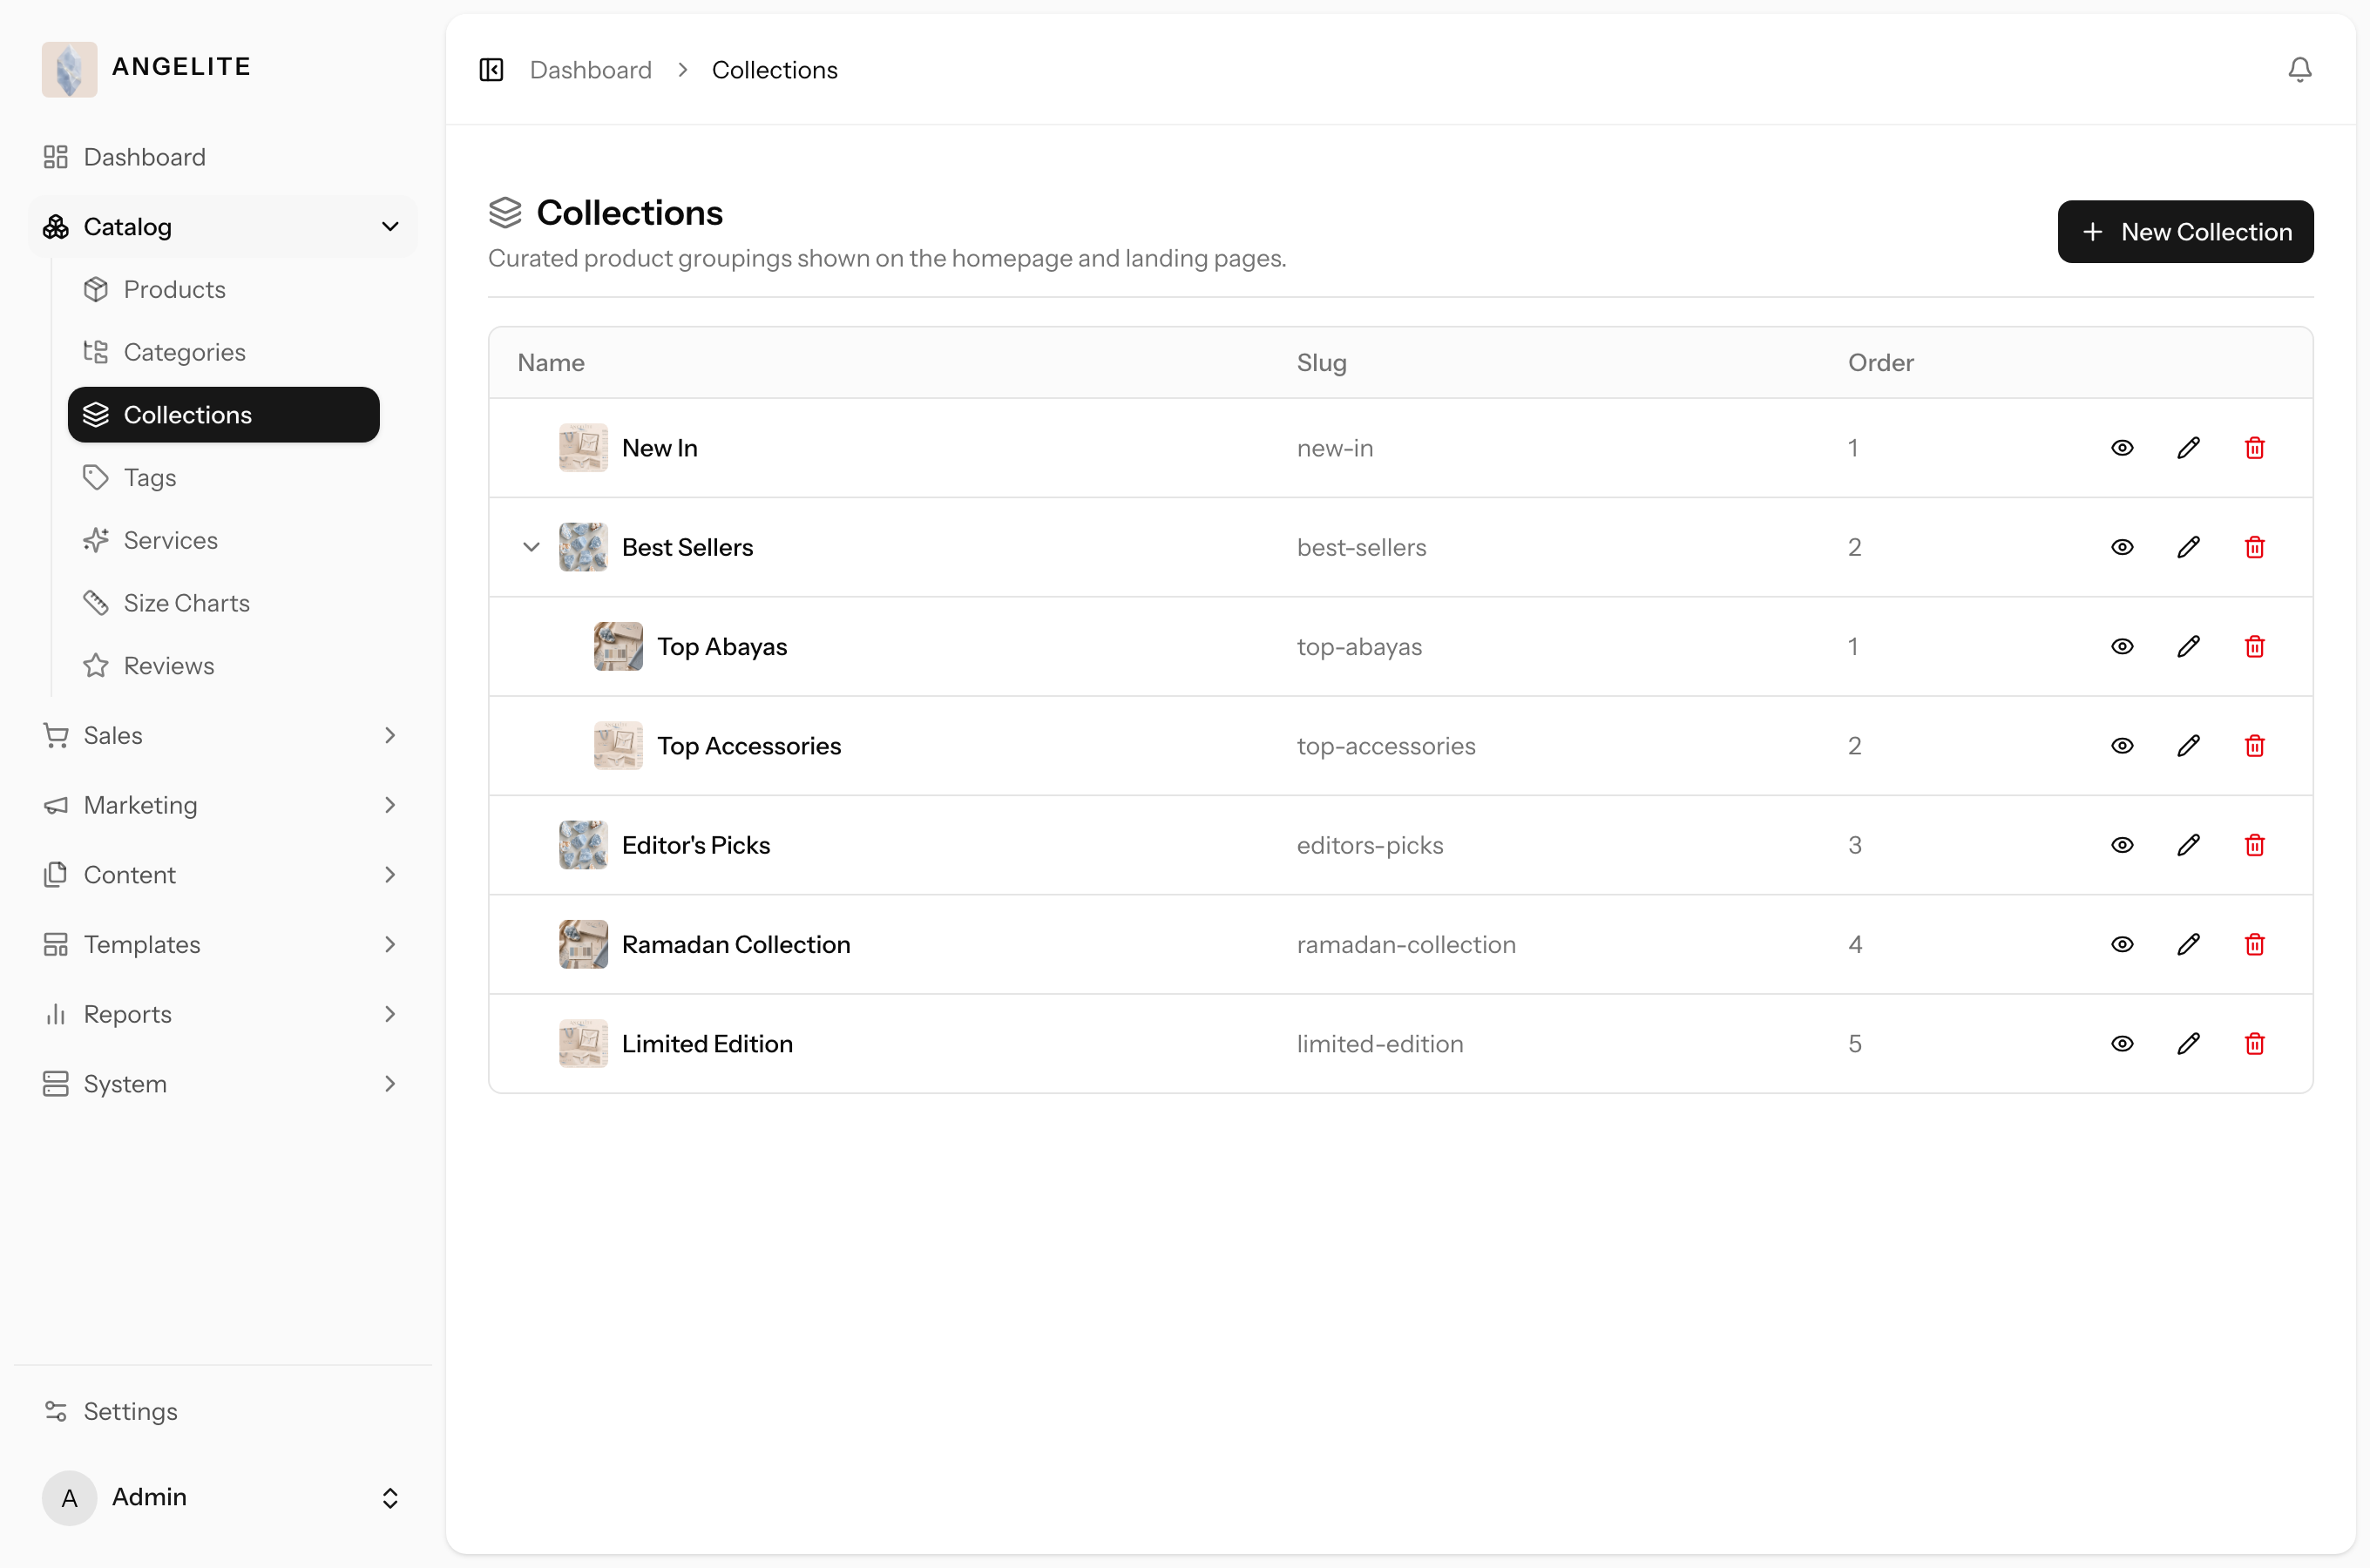
Curated, themed groupings of products (for example "Best sellers" or a seasonal edit)
that cut across categories. A collection gets its own storefront page you can feature on the
homepage, so a themed edit can go live in minutes without touching your category tree.
In practice
Say you want to tell a Ramadan collection story on the homepage that brings
together a few everyday abayas, a made-to-order kaftan and a set of matching hijabs that all share a
warm, festive look.
How Angelite handles it: you open Catalog then Collections, create a Ramadan
Collection grouping, name it in English and Arabic, and add those hand-picked pieces even though they
sit in different categories. The collection gets its own storefront page you can feature on the
homepage, so shoppers see a single, curated edit rather than hunting across the catalog.
How to use it
Open Catalog → Collections.
Create a collection, name it in each language, and add the products that belong in it.
Save. The collection gets its own storefront page and can be featured on the homepage.
Where: Catalog → Collections.
Tags
Admin
The problem: shoppers shop by occasion ("an Eid gift",
"something for work"), but your departments are organised by style, so those questions land in
your inbox instead of ending in a purchase.
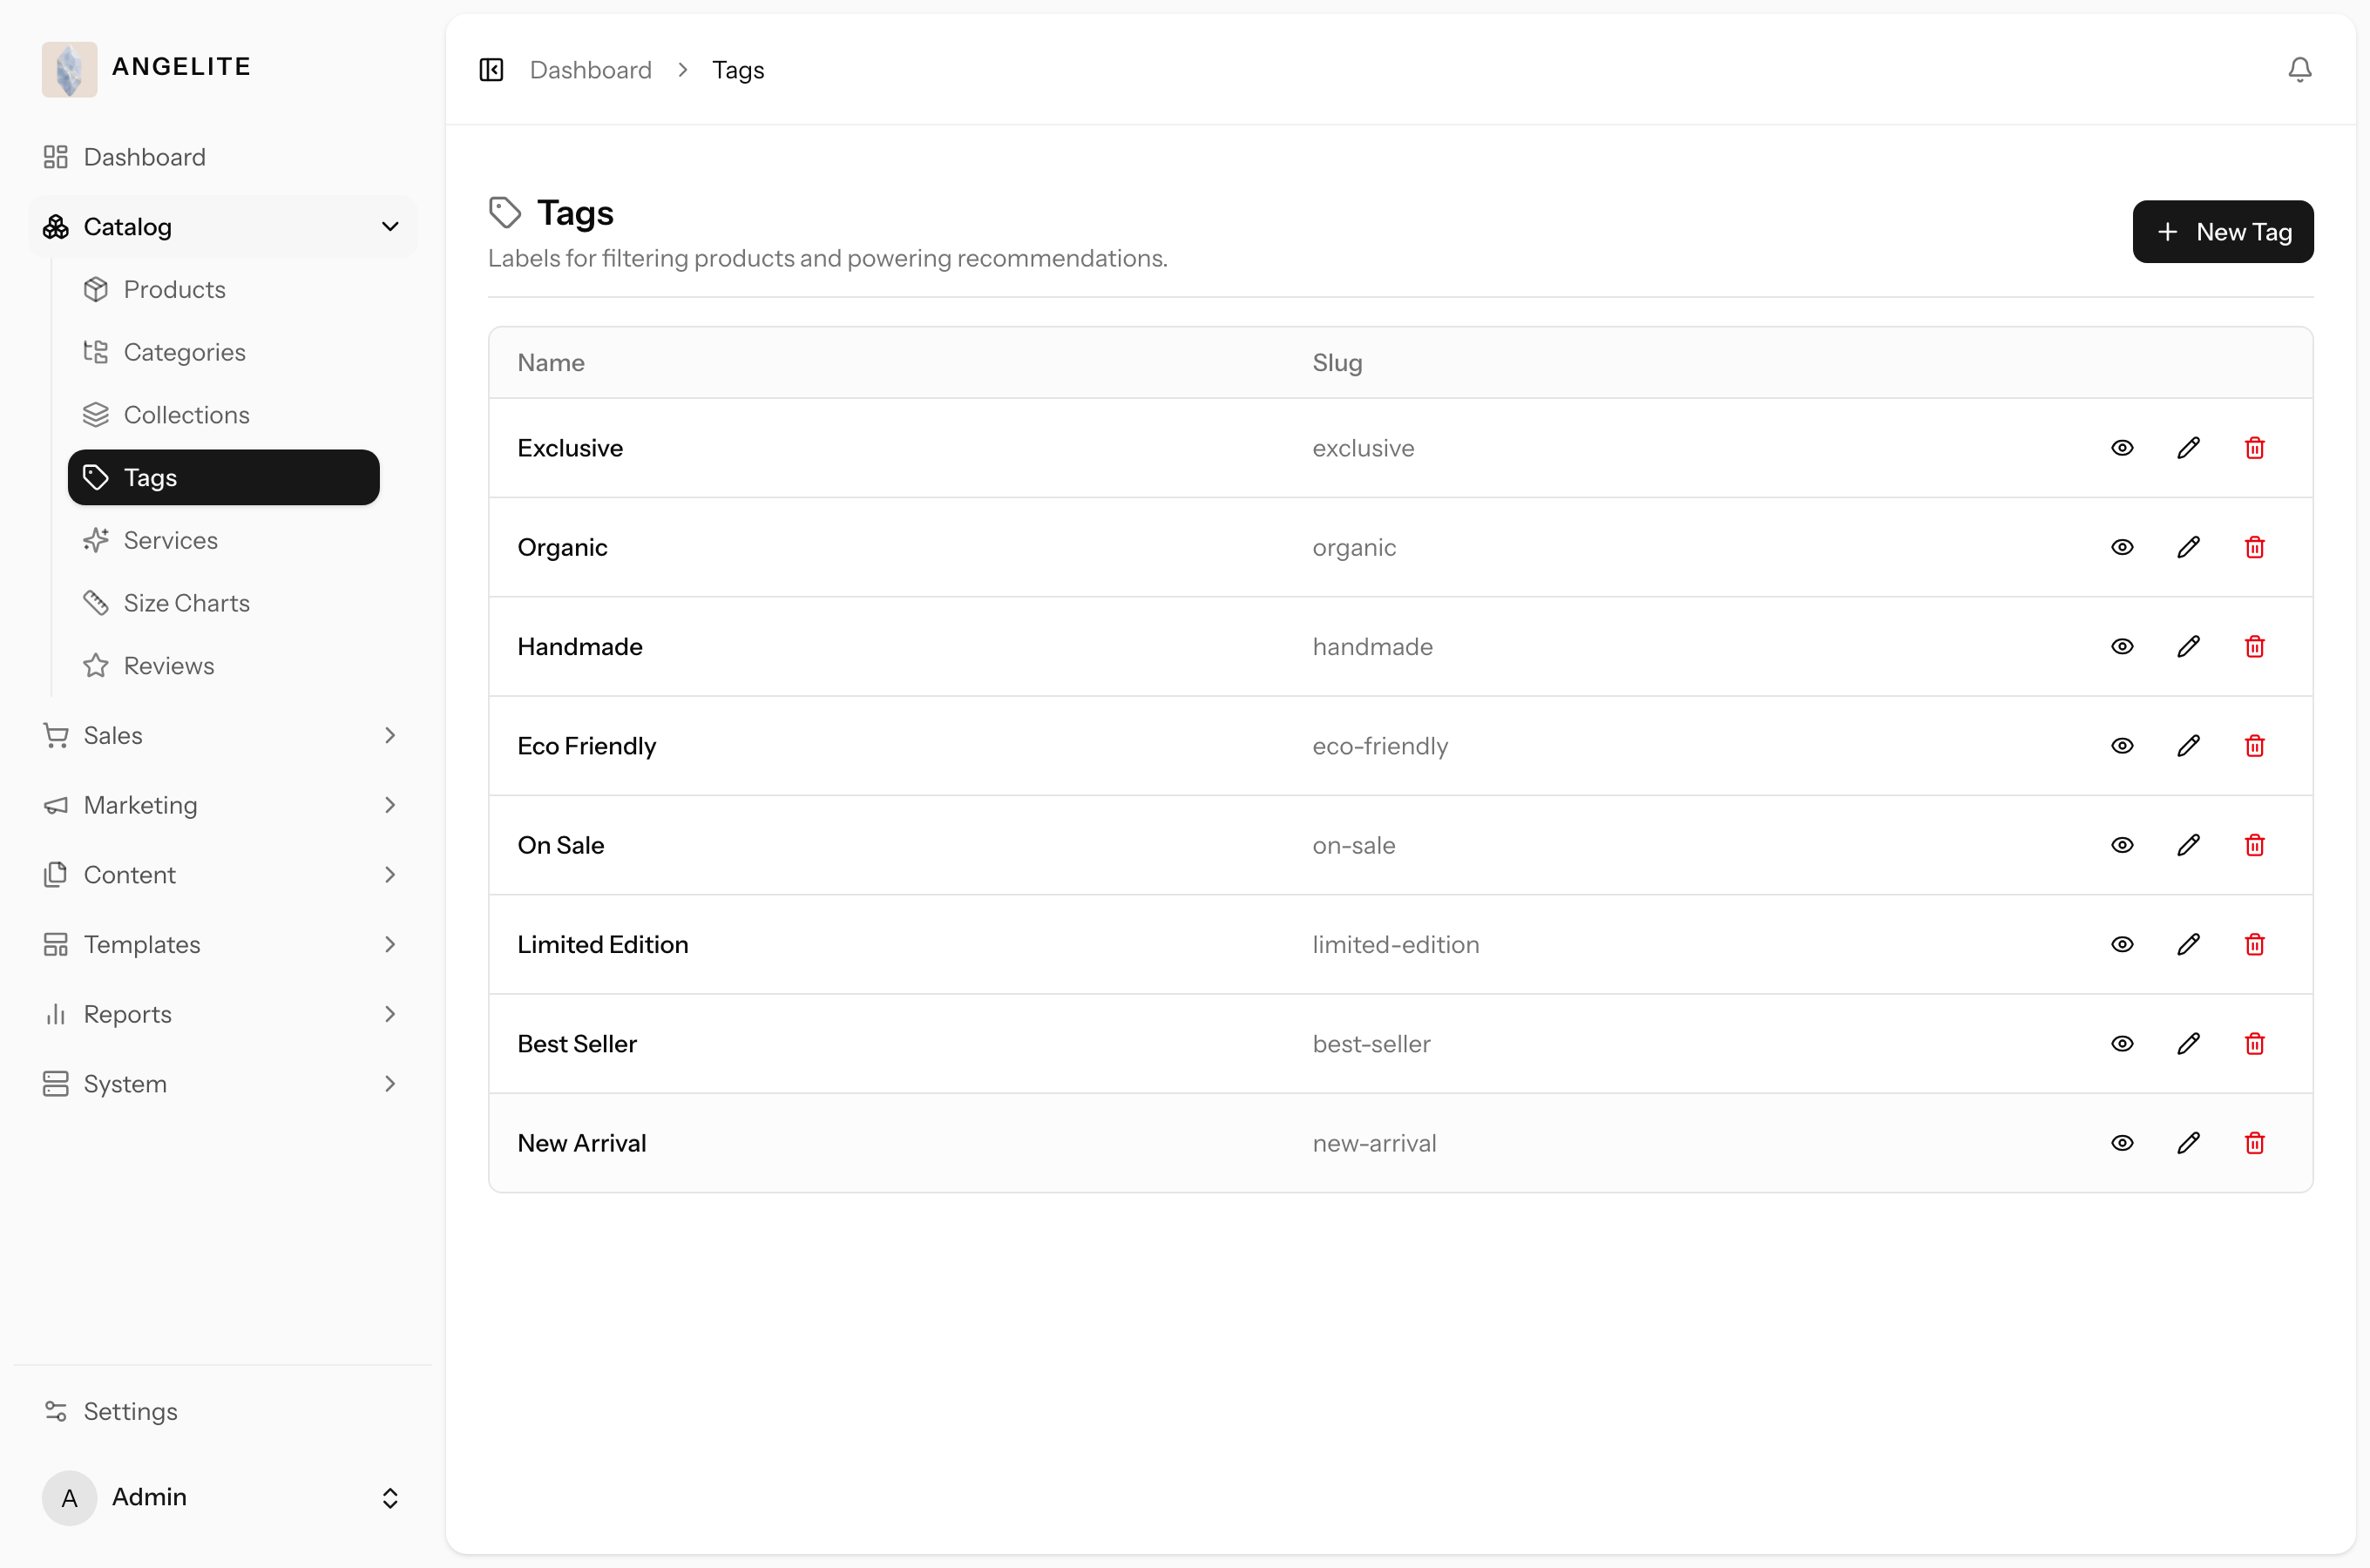
Flat keywords attached to products (for example "gift", "new"). Tags power the
storefront filters and improve search, so shoppers can self-serve their way to a theme or
occasion your fixed category tree was never built to answer.
In practice
A customer messages you asking what would make a good Eid gift under a tight
budget, and you wish shoppers could simply filter to your giftable pieces themselves.
How Angelite handles it: you open Catalog then Tags and create a "gift" tag, then
apply it from the product editor to every piece you would happily recommend as a present. On the
storefront, shoppers can now filter and search by "gift" and instantly see just those items,
without you needing to reshape your category tree around the occasion.
How to use it
Open Catalog → Tags and create the tags you want to use.
Apply tags to products from the product editor.
Shoppers can then filter and search by those tags.
Where: Catalog → Tags.
Extras
Size charts
Admin
The problem: wrong-size orders come back as returns you pay
for, and typing the same measurements table into every product page is tedious enough that it
never quite gets done.
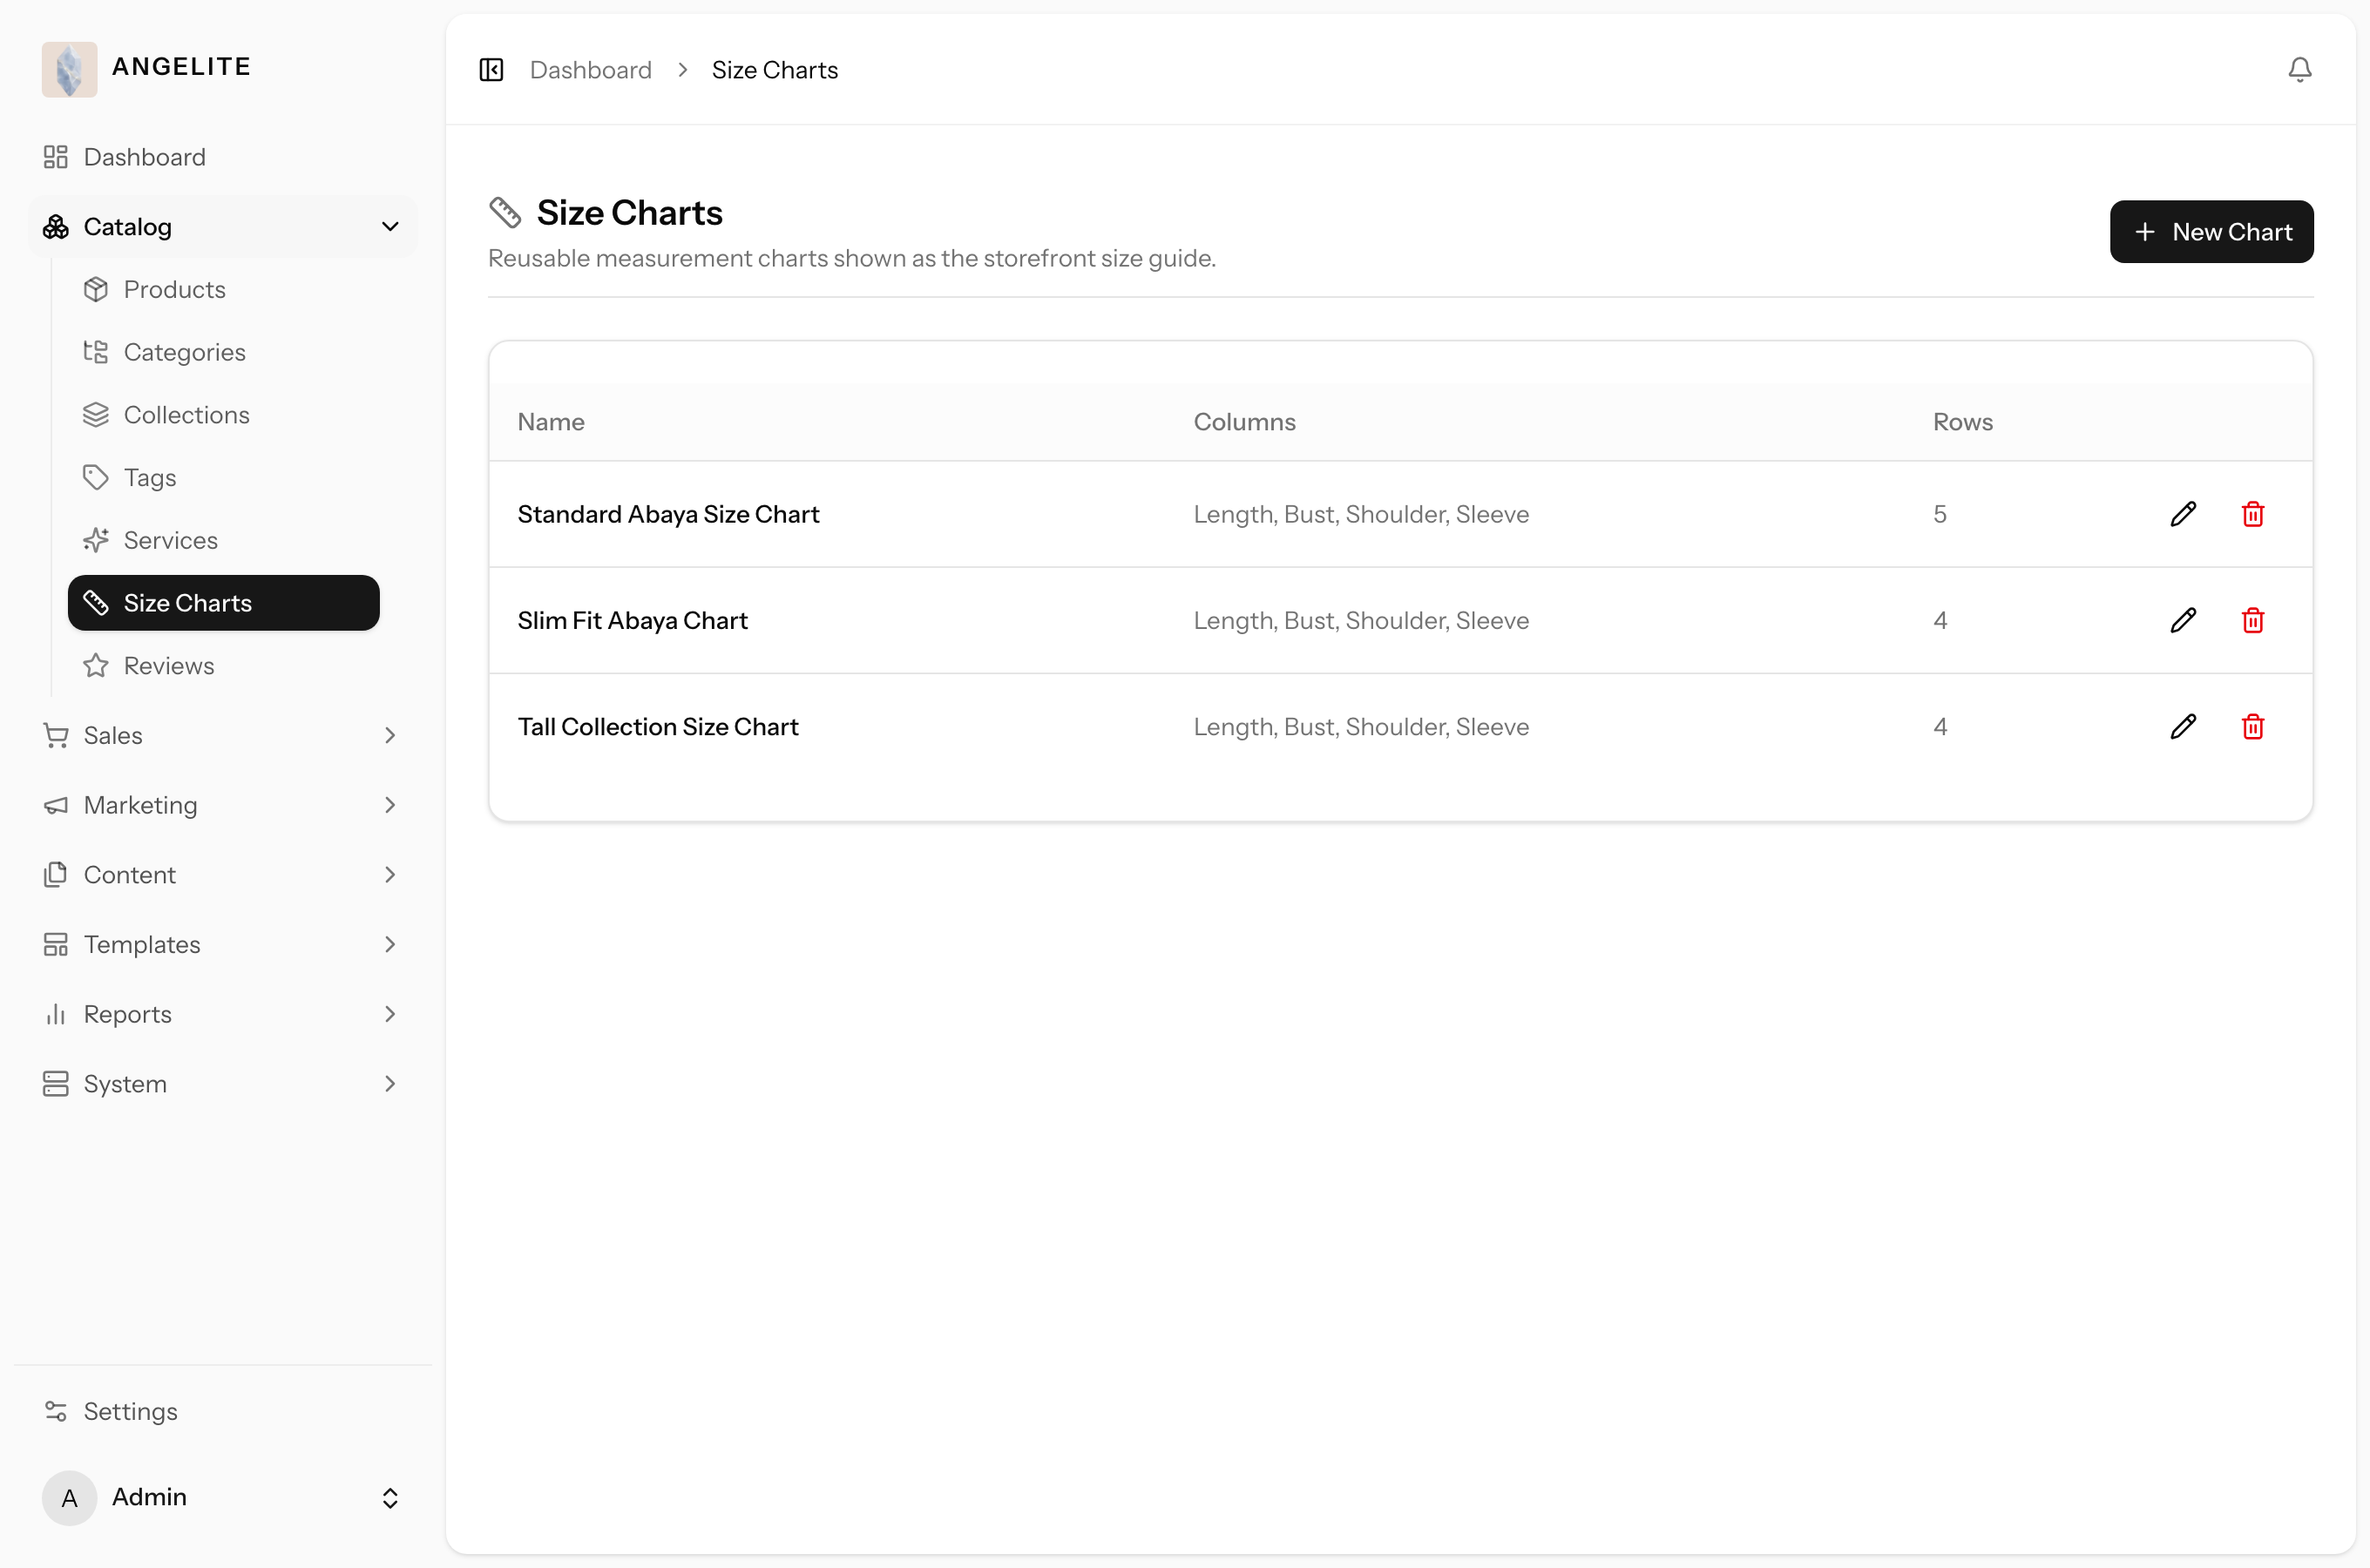
Reusable sizing tables you build once and attach to as many products as you like.
The chart appears on the product page so a shopper can match her measurements to the right size
before she buys, which means fewer wrong-size orders and fewer returns.
In practice
Say shoppers keep ordering abayas a size too large and returning them, and you
want them to measure correctly before they buy across your whole ready-to-wear range.
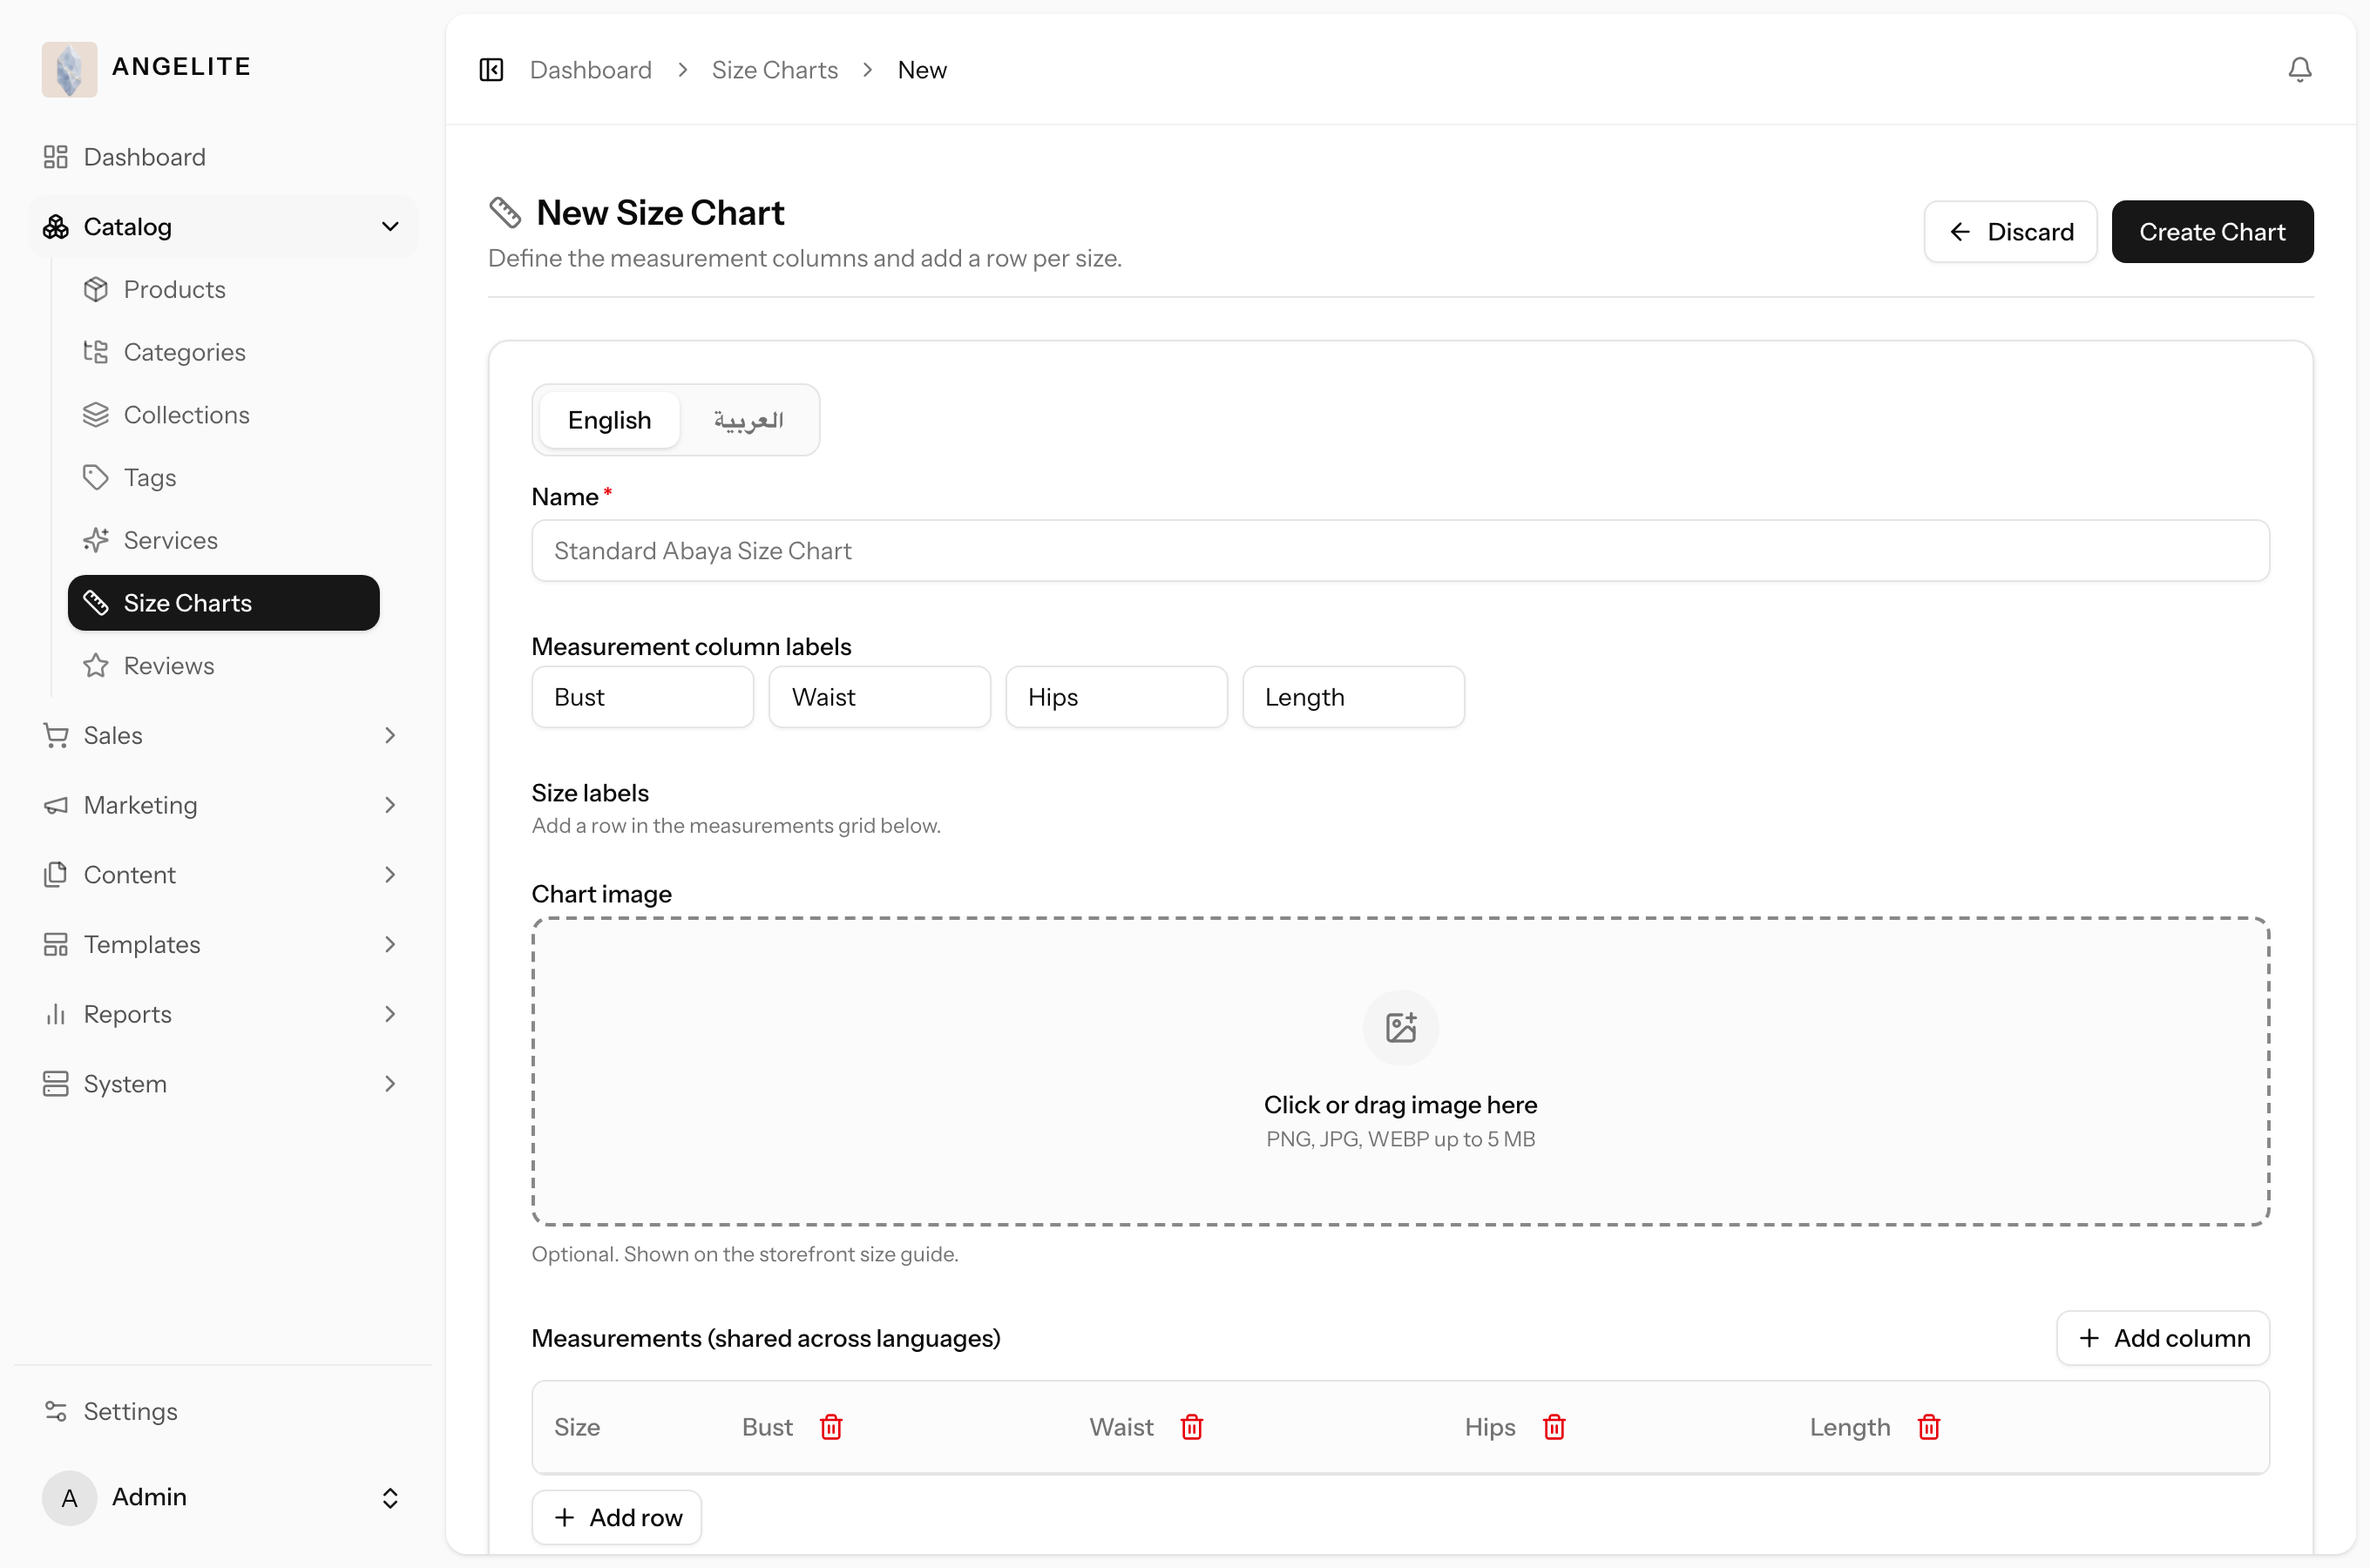
How Angelite handles it: you open Catalog then Size charts, click Create, and
build one abaya-sizing table with rows for each size and columns for bust, length and sleeve, in both
English and Arabic. You then link that single chart to every abaya from the product editor. The
chart shows on each abaya's page so a shopper can match her measurements to the right size, which
means fewer wrong-size orders and fewer returns to process.
How to use it
Open Catalog → Size charts and click Create.
Build the table rows and columns (for example size, bust, length and sleeve), in each language.
Save, then link the chart to the relevant products from the product editor.
Where: Catalog → Size charts.Where: the size-chart editor, where you build the table.
Services
AdminOptional · Services
The problem: a customer asks for the hem adjusted to her
length and the abaya gift-wrapped. You agree in chat, and by packing day the request lives only
in a message thread someone has to remember to dig up.
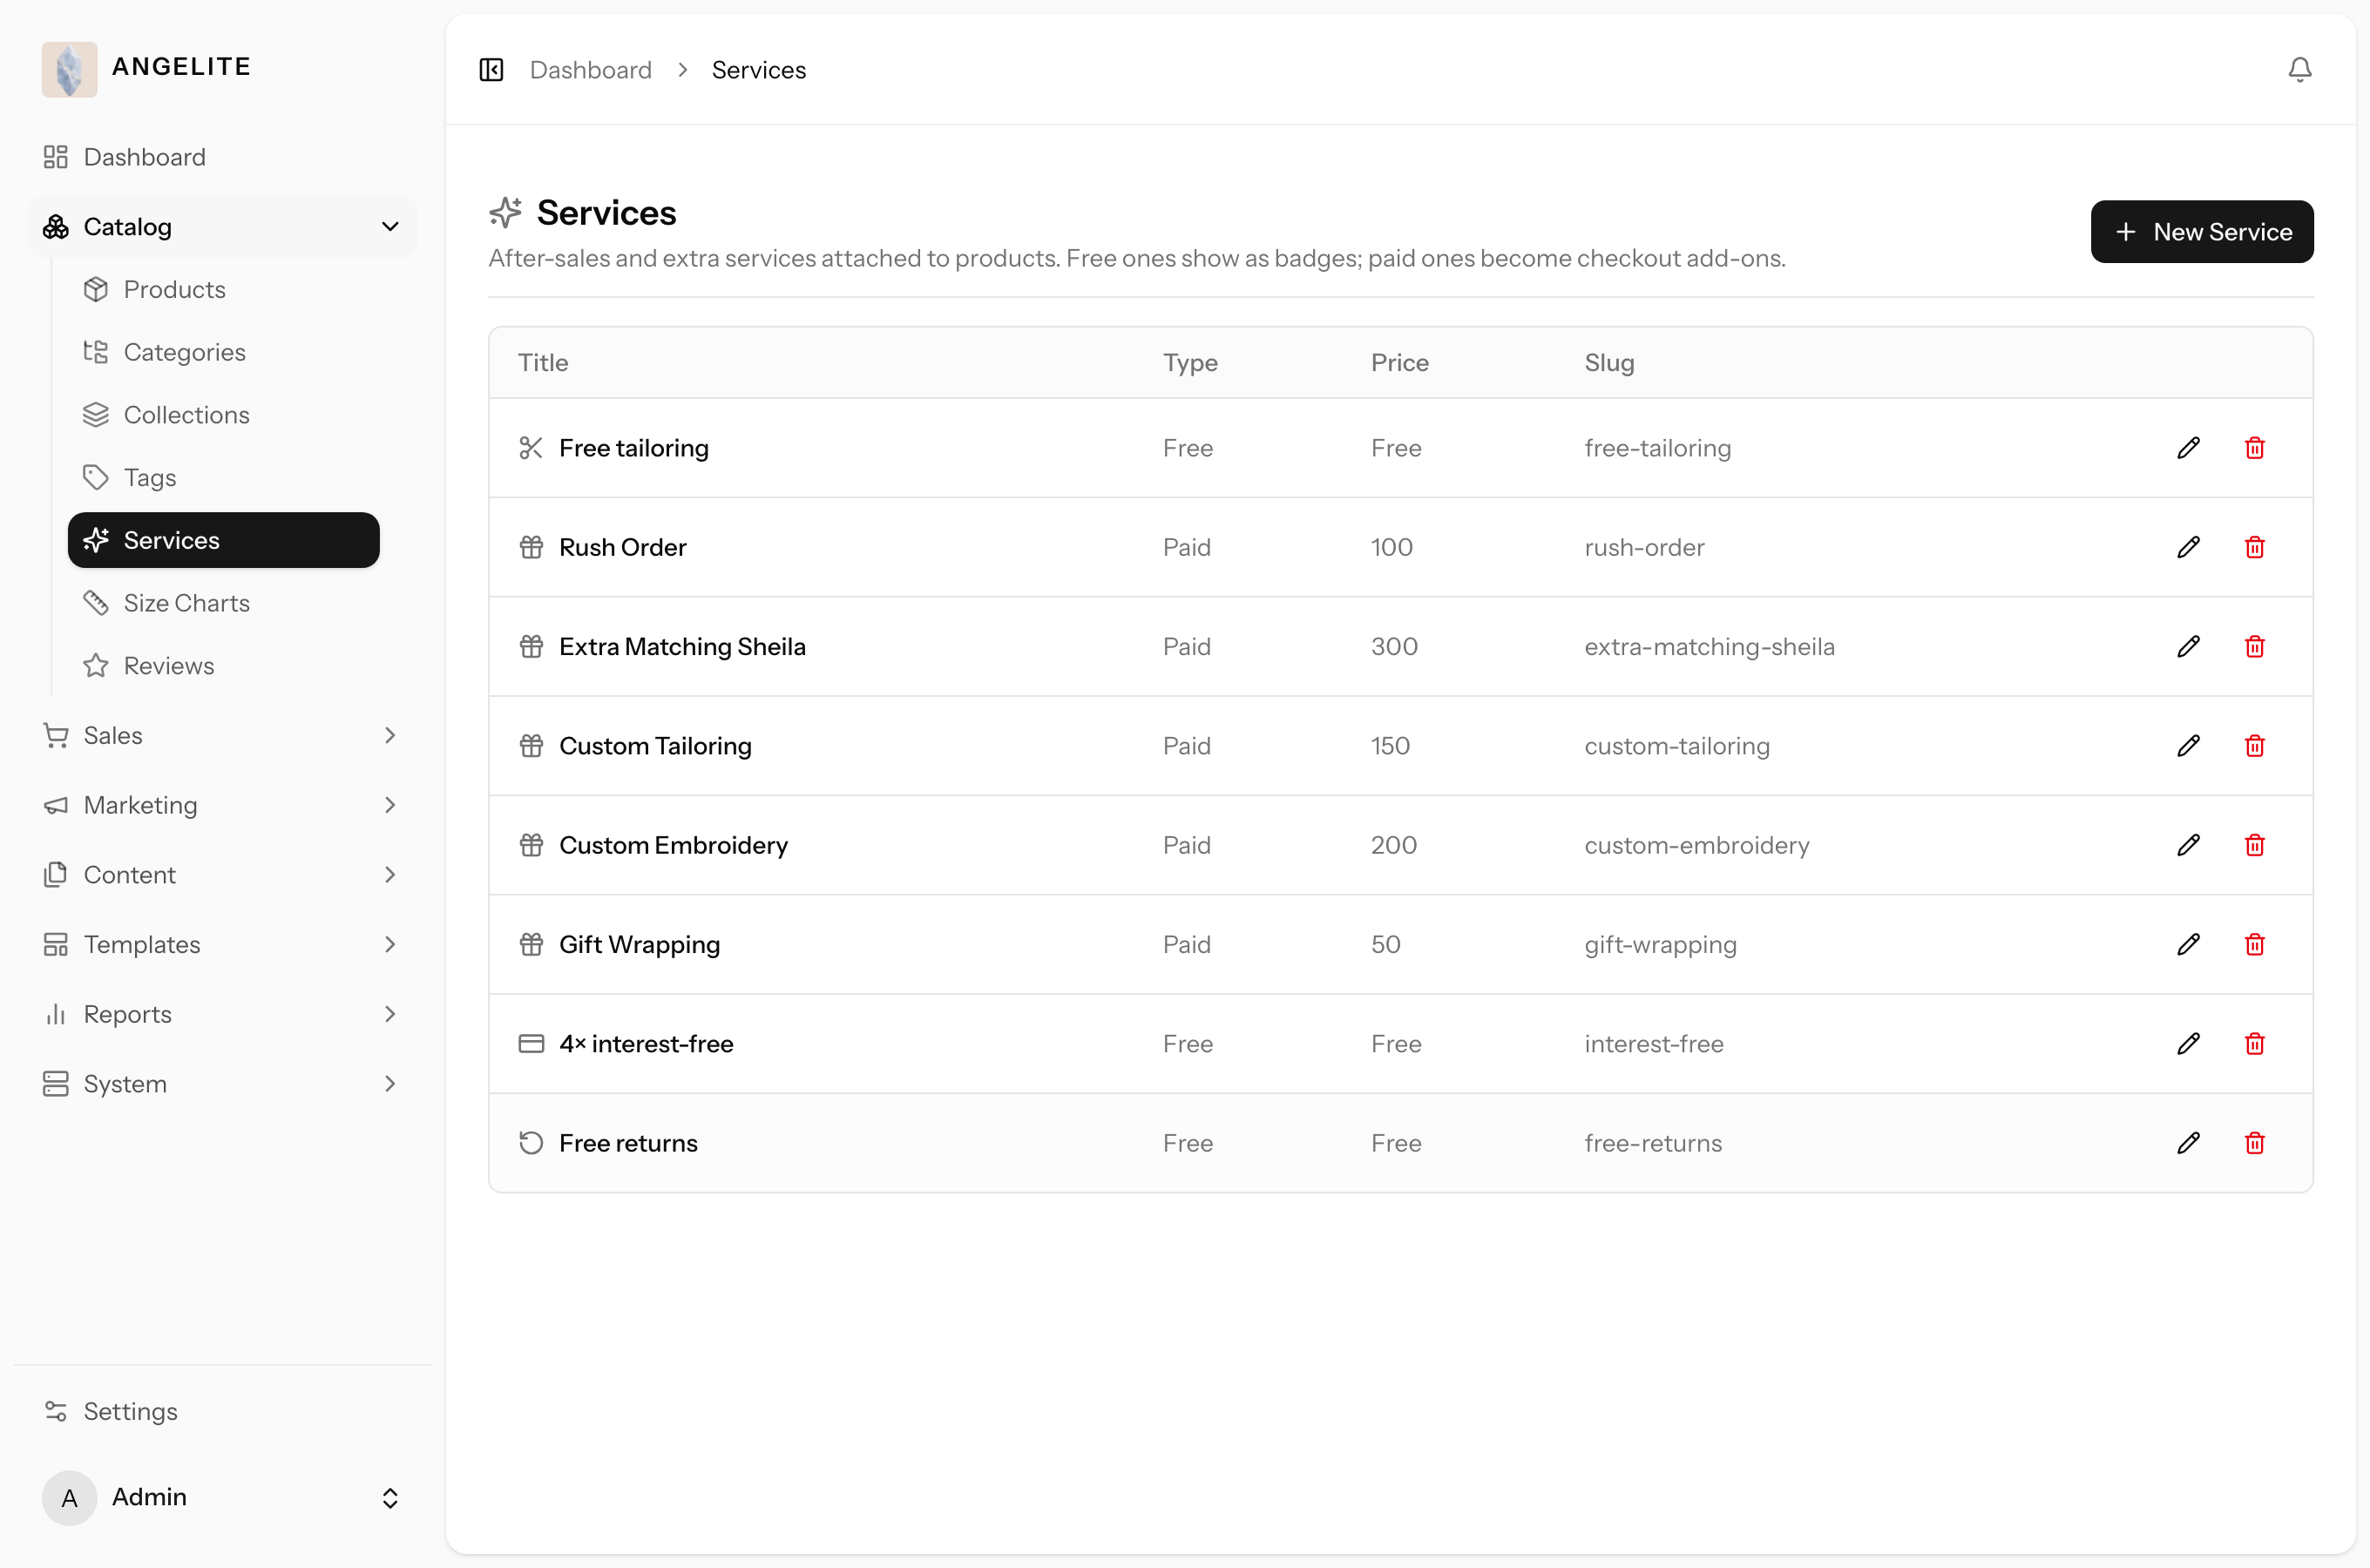
Free or paid add-on services a shopper can attach to a product, such as gift
wrapping or custom hemming. The service she picks is recorded on the order together with its
price, so it is always charged correctly and your team sees exactly what to do, with no manual
follow-up.
In practice
A customer buying a made-to-order abaya as an Eid gift asks whether you can adjust
the hem to her length and wrap it nicely, and you want to offer that for a small fee.
How Angelite handles it: you open Catalog then Services and create a Custom
hemming service with a price and a free Gift wrapping service, naming each in English and Arabic,
then make them available on the relevant pieces. The shopper ticks custom hemming and wrapping on the
abaya page, and both choices are recorded on the order, so the hemming fee is always charged
correctly and the gift wrap is right there for your team to action.
How to use it
Open Catalog → Services.
Create a service, set whether it is free or has a price, and name it in each language.
Make it available on the relevant products; shoppers then select it on the product page.
Where: Catalog → Services (visible when the Services module is on).
Optional module: switch Services on or off under
Settings → Features.
Reviews (moderation)
Admin
The problem: left unmoderated, anyone could post spam or a
fake complaint straight onto your best seller's page, and the first you would hear of it is a
customer asking about it.
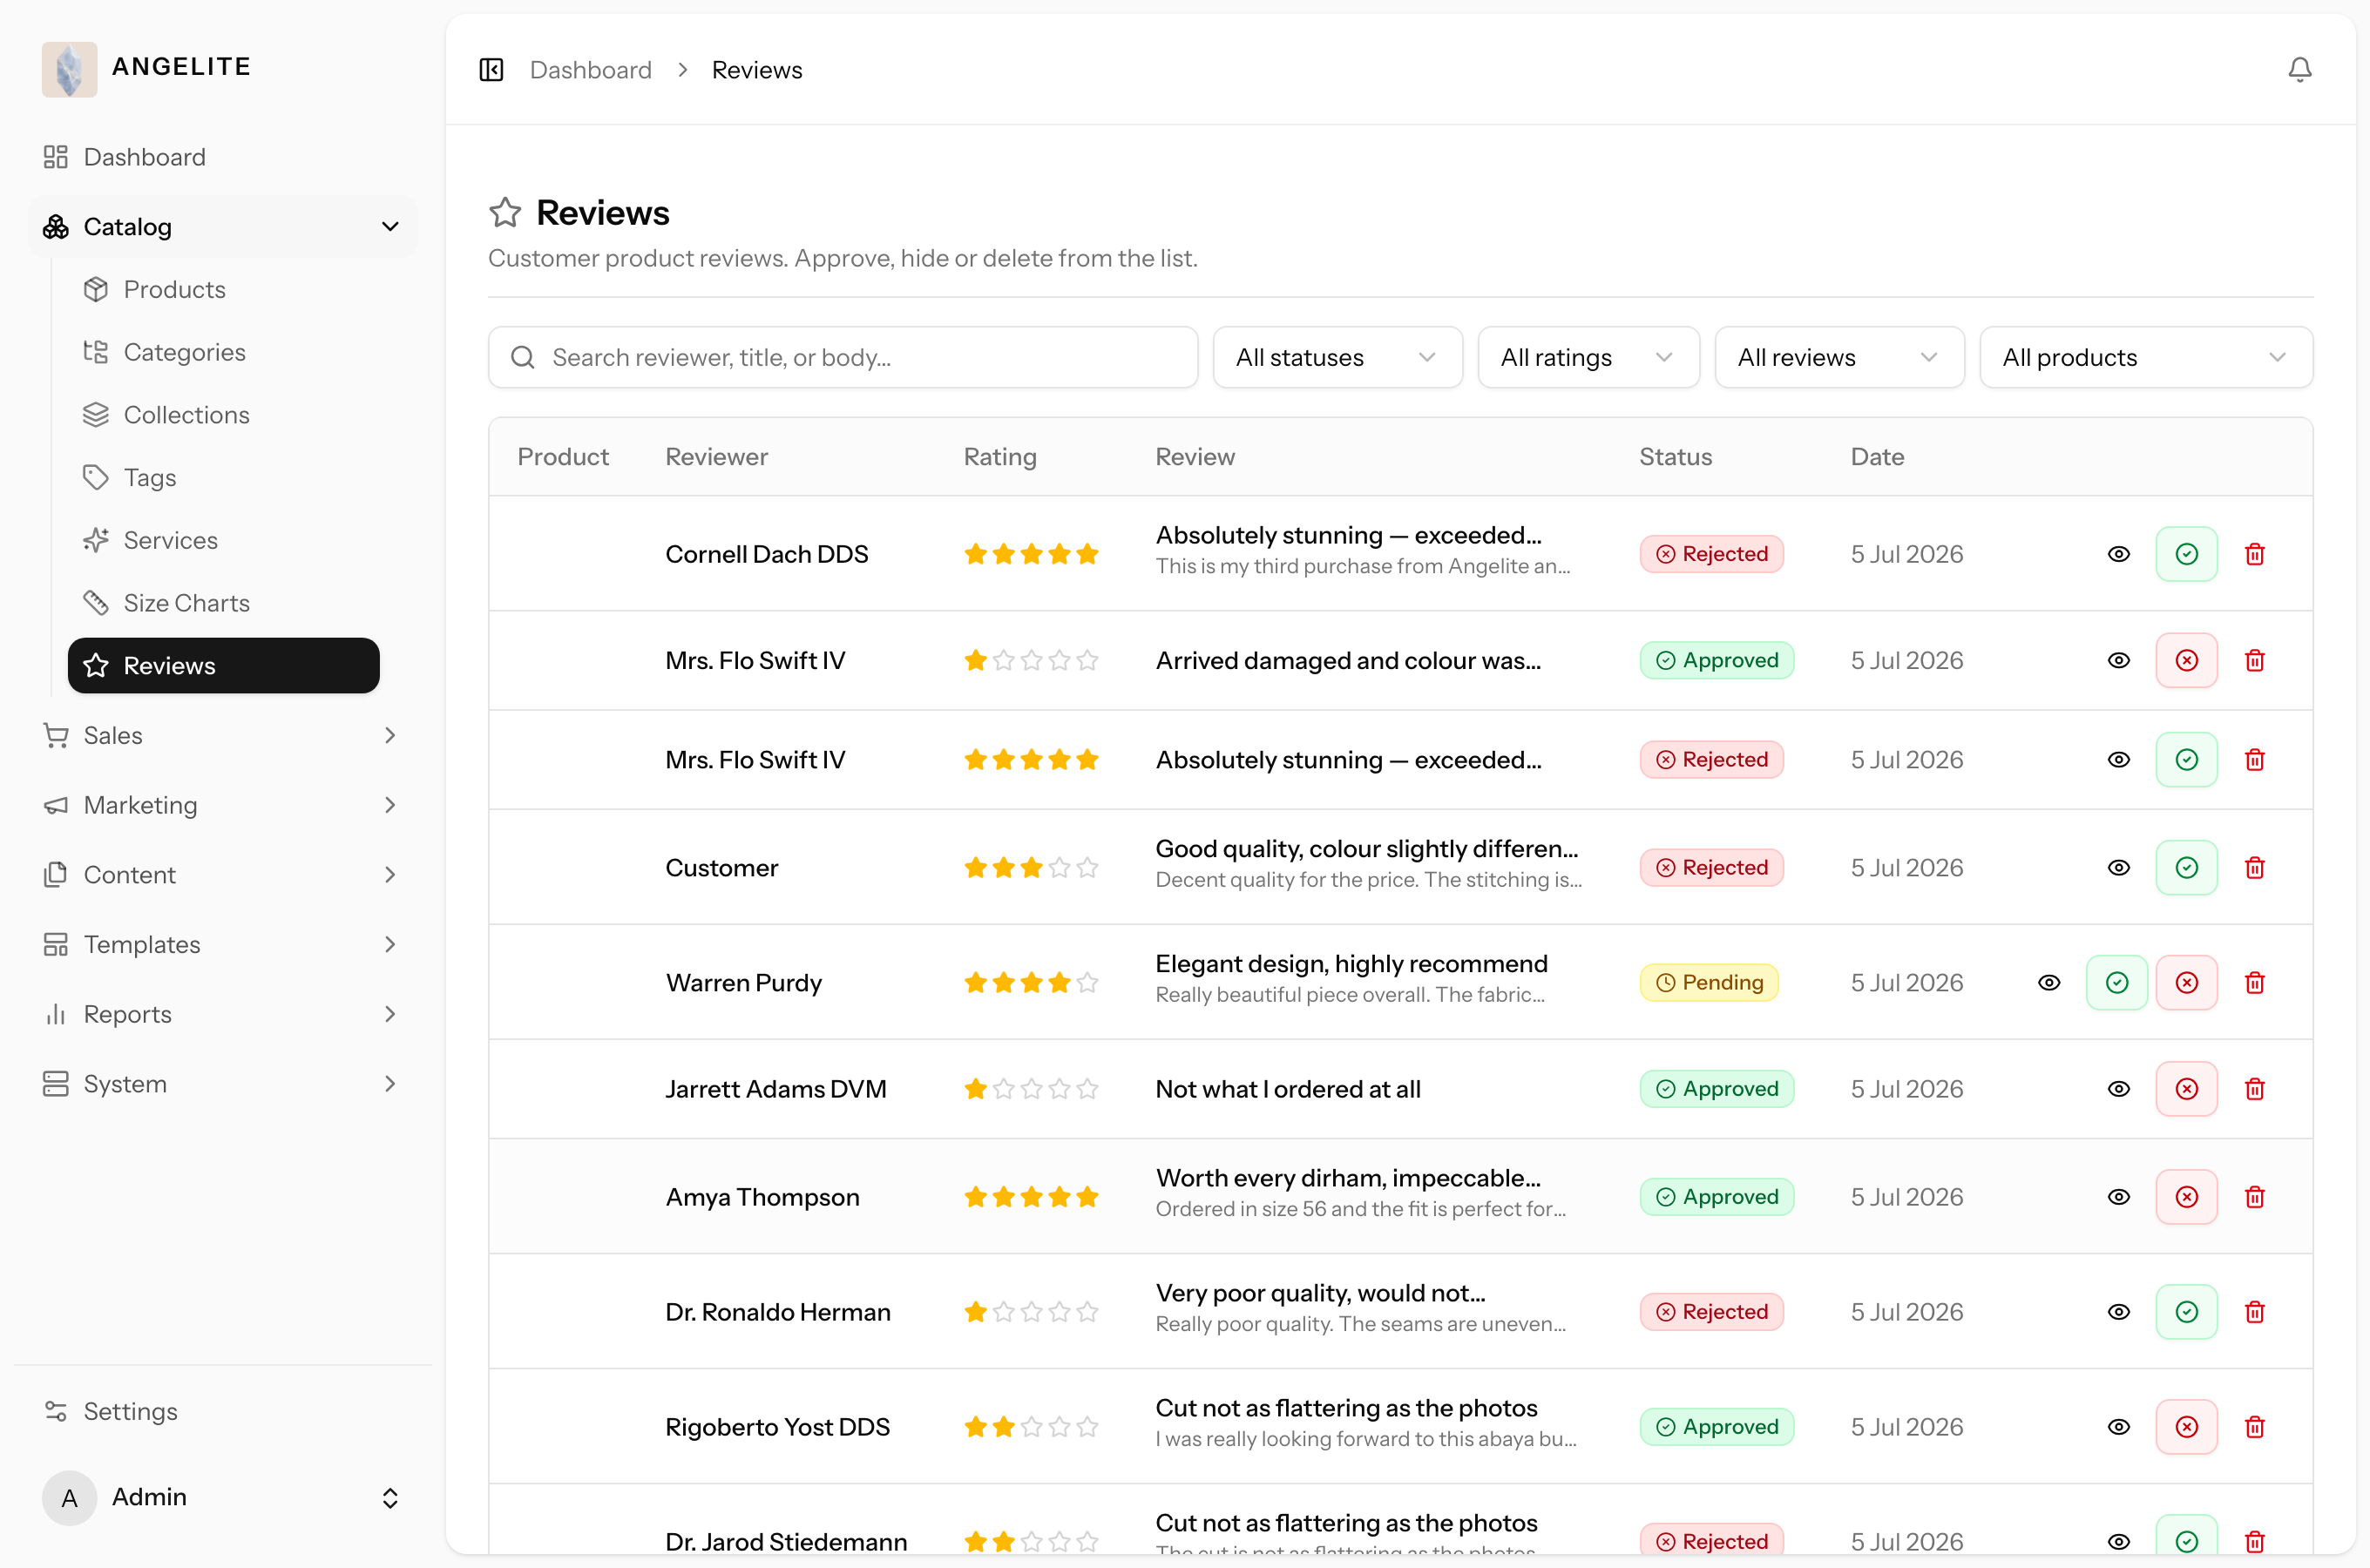
Approve or reject every review a customer submits before it appears on the
storefront. Verified-purchase reviews are badged, and reviews reported by other shoppers are
flagged for you, so what shoppers read on your product pages stays trustworthy and genuinely
reflects what customers received.
In practice
A customer who bought a ready-to-wear abaya leaves a glowing review with a photo,
while another submission looks like spam, and you want only genuine feedback shown on the shop.
How Angelite handles it: you open Catalog then Reviews to see the submissions
waiting for moderation. You read the abaya review, see its verified-purchase badge, and click
Approve so it publishes and the happy customer is notified. You read the spam one and click Reject
so it never appears. Anything other shoppers have reported is flagged for your attention, so the
reviews on your product pages stay trustworthy.
How to use it
Open Catalog → Reviews to see submissions awaiting moderation.
Read each review and click Approve to publish it or Reject to hide it.
Approving a review can notify the customer; reported reviews are flagged for your attention.
Where: Catalog → Reviews.
Media library
Admin
The problem: the same photo gets uploaded again and again,
once for the product, once for the category, once for the homepage, and a single unsafe file
slipping onto the public shop is a risk you would never spot yourself.
The image store behind products, categories, collections and pages. Uploads accept
only safe image types (JPEG, PNG, WebP), each image can carry its own description for
accessibility, and one upload is reused everywhere you attach it instead of re-attaching the
same photo screen by screen.
In practice
Imagine your photographer sends over several angles of a new embroidered evening
abaya and you want the best shot to lead, with each image described for shoppers using a screen
reader.
How Angelite handles it: you drag the photo files straight into the abaya's gallery
in the product editor, where only safe image types (JPEG, PNG and WebP) are accepted. You reorder
the images so your hero shot sits first as the main photo, and you add a short alt description to
each, such as "hand-embroidered black abaya, front view". The images are then stored once and reused
wherever you attach them, across products, categories, collections and pages.
How to use it
Upload images directly where you need them, for example by dragging files into a product's gallery.
Reorder images to set the main photo, and add an alt description to each.
Save; the images are stored and reused wherever you attach them.
Where: the gallery inside the product editor (and the equivalent on categories, collections and pages).