Every store leans on outside companies: someone to take the card payment, deliver the
parcel, send the email. The worry is picking wrong and being stuck, or wiring a connection up badly and
finding out at a customer's checkout. This chapter is where you connect those services yourself, test
each one safely before it touches a shopper, and swap any of them later without a developer.
Angelite deliberately avoids locking your store to any single provider: every category is built to be
configurable so the choice, and the ability to change that choice later, always stays yours. Your shop
should never be locked to a single payment company, one courier, or one email service. The market moves,
fees change, and a provider you love today may not be the right fit next year. Integrations are the way
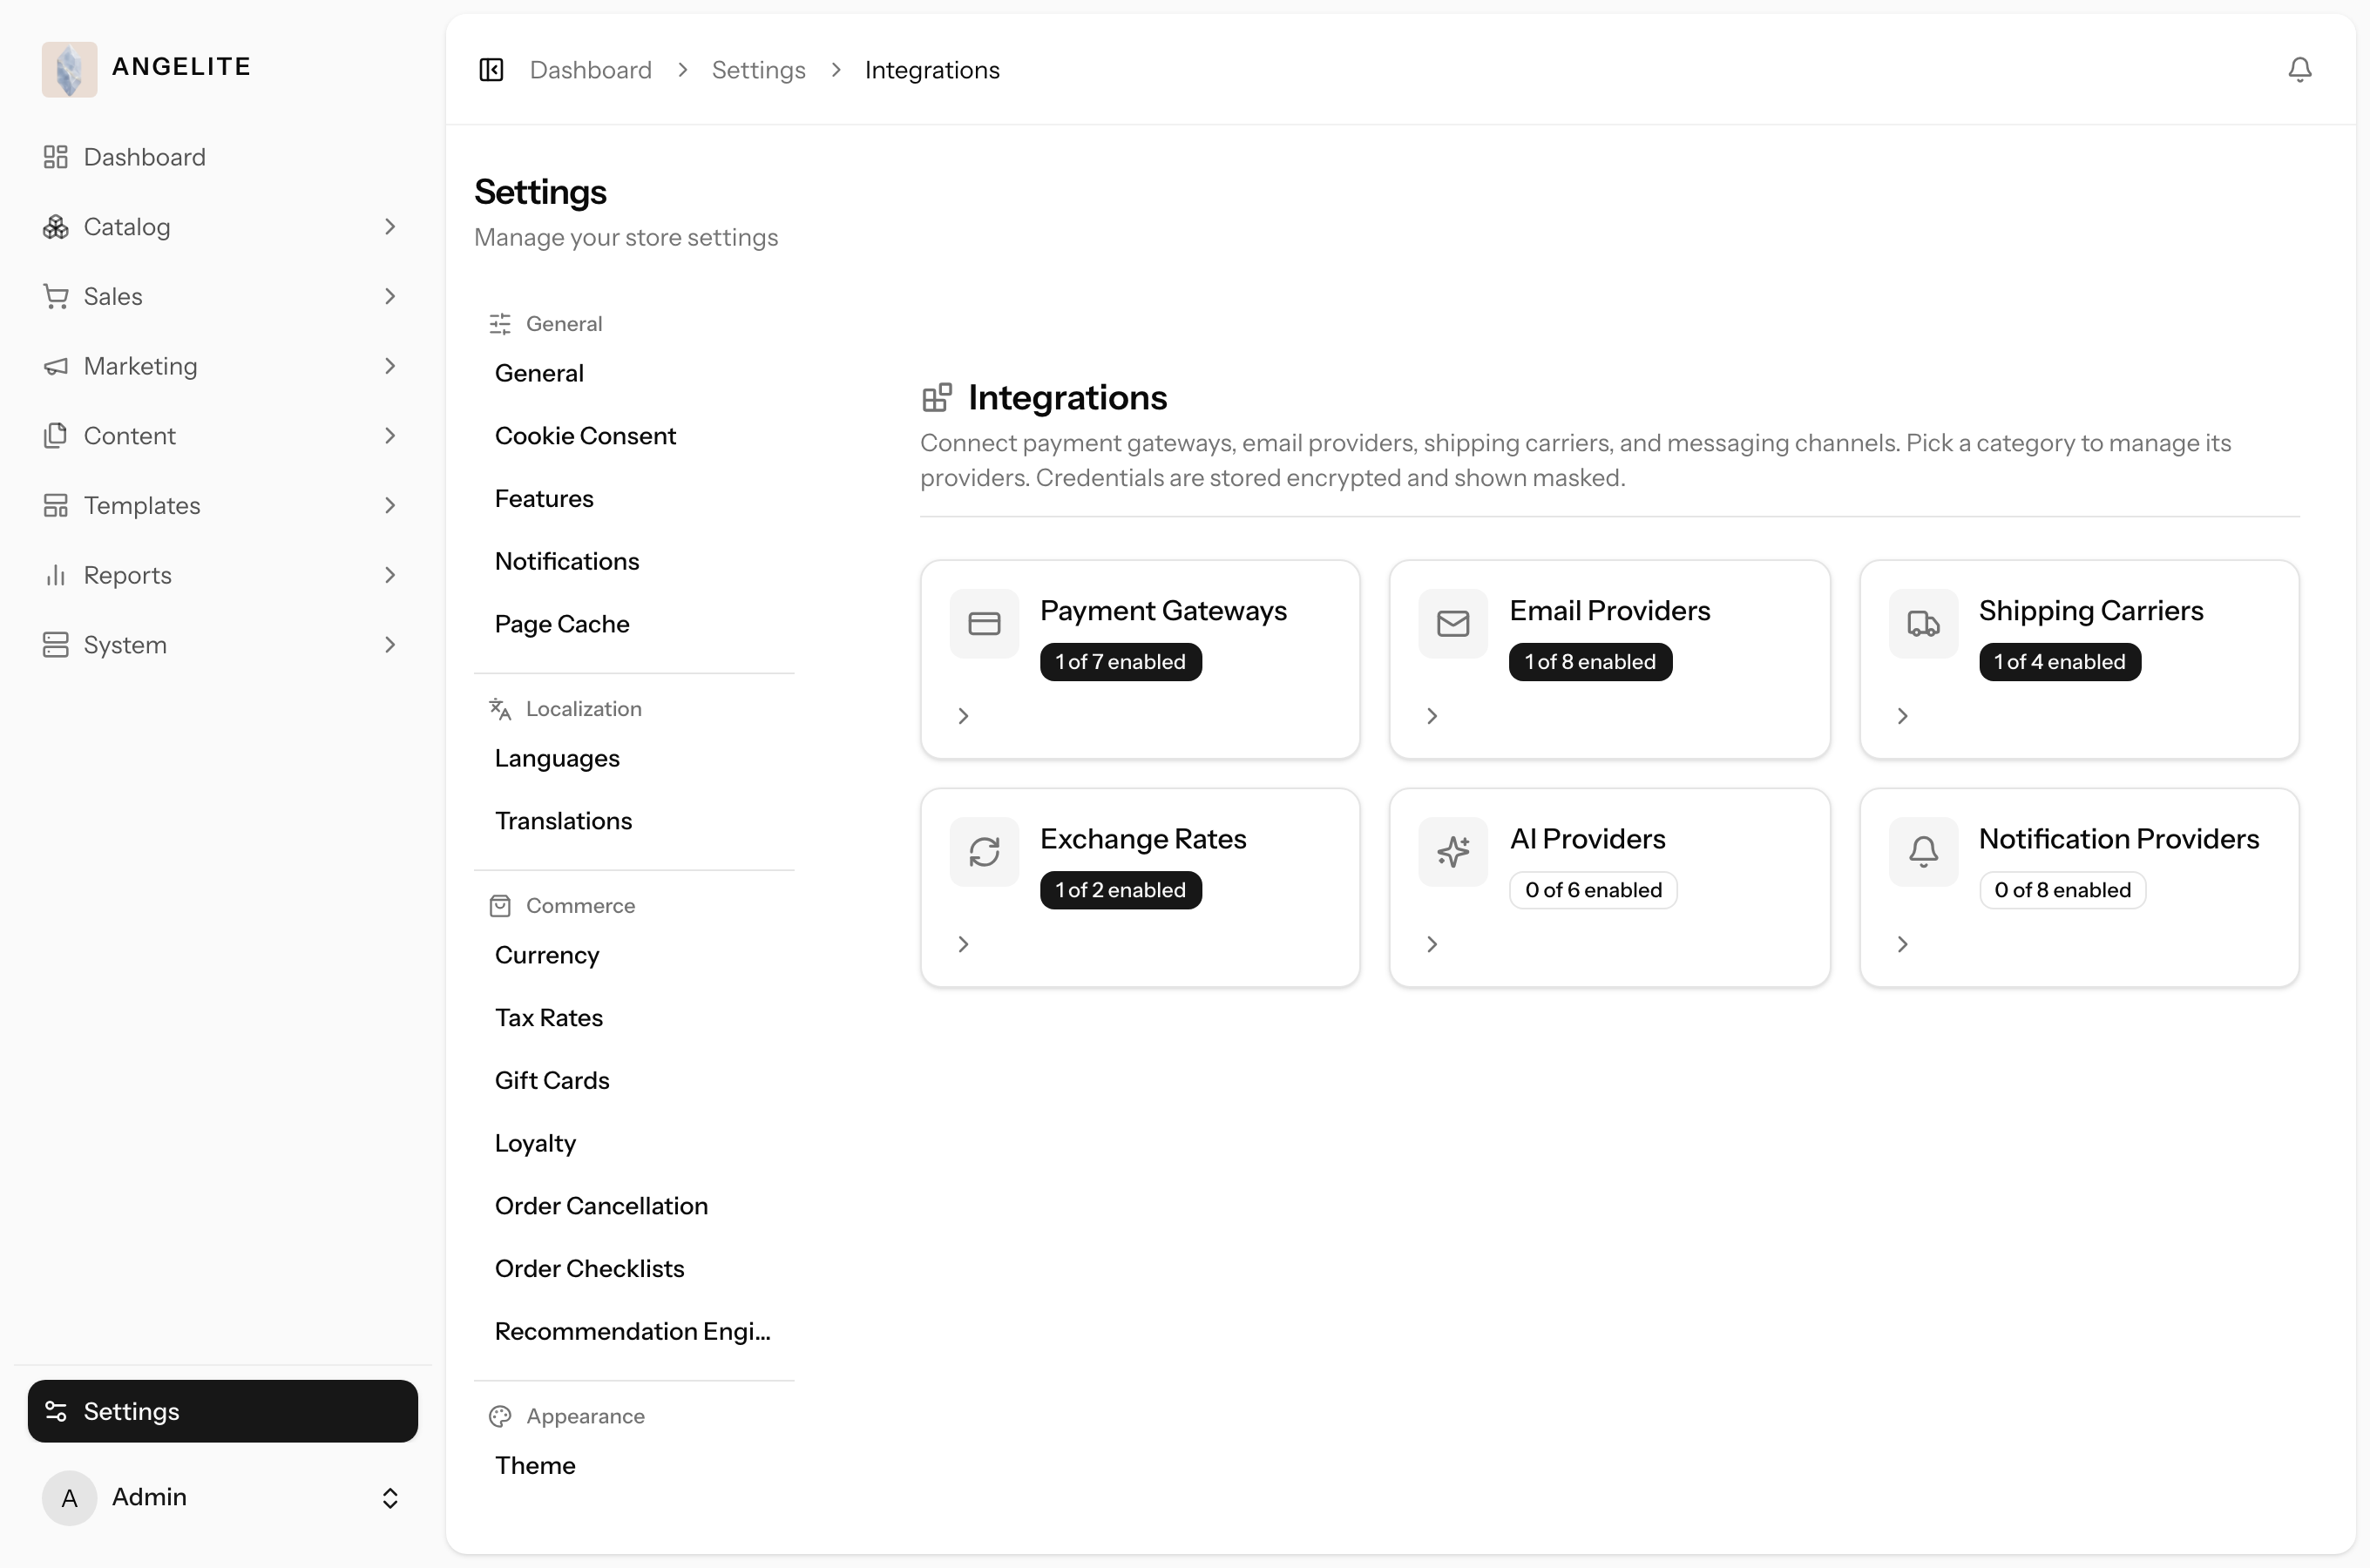
Angelite keeps you free to choose. Instead of wiring outside services deep into the code, every external
connection lives behind one settings screen, so you can plug in the providers you want and unplug the
ones you do not. Every category ships with a built-in option, for example Bank Transfer for payments and
Standard Shipping for delivery, which means the store always works from day one even before you connect
anything. When you are ready for something stronger, such as taking cards through Stripe or offering live
courier rates, you switch the category on, paste a few keys, run a test, and enable it. No developer, no
downtime, and you can change your mind any time without breaking the shop.
If a provider-dependent feature is missing on your store
A few features described in this chapter and elsewhere only appear once you have connected the relevant
provider, for example live carrier rates need a shipping carrier connected here, and card payments need a
payment gateway connected here. If you do not see one of them on your live store yet, it is waiting on
that connection, not missing from the platform. See "How to read this guide" at the front of this report
for the full explanation.
Connecting services
Payment gateways
AdminOptional · Payment Gateways
The problem: a shopper reaches checkout with a full bag and the way she
wants to pay is not there, a mada card, a wallet, cash at the door, so she quietly leaves. And connecting
real payments yourself feels risky: one mistyped key and it is your own checkout that breaks.
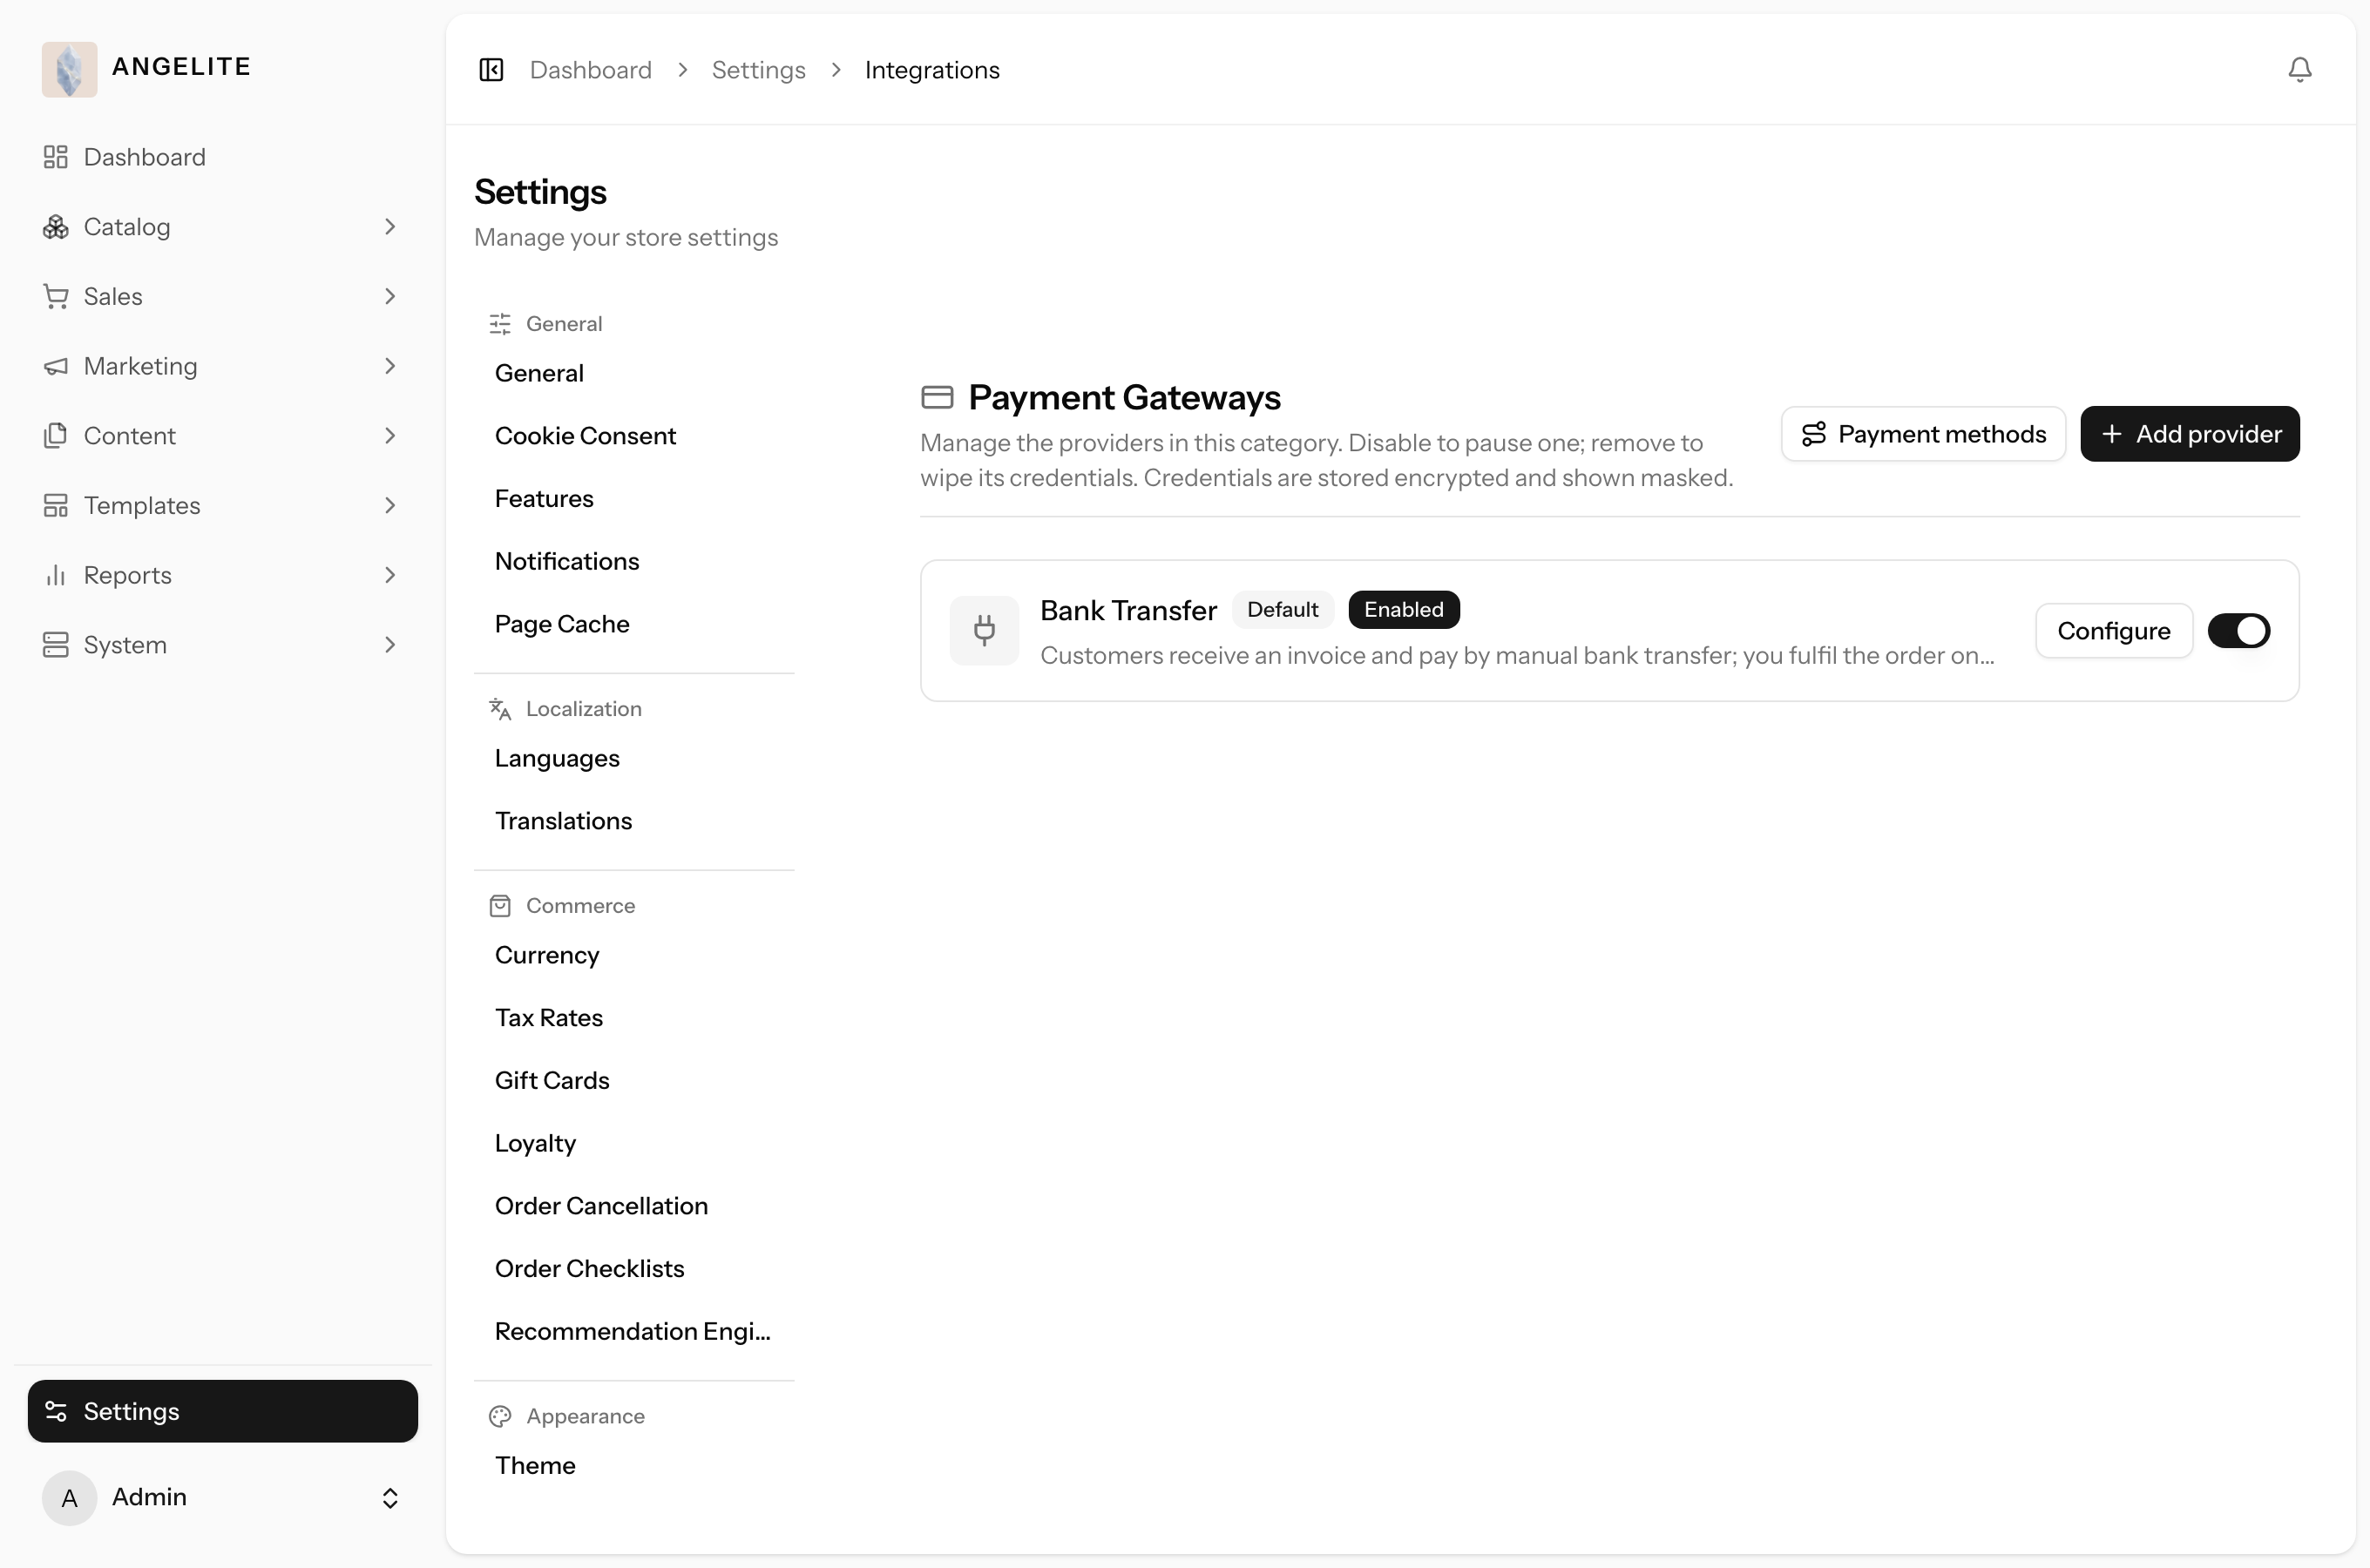
Choose how your customers pay, and connect it without fear. Bank Transfer is built in and
always available, so you can take payments from day one. When the category is switched on you can also add
Cash on Delivery, Stripe, PayPal, PayTabs, MyFatoorah, and SkipCash (a Qatar-focused option that pays out
to you in Qatari riyal), then pick which ones appear at checkout. Every online gateway holds two separate
sets of credentials, a test set and a live set, and it cannot be switched live until a test payment has
succeeded in test mode, so a mistyped key can never quietly break real checkout.
In practice
Say a customer in Doha is buying a ready-to-wear abaya in her usual size and wants to pay
with a local mada card, while a visitor from London on the same day expects to use a Visa card or PayPal.
How Angelite handles it: you open Settings, go to Integrations, choose Payment Gateways,
click Add provider, and connect MyFatoorah for Gulf cards like KNET and mada and Stripe for international
Visa and Mastercard. You start each one in test mode, run a successful test payment, then switch it live
and enable it. Now the Doha shopper pays with mada and the London shopper pays with a global card, all
from the one checkout page, with Bank Transfer still there as a backup.
How to use it
Open Settings → Integrations and choose the Payment Gateways category.
Click Add provider and pick the gateway you want, for example Stripe.
Follow the short setup guide and enter the test credentials from your provider's dashboard.
Run a successful test payment in test mode; only then can the gateway be switched to live.
Enter the live credentials, switch the gateway to live, and enable it.
Set a default if you offer several, and the gateway is now live at checkout.
Taking money is the heart of the shop. Different shoppers reach for different cards and wallets, and a
missing payment option is a lost sale, so you want the methods your customers actually use.
How to configure
Open Settings, go to the Integrations area, pick the Payment Gateways category, click Add provider, paste
the keys from the provider's dashboard, run a test payment in test mode, then switch to live and enable.
Why these providers
This line-up covers a GCC abaya retailer end to end: trusted local options (Cash on Delivery, Bank
Transfer), the leading regional gateways (PayTabs, MyFatoorah, SkipCash) for mada, KNET and Benefit, the
local card schemes Gulf shoppers actually pay with, with the money paid out to you in Qatari riyal, and
the global names (Stripe, PayPal) for tourists and overseas buyers.
Provider
Why choose it
Documentation
Bank Transfer
Zero fees and always available as a safe fallback.
Built in
Cash on Delivery
Trusted and expected across the GCC, pays on the doorstep.
Built in
Stripe
Global cards with the Payment Element and 3-D Secure.
Optional category: turn extra payment gateways on under
Settings → Features. Until then the store runs on the built-in Bank Transfer option.
Email providers
AdminOptional · Email Providers
The problem: an order confirmation that lands in spam might as well not
exist. The customer wonders whether her payment went through, messages you to check, and starts the
relationship doubting the shop.
Decide which service delivers your store's emails, and make sure they actually arrive.
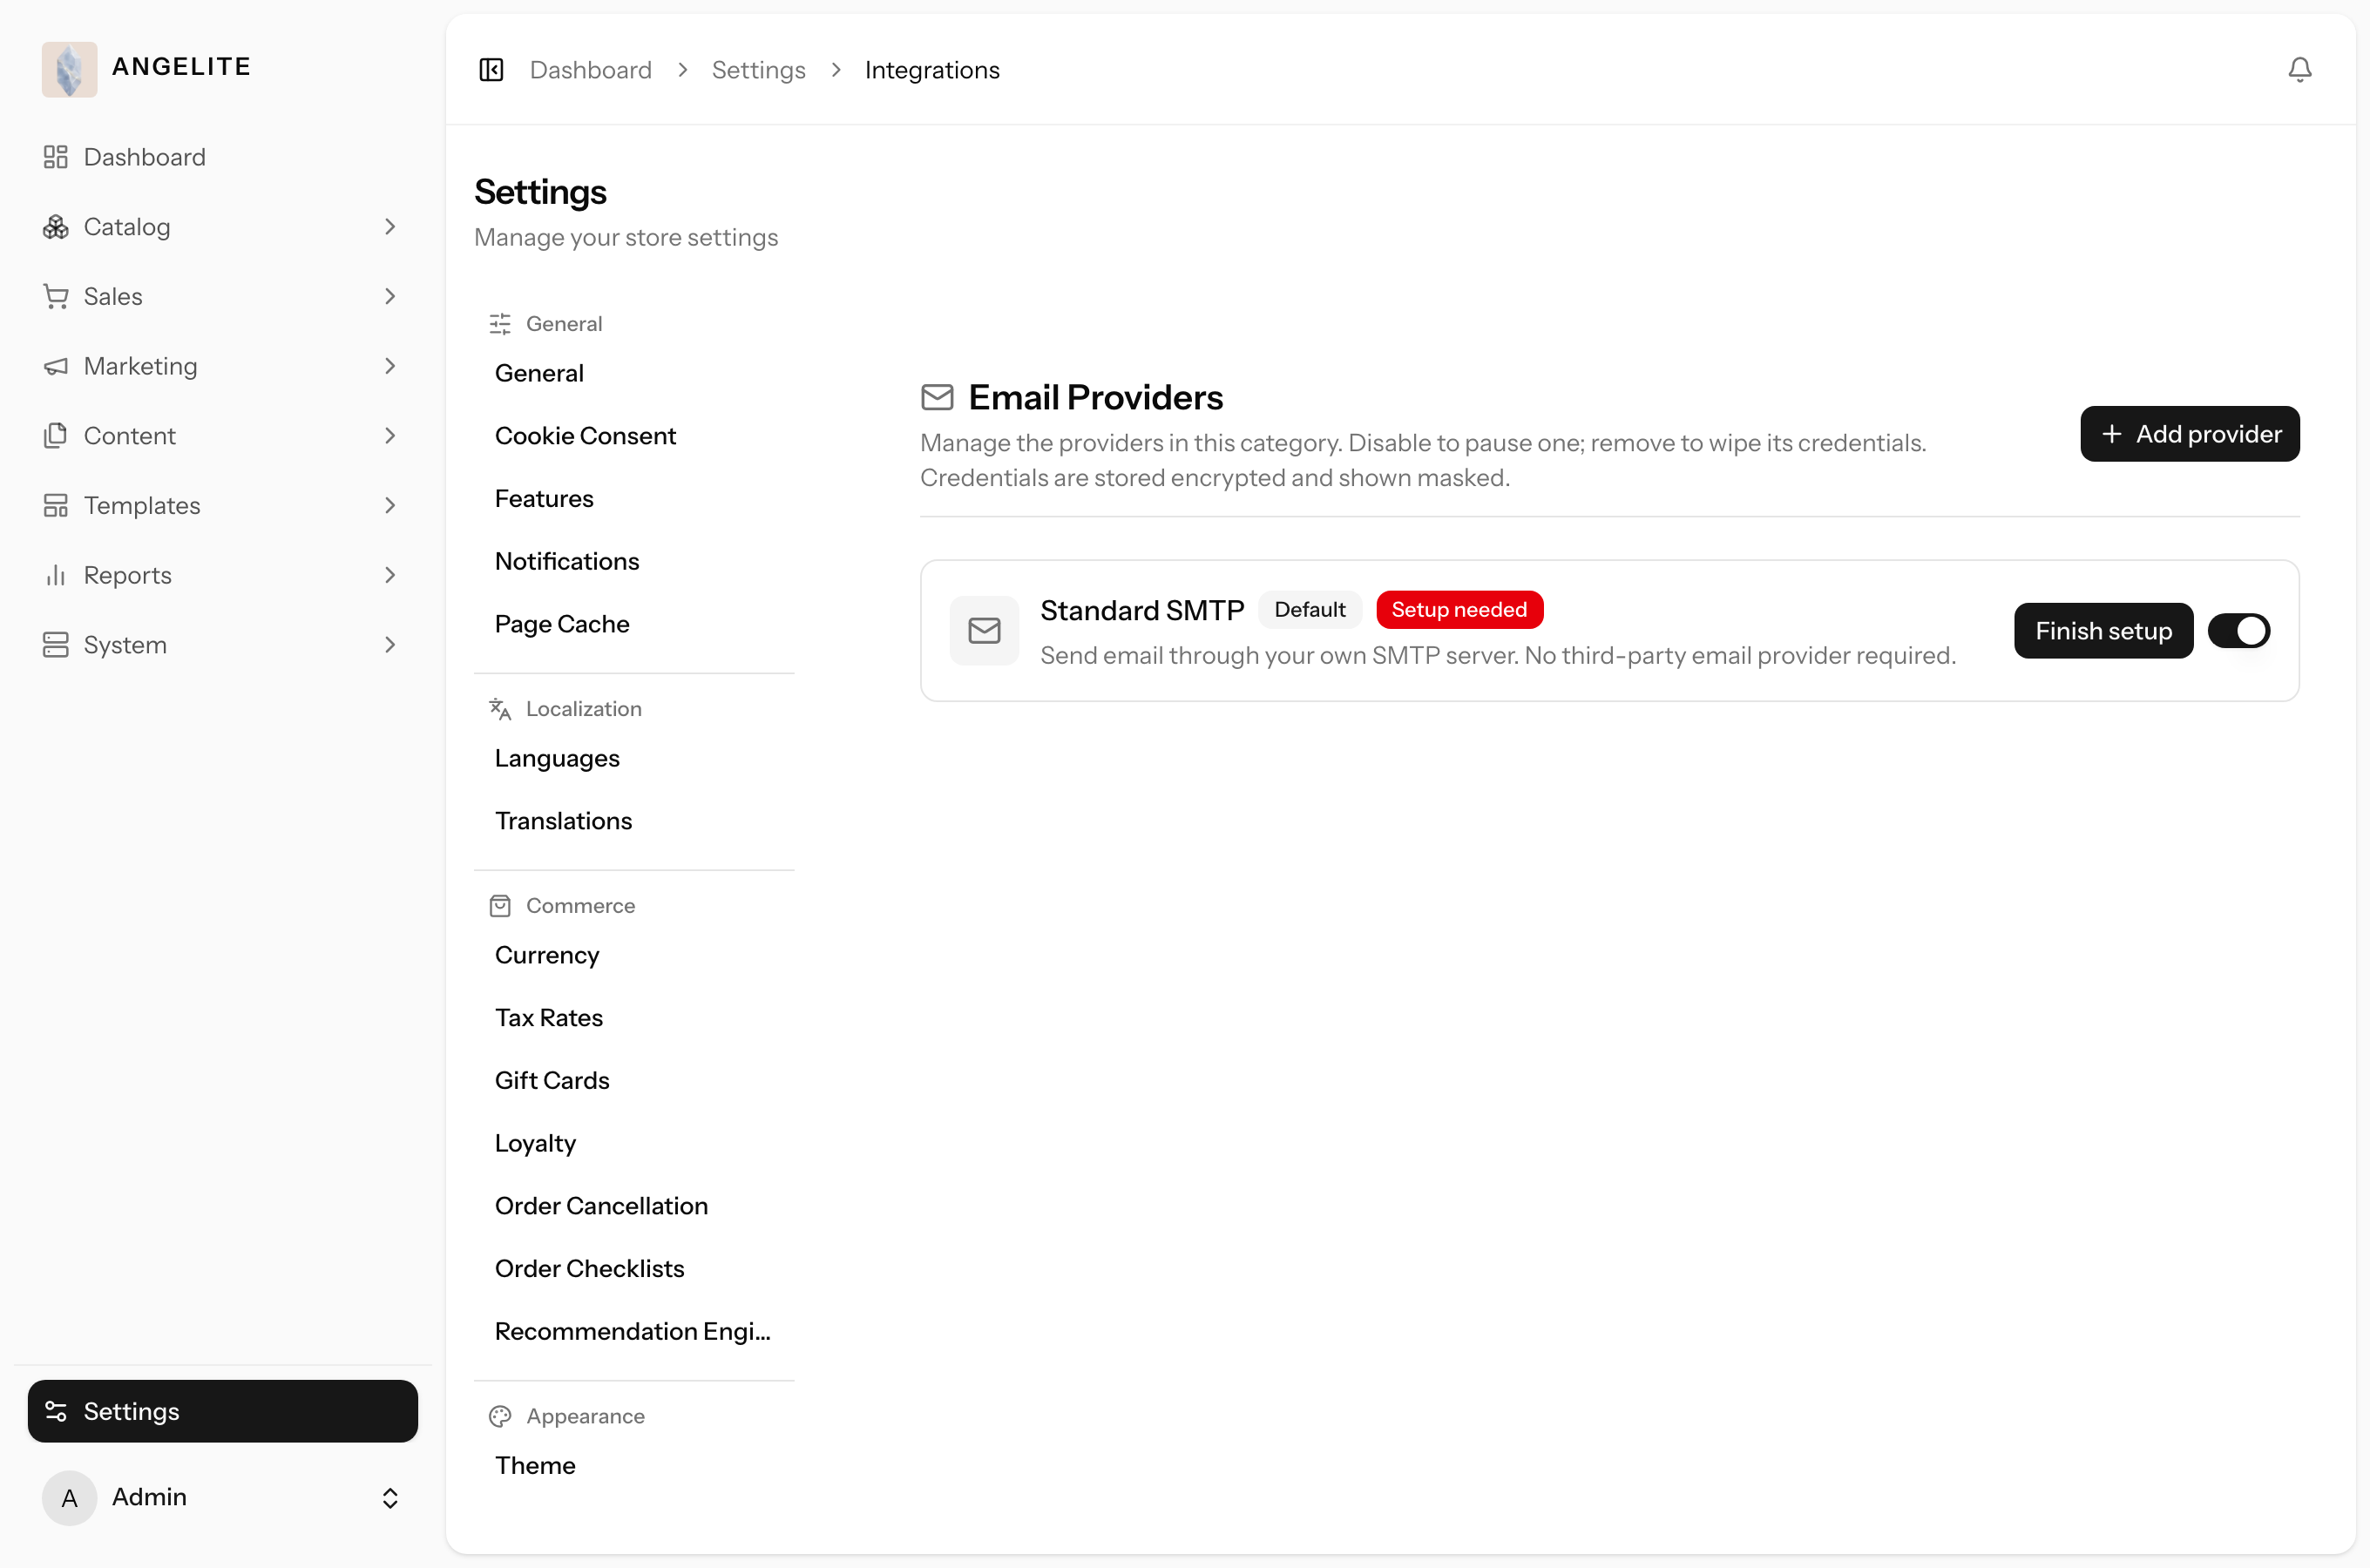
Standard SMTP is built in and always available. When the category is switched on you can also add Amazon
SES, Mailgun, Postmark, Resend, SendGrid, Mailchimp Transactional and Mailtrap, and if your main provider
has a hiccup another enabled one quietly takes over, so the message still goes out.
In practice
Imagine you send out a "new Ramadan collection has arrived" email to your
subscriber list, plus order confirmations all day, and you notice some buyers say the confirmation never
reached their inbox.
How Angelite handles it: you open Settings, go to Integrations, choose Email Providers,
click Add provider and connect a dedicated sending service such as Postmark for receipts and SendGrid for
your campaign list. After you enter the sending domain and key and click Test connection, you set one as
default. From then on order confirmations land reliably, and if that provider has a hiccup the store
quietly falls back to another enabled one so the email still goes out.
How to use it
Open Settings → Integrations and choose the Email Providers category.
Click Add provider and pick your email service.
Enter the credentials your provider supplies, such as the sending domain and key.
Use Test connection to confirm it can send, then enable the provider.
Set one as default; if it ever fails, the store quietly falls back to another enabled provider.
Where: Settings → Integrations → Email Providers.
Why you need it
Order confirmations, password resets and campaign emails have to arrive in the inbox, not the spam
folder. A proper sending service protects your reputation so customers actually receive what you send.
How to configure
Open Settings, go to the Integrations area, pick the Email Providers category, click Add provider, paste
the keys from the provider's dashboard, run Test, then enable.
Why these providers
A boutique can start with the built-in mailbox option and grow into a dedicated sender. The choices here
cover budget-friendly, high-deliverability and developer-favourite services, all proven in the region, so
you can pick on price and reliability.
Optional category: enable extra email providers under
Settings → Features. Until then the store sends through the built-in Standard SMTP option.
Notification providers
AdminOptional · Notifications
The problem: in the Gulf, an email can sit unread for days while a
WhatsApp message is seen in minutes, so your carefully sent updates simply miss where customers actually
look. Meanwhile your own team only learns about a new order when someone thinks to refresh the admin,
which on a busy Friday is exactly when nobody does.
Reach customers and staff beyond email. Customer-facing updates go over SMS (Twilio or
Vonage), WhatsApp (Twilio or Meta Cloud) and a Telegram bot, and for each of those you decide who gets
them: your team only, or every customer plus anyone who opts in. Separately, your own team can get
instant alerts in the chat tools you already use, Slack, Discord or Microsoft Teams, whenever something
needs attention. The whole messaging surface turns on with a single switch.
In practice
A customer orders a made-to-order wedding abaya as an Eid gift and wants to know the moment it ships, but in the Gulf many shoppers check WhatsApp far more than email, and separately your small team wants a heads-up in their Slack channel the second a new order comes in, rather than checking the admin bell all day.
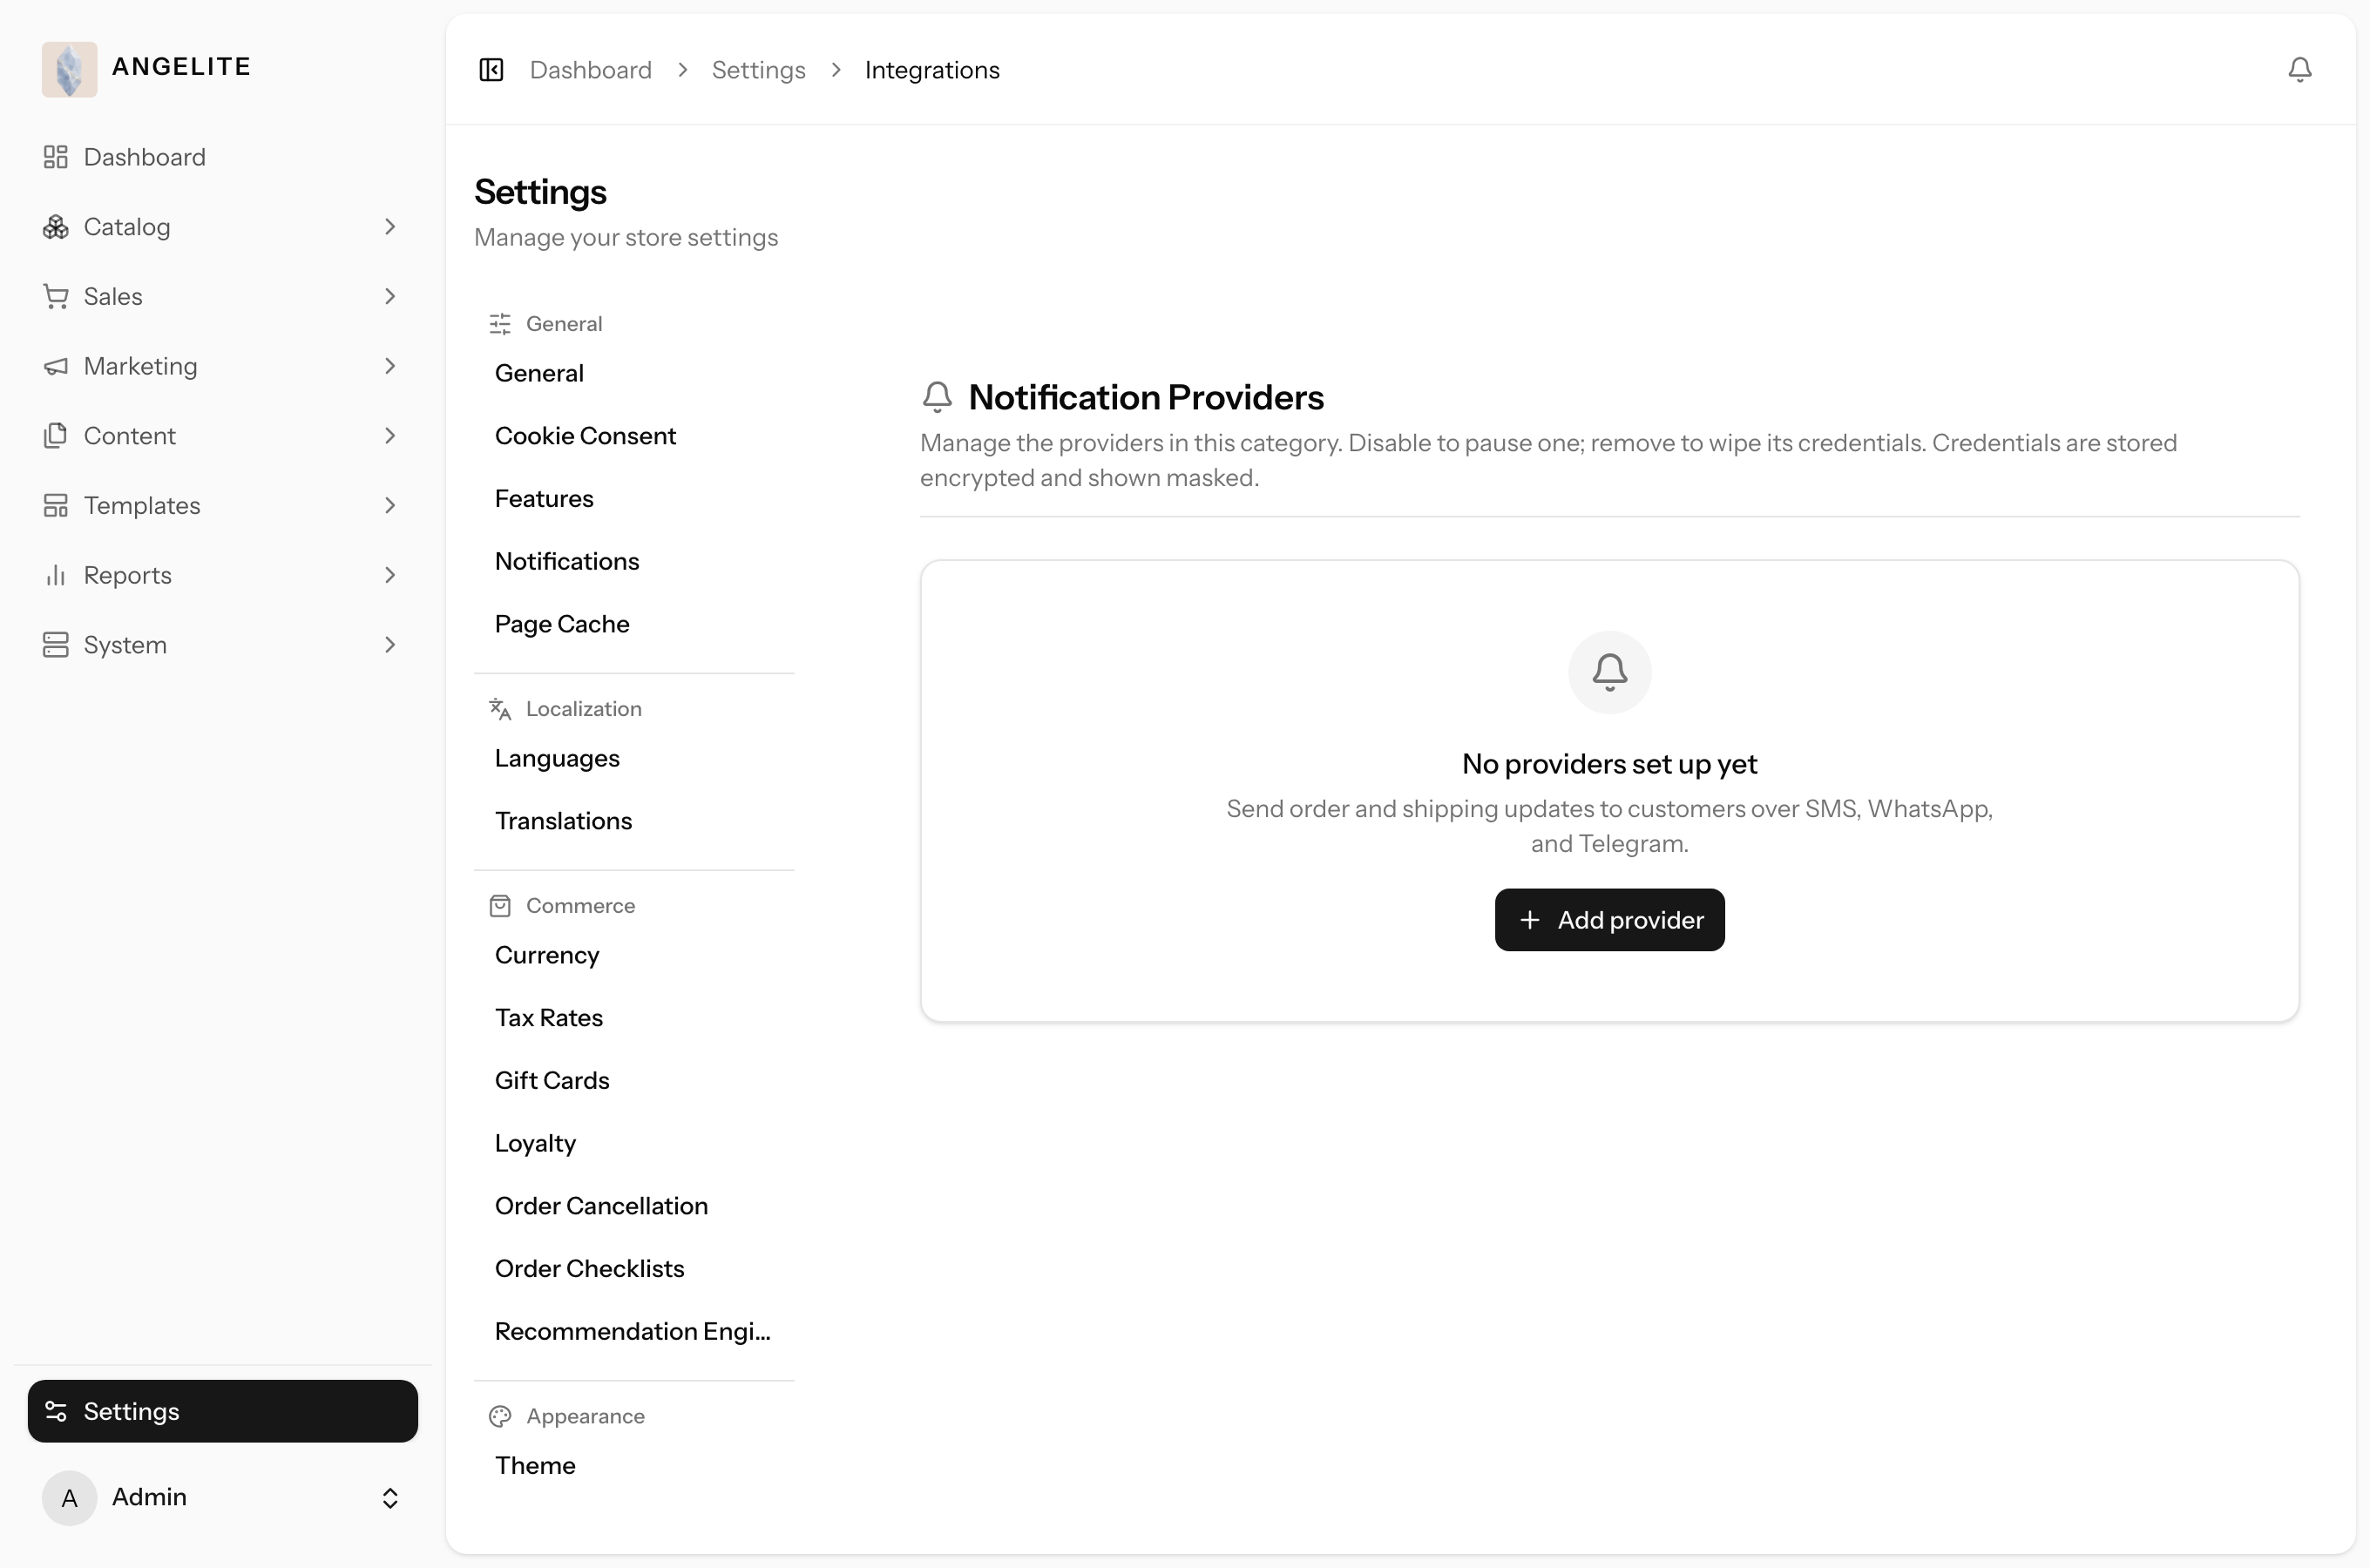
How Angelite handles it: you open Settings, go to Integrations, choose Notification
Providers, click Add provider and connect WhatsApp through Meta Cloud for customers, opening it to
everyone who opts in. You also connect your team's Slack channel for order alerts using the private
posting link Slack gives you. After you enter the credentials and use Test message to send yourself a
sample, you enable each channel. Now the buyer gets a WhatsApp note when the abaya ships, and your team
sees a rich card land in Slack the moment the order comes in, so nothing is missed either side.
How to use it
Open Settings → Integrations and choose the Notification Providers category.
Click Add provider and pick a channel and service, for example Twilio for SMS or Slack for team alerts.
Enter the credentials from your provider's account.
Use Test message to send yourself a sample, then enable the provider.
For customer channels (SMS, WhatsApp, Telegram), choose who receives them: your team only, or customers too.
In the Gulf, WhatsApp and SMS are how people actually read updates. Reaching shoppers on the channel they
check means fewer missed delivery notes and a more personal feel for a boutique, and a Slack or Discord
ping means your own team never has to keep the admin tab open to catch a new order.
How to configure
Open Settings, go to the Integrations area, pick the Notification Providers category, click Add provider,
paste the keys (or, for a team channel, the private posting link from Slack, Discord or Teams), run Test message, then enable.
Why these providers
WhatsApp is the everyday messenger in the region, and SMS still reaches any phone when WhatsApp cannot,
while Telegram doubles as a customer channel or a staff one. Slack, Discord and Microsoft Teams cover
whichever chat tool your own team already lives in for internal alerts.
Optional category: switch notifications on under
Settings → Features. This category has no built-in option, so it stays inactive until you enable it.
Good to know: Slack, Discord and Microsoft Teams are for your team only,
they never message a customer. SMS, WhatsApp and Telegram can each be scoped to staff-only or opened up
to customers as well.
Notification message templates
AdminOptional · Notifications
The problem: the standard order updates a shop sends read like they were
written by a machine, and only in English. A boutique's WhatsApp messages should sound like the boutique:
warm, brief, and in Arabic when the customer is Arabic.
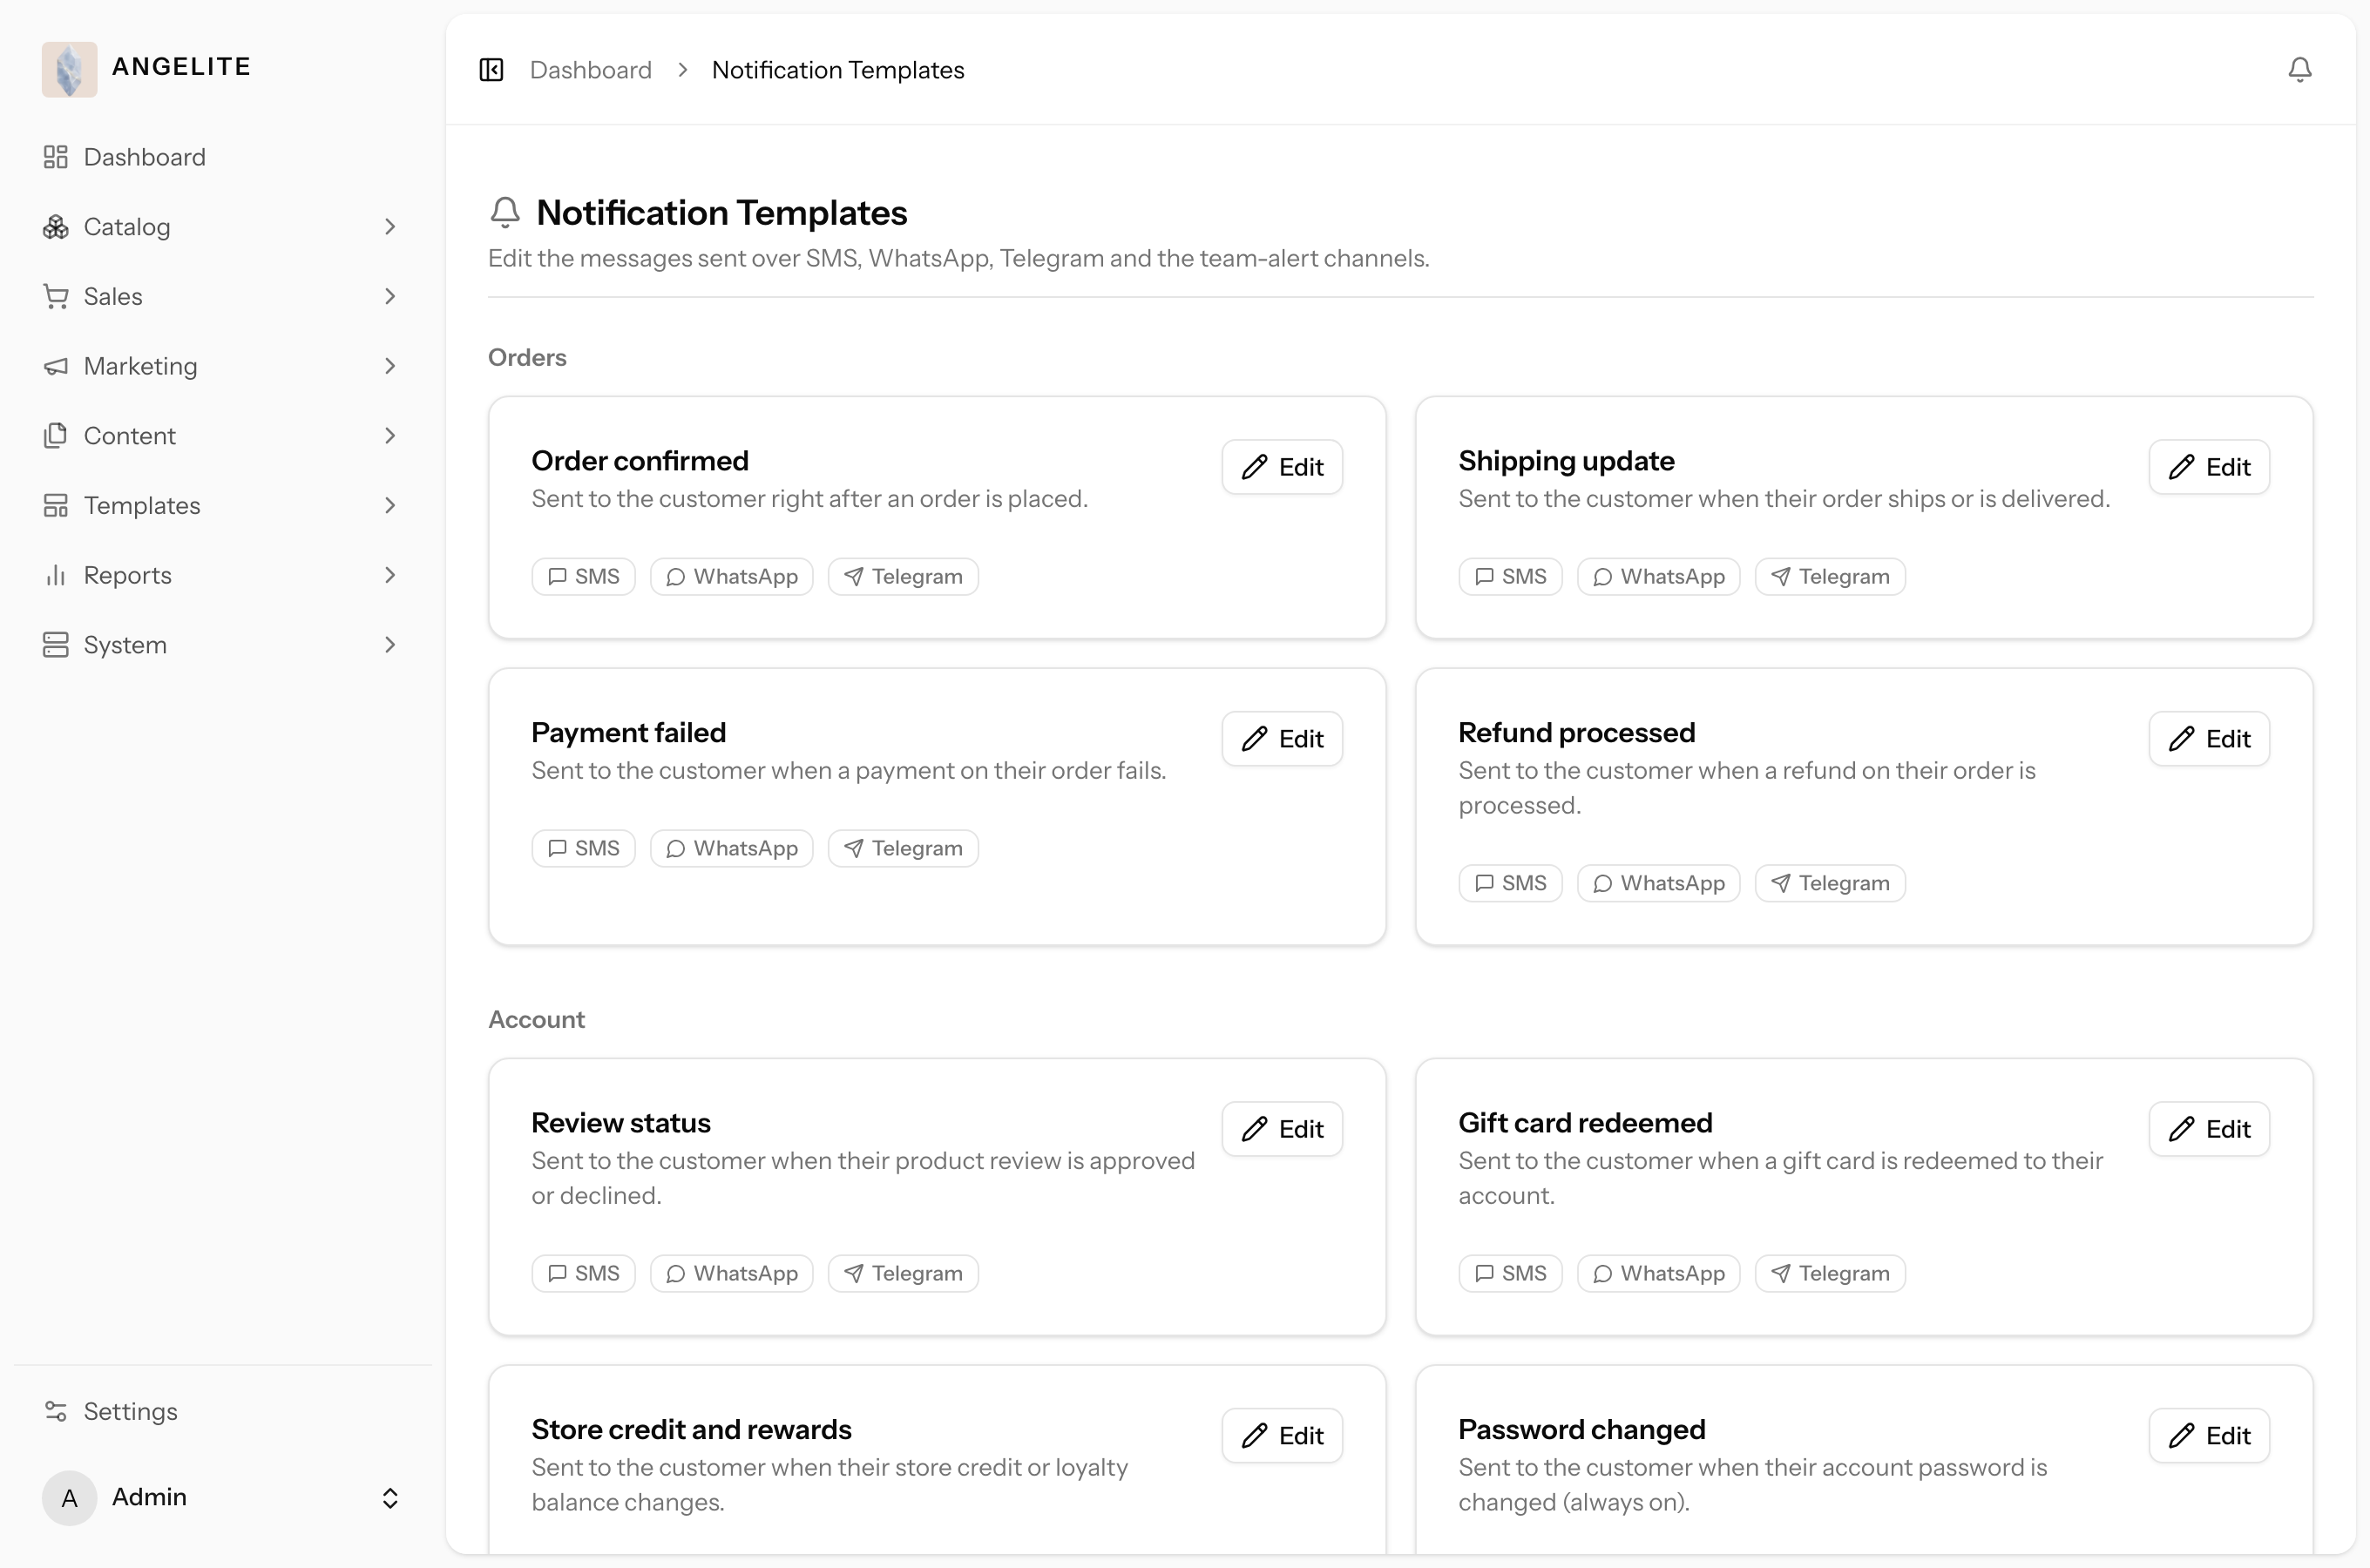
The text of every SMS, WhatsApp and Telegram message the store sends is an editable template,
per channel and per language. You reword each one freely and drop in merge tags for details like the
customer's name or the order number, which are filled in automatically on every send. The SMS editor shows
a live length counter so you know how many message segments you will pay for, a test-send button lets you
read the result on your own phone, and any template can be reset to its default. The built-in base
messages can never be deleted, so a notification always has a safe wording to fall back on.
In practice
Say your order-confirmation message currently reads like a system receipt, and you want
your Arabic-speaking customers to get a warm Arabic WhatsApp note that greets them by name and quotes
their order number.
How Angelite handles it: you open Templates then Notification Templates, pick the
order-confirmed message, choose the WhatsApp tab and then the Arabic tab, and rewrite the text in your
own voice, dropping in the merge tags for the customer's name and order number. You send yourself a test
to read it on your own phone, then save. From then on every Arabic-speaking customer gets your wording
the moment her order is confirmed, while English-speaking customers keep the English version you wrote
beside it.
How to use it
Open Templates → Notification Templates.
Pick a message, then choose the channel tab (SMS, WhatsApp or Telegram) and the language tab.
Rewrite the text, using the merge tags for details like the customer's name and the order number.
For SMS, watch the live length counter so you know how many message segments you will pay for.
Use Test send to check it on your own phone, then save. Reset to default brings back the original wording at any time.
Where: Templates → Notification Templates, one editable message per event and channel.
Good to know: the built-in base messages cannot be deleted, so even if a
template is switched off or left empty, the store always has a sensible default to send and no
notification ever goes out blank.
Shipping carriers
AdminOptional · Shipping Carriers
The problem: a guessed flat delivery fee is always wrong somewhere. Set
it high and it scares off the shopper buying a single abaya; set it low and one courier parcel to Riyadh
quietly eats the profit on the order.
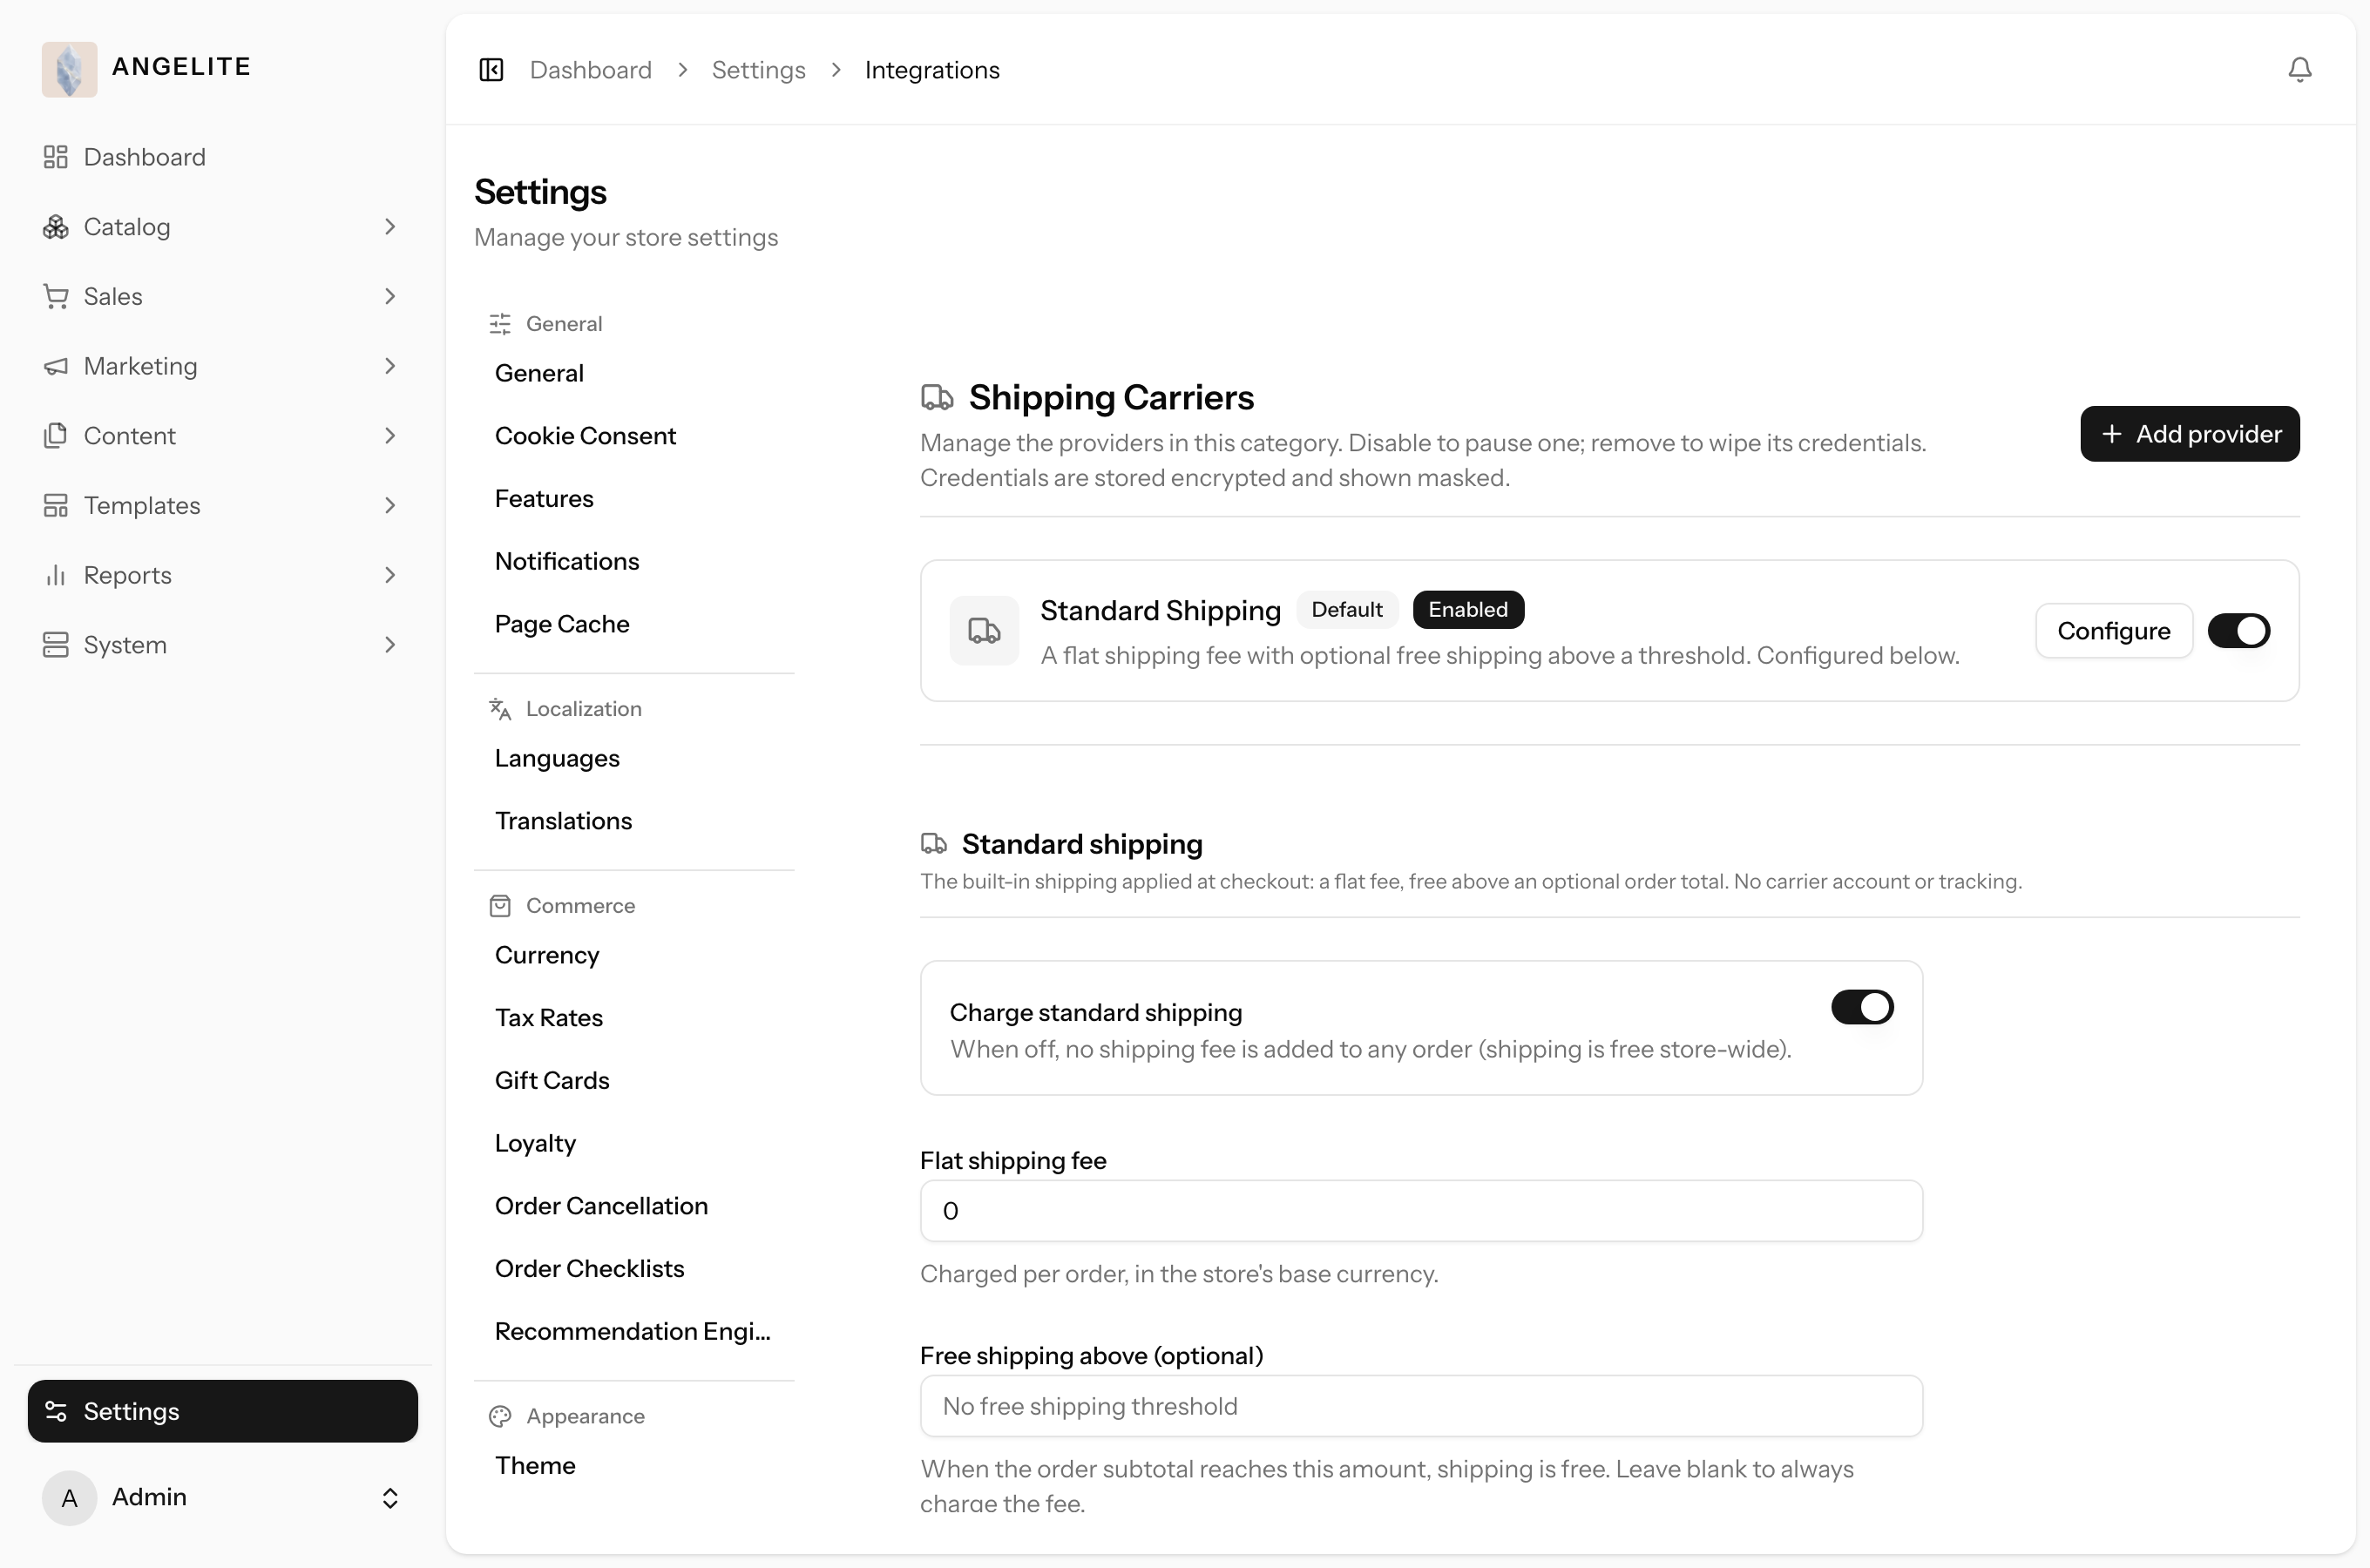
Charge delivery at its real price. Standard Shipping is built in and always available, and
you can set your own manual rate tables by zone. When the category is switched on you can also pull live
rates from DHL, FedEx and UPS for the exact basket and address, all shown side by side to the shopper at
checkout.
In practice
A customer in Saudi Arabia adds a ready-to-wear abaya and a matching hijab set to the bag and
wants it couriered quickly, and you would rather charge the real courier price than guess a flat fee.
How Angelite handles it: you open Settings, go to Integrations, choose Shipping Carriers,
click Add provider and connect DHL with your account number and ship-from address. After you click Test
connection and enable it, the checkout shows DHL's live express price for that exact basket and address,
right beside your own manual flat rate for local Qatar delivery, so the shopper picks the option that
suits them and you never undercharge on a cross-border parcel.
How to use it
Open Settings → Integrations and choose the Shipping Carriers category.
Set up your manual rate tables, or click Add provider to connect a live carrier.
Enter the carrier credentials, such as the account number and ship-from details.
Use Test connection to confirm the connection, then enable the carrier.
The carrier's live rates now appear alongside your manual rates at checkout.
Delivery cost can make or break a sale, especially across borders. Live carrier rates mean you charge the
true price and never lose money on an underquoted parcel or scare a buyer with a guess that is too high.
How to configure
Open Settings, go to the Integrations area, pick the Shipping Carriers category, click Add provider, paste
the account details from the carrier's dashboard, run Test, then enable.
Why these providers
DHL, FedEx and UPS all deliver express across the GCC and worldwide, which is exactly what an abaya
retailer shipping made-to-order and ready-to-wear pieces to gift recipients abroad needs.
Provider
Why choose it
Documentation
Standard Shipping
Flat-fee rates by zone, always works.
Built in
DHL
Strong express network across the GCC and worldwide.
Optional category: enable live carrier rates under
Settings → Features. Until then the store uses the built-in Standard Shipping option and your manual rates.
Exchange-rate providers
AdminOptional · Exchange Rates
The problem: currencies move while your converted prices stand still. A
stale rate either overprices a kaftan until the shopper walks away, or underprices it and quietly costs
you profit on every foreign sale, and updating rates by hand every morning is nobody's favourite job.
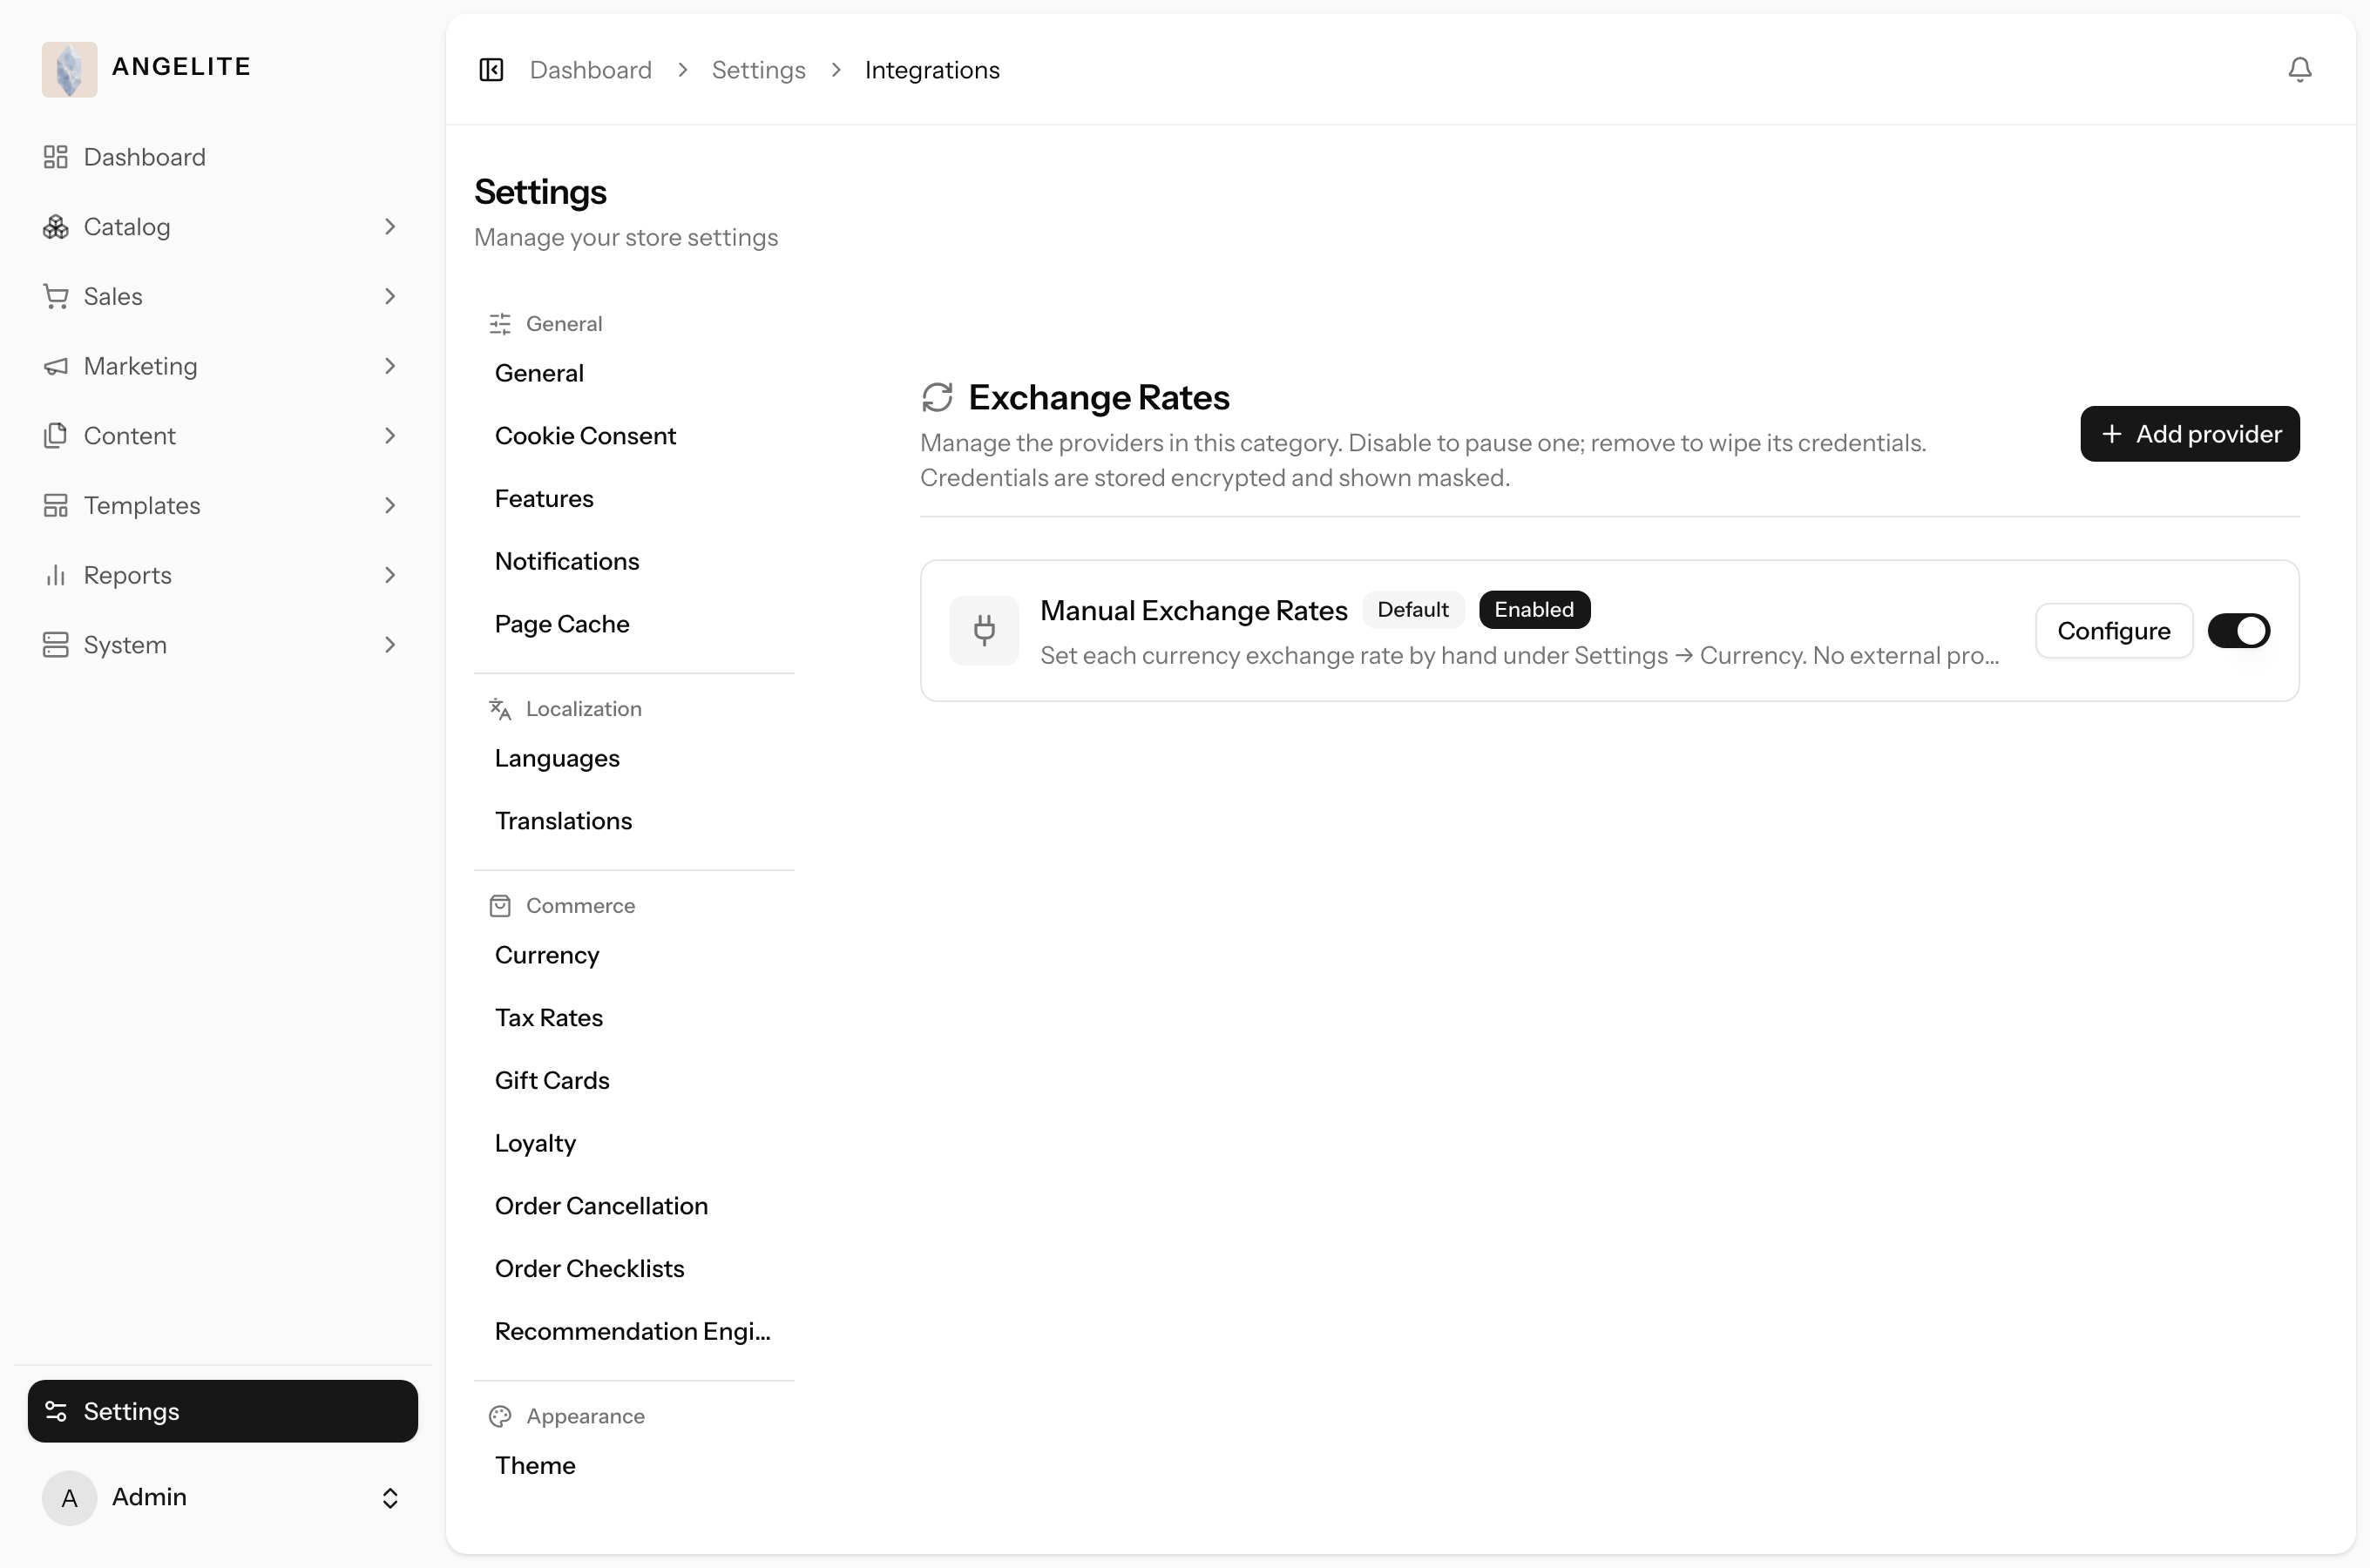
Keep your prices honest in every currency without daily work. Manual rates are built in, so
you can set each rate by hand. When the category is switched on you can connect Open Exchange Rates and
the store keeps every rate current on its own.
In practice
Your prices are set in Qatari riyal, but a tourist browsing from Europe wants to see a
made-to-order kaftan in euros and a shopper in the UK in pounds, and you do not want to update those rates
by hand every morning.
How Angelite handles it: you open Settings, go to Integrations, choose Exchange Rates,
click Add provider and connect Open Exchange Rates with your access key. After Test connection passes and
you set it as default, the store refreshes EUR, GBP, USD, SAR and KWD against your riyal base on its own,
so every visitor sees an honest, up-to-date converted price without any daily work from you.
How to use it
Open Settings → Integrations and choose the Exchange Rates category.
Click Add provider and pick Open Exchange Rates.
Enter the access key from your provider account.
Use Test connection to confirm it works, then enable the provider.
Set it as default and your currency rates refresh on their own.
Where: Settings → Integrations → Exchange Rates.
Why you need it
Selling to tourists and overseas buyers means showing prices in their own currency. Stale rates can quietly
cost you profit or overprice an item, so fresh, automatic rates keep every converted price honest.
How to configure
Open Settings, go to the Integrations area, pick the Exchange Rates category, click Add provider, paste the
access key from the provider's dashboard, run Test, then enable.
Why these providers
A boutique can start with hand-set rates and switch to automatic syncing once it sells across currencies.
Open Exchange Rates is a well-known, dependable source for the USD, EUR, GBP, SAR and KWD rates a GCC shop
needs against its Qatari riyal base.
Provider
Why choose it
Documentation
Manual
Set each rate by hand, full control, no account needed.
Optional category: turn automatic rate syncing on under
Settings → Features. Until then your rates stay on the built-in manual option.
AI providers
AdminOptional · AI Assistant
The problem: every new abaya needs a polished description in English and
Arabic, plus a campaign email, and writing all of it from a blank page eats the morning you meant to spend
on the shop.
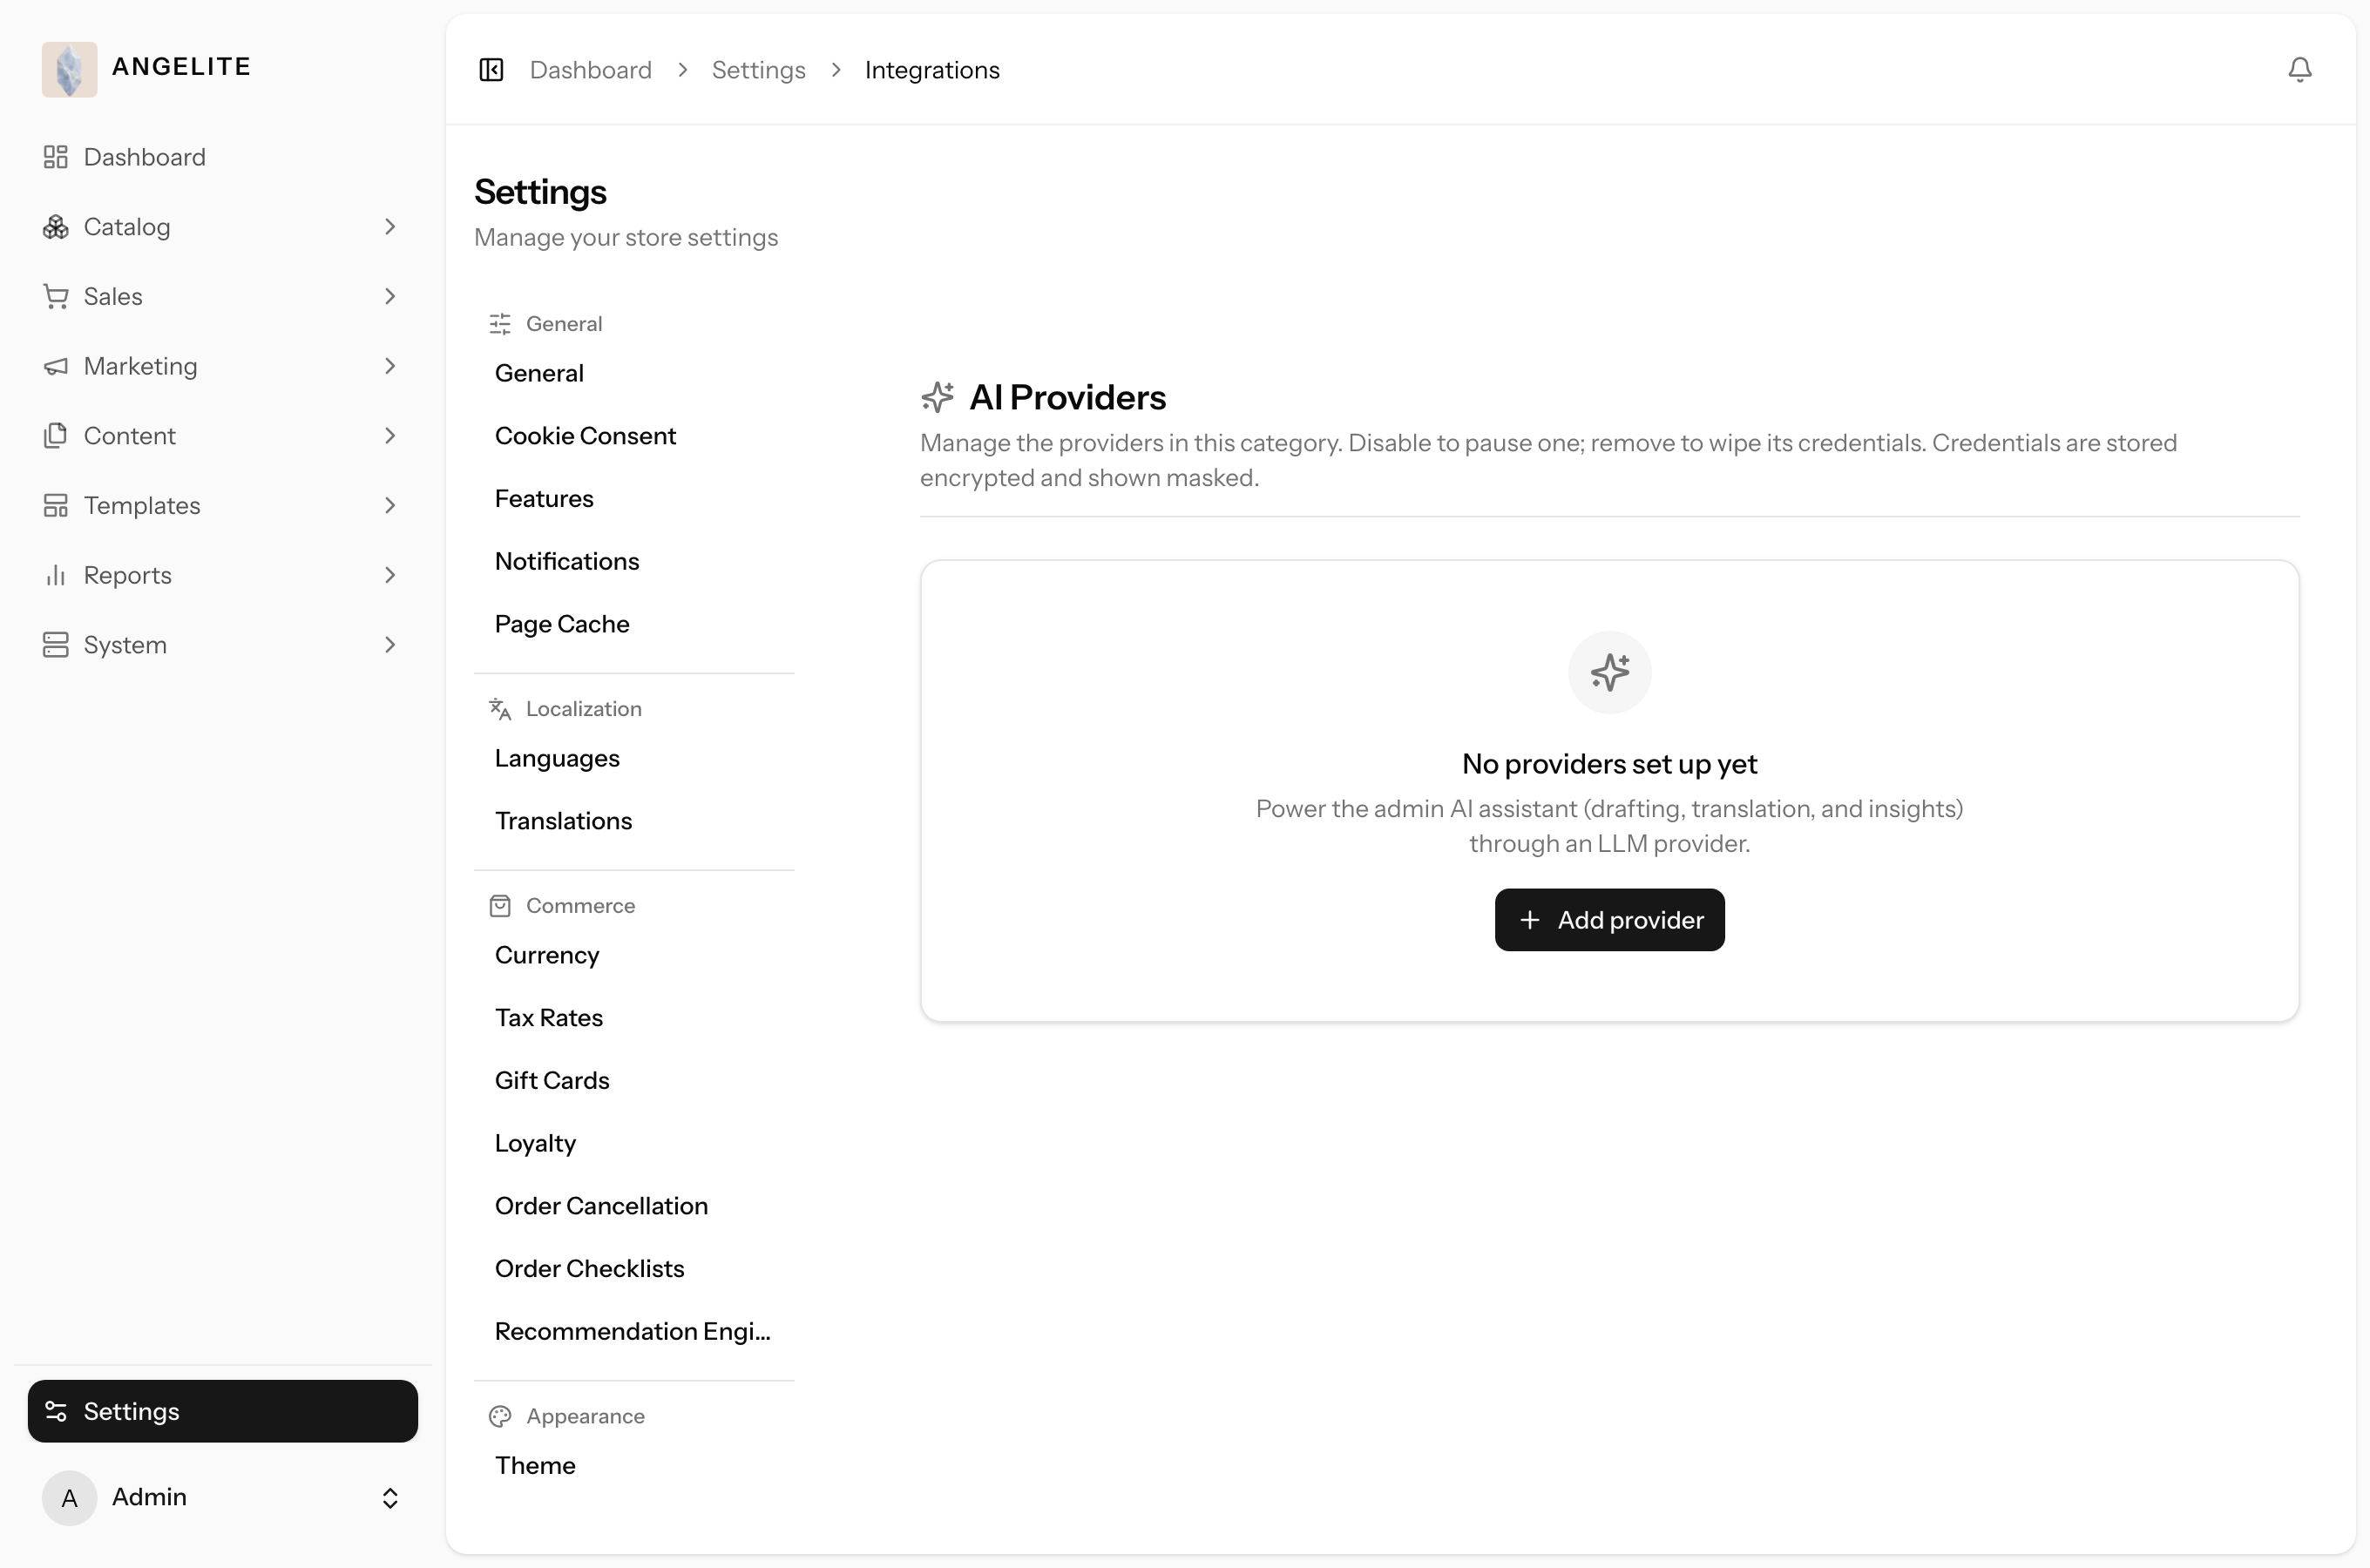
Turn the admin's writing chores into quick first drafts by connecting an AI service. You can
choose from Anthropic, OpenAI, Gemini, DeepSeek, Mistral and Z.ai, pick the one that suits your needs and
budget, and change it later; the drafts are always yours to review before anything is published.
In practice
Say you have just photographed a new embroidered abaya and need its English and
Arabic descriptions, plus a tidy marketing email, before the day gets away from you.
How Angelite handles it: you open Settings, go to Integrations, choose AI Providers, click
Add provider and connect a service such as Anthropic with your access key. After Test connection passes and
you set it as default, the AI-assist buttons across the admin start working: you click to draft the abaya's
description, translate it to Arabic, and compose the campaign email, then review and tweak before publishing.
The drafts are a starting point, and you always have the final say.
How to use it
Open Settings → Integrations and choose the AI Providers category.
Click Add provider and pick your AI service.
Enter the access key from your provider account.
Use Test connection to confirm it works, then enable the provider.
Set it as default, and the AI-assist buttons across the admin start using it.
Where: Settings → Integrations → AI Providers.
Why you need it
Writing product copy, translating to Arabic and drafting campaigns is slow work for a small team. An AI
service turns those chores into quick first drafts so you spend your time refining, not staring at a blank page.
How to configure
Open Settings, go to the Integrations area, pick the AI Providers category, click Add provider, paste the
access key from the provider's dashboard, run Test, then enable.
Why these providers
Different services trade off quality, price and Arabic fluency, so offering several lets a boutique pick the
one that fits its budget and the bilingual, right-to-left copy a GCC shop needs.
Related: the AI-assist features themselves are covered in Chapter 12, AI Assist.
Keeping it healthy
Test connection / message
Admin
The problem: a pasted key with one wrong character looks exactly like a
right one, and without a safe way to try it, the first person to find out is a customer whose payment
fails at your checkout.
Check that a provider's credentials really work before any shopper depends on them. For most
providers this is a one-click connection test; for notification providers it sends a real sample message
so you can see it arrive on your own phone.
In practice
Say you have just pasted your Stripe keys to start taking cards for the Eid gifting
season, and you want to be sure they are right before a single customer pays.
How Angelite handles it: after you save the keys, you click Test connection on the Stripe
panel and Angelite quietly talks to Stripe with those exact credentials. A green success means you are clear
to enable it; a failure explains what is wrong, for example a mistyped key, so you fix it and test again
before any shopper is involved. For a notification provider you click Test message instead and a sample SMS
or WhatsApp lands on your own phone so you can see it really arrives.
How to use it
Open the provider you are setting up in Settings → Integrations.
Save the credentials, then click Test connection (or Test message for notifications).
Read the result: a success confirms the credentials, a failure explains what went wrong.
Fix anything that is off and test again until it passes, then enable the provider.
Where: the test control on a provider, inside its setup panel.
Tip: the test always checks the credentials you have already saved, so save
first and then test.
Automatic setup
Admin
The problem: many providers only work fully once a notification link is
created back in their own dashboard, and that is the setup step people most often skip or mistype. A
missing one fails silently: orders never flip to paid, and addresses that came back undeliverable keep
getting emailed.
Some providers need a webhook - a private link the provider uses to notify your store the
moment something happens, such as a payment being completed, an email coming back undeliverable, or a customer
connecting their Telegram. Angelite registers that link for you automatically the instant you save the
provider. You never open the provider's dashboard to create it, and you never run any technical command.
In practice
You connect Telegram so customers can get order updates, and you connect Stripe to take
card payments for the new abaya collection. Both need that private notification link, but you have no
interest in hunting through developer dashboards or copying secret addresses.
How Angelite handles it: the moment you save each provider, Angelite quietly registers its
link for you - the Telegram connect link, the Stripe payment-completed notification - and shows a small
“Webhook registered” confirmation on the provider's panel. If it ever cannot
(for example a key without enough permission), it says so plainly and offers a Re-register
button to try again. For the few providers whose link can only be set in their own dashboard, the setup
guide shows you the exact address to paste and a link to their instructions - nothing is left to guesswork.
How to use it
Add a provider in Settings → Integrations and enter your credentials.
Click Save; the notification link is registered automatically in the background.
Check the status line on the provider: Webhook registered means it is done.
If it shows a failure, fix the issue and click Re-register to try again.
Where: the provider's setup panel in Settings → Integrations, below its credentials.
Tip: providers whose link can only be created in their own portal (PayTabs,
MyFatoorah, SkipCash) instead show you the exact address to paste and a documentation shortcut, so even those
take just a copy and paste.
Credential validation & health
Admin
The problem: a payment provider rotates its keys on a Tuesday and nothing
looks different until Friday evening, when checkouts start failing, and you learn about it from a run of
lost weekend orders.
Catch a broken provider before it disrupts a customer. Saving a provider live-tests its
credentials and blocks the save if they are wrong, so a bad key never goes in. A daily check and a
Healthy or Failing badge keep you informed, and an alert reaches you the moment a working provider starts
failing, on your phone rather than through a complaint.
In practice
A customer wants to pay for a made-to-order abaya on Friday evening, but your payment
provider rotated its keys earlier that week and the old ones no longer work.
How Angelite handles it: two safeguards cover you. When the keys were first wrong, saving
them was simply refused with a clear message right where you typed them, so a bad key never went live. And
when a previously working provider starts failing, the provider's badge flips from Healthy to Failing and an
alert reaches you on the admin bell and through your other channels, so you swap in the new keys before more
shoppers are turned away. An ordinary card decline is not treated as a failure, so you are only nudged for
genuine connection problems.
How to use it
Add or edit a provider in Settings → Integrations and save.
If the credentials are wrong, the save is refused with a clear message right where you entered them.
Watch the status badge on each provider to see at a glance whether it is Healthy or Failing.
When a provider starts failing, an alert reaches you on the admin bell and through your other channels.
Where: Settings → Integrations, where each provider shows its health status.
Tip: a normal customer card decline is not treated as a credential failure,
so only genuine connection problems raise an alert.